Great Planes Spirit 100 Sailplane Kit - GPMA0550 User Manual
Page 13
be tightly wrapped and closely spaced near the root end but it can
be spaced farther apart as you get closer to the W2S rib Do not
allow the thread to overlap or it will build up in thickness and the
top sheeting w i l l not seat properly on the spar When finished
wrapping, soak the entire thread with CA HINT - It will take at
least 15 feet of thread to properly wrap each joiner box
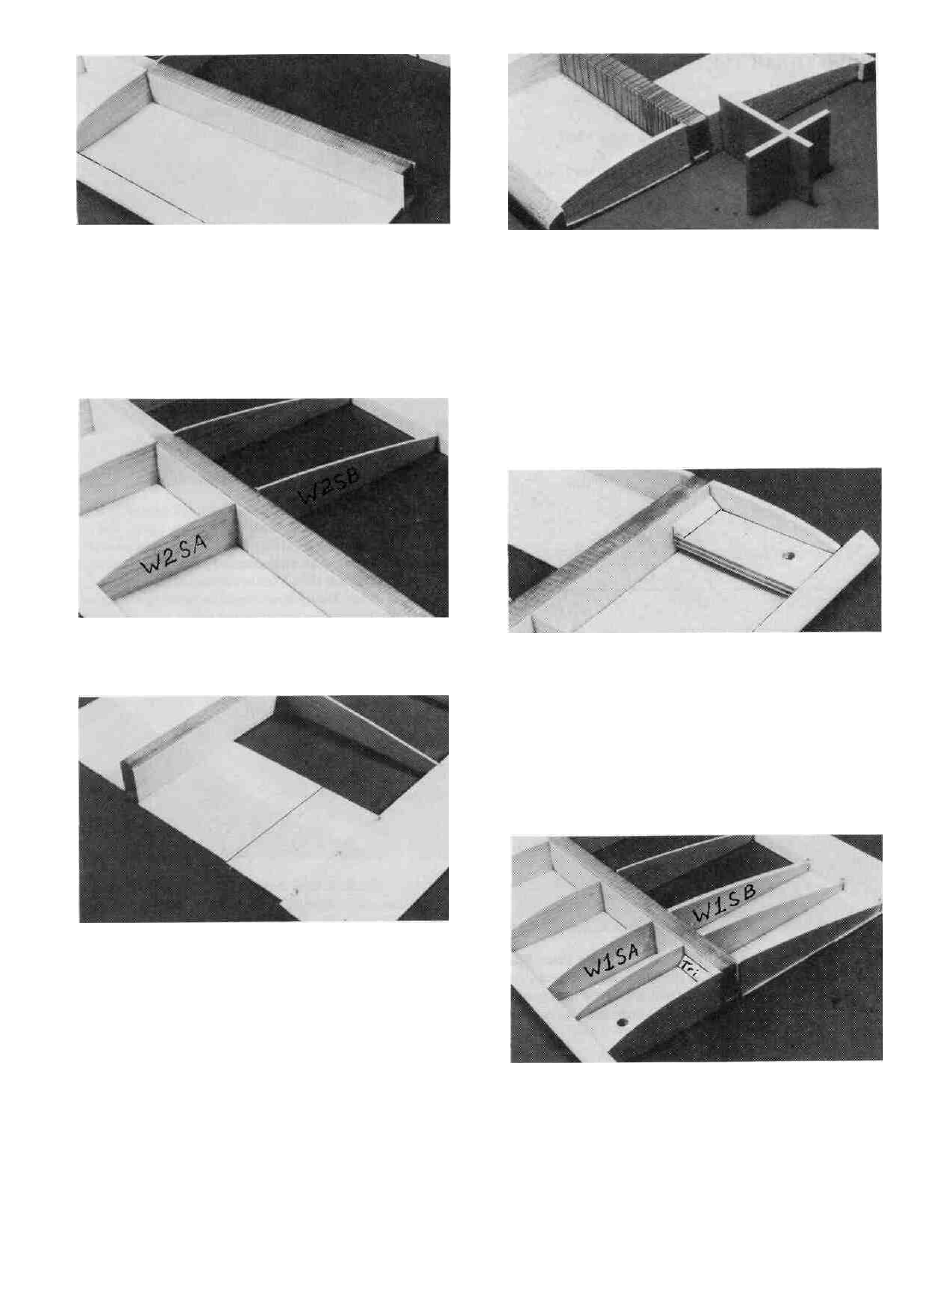
D D 20 With the wing panel over the plans for reference,
glue W2SA and the W2SB (SPT1W04) in place
D D 21. Locate the "odd" (see p10, step 2) 1/16" x 3" x 30"
Balsa Sheet (SPRTW20) and cut off three pieces 3" long Slide
one of the sheets in place behind the joiner box and glue it in place
with med or thick CA Cut another piece to fit between the first
sheet and the TE and glue it in place Save the remaining pieces
for the other wing panel
these
ribs into place
NOTE: If you are going to install spoilers,
you should drill 1/8" holes in the remaining W1 SB ribs for the
tubing before gluing them in place.
D D 23 Position the 1/4" xl-l/8"x 2-7/8" Ply Front Wing
Bolt Plate (SPT1W27) next to the template on the plan Use the
measurements given to mark where to drill the hole Drill a
13/64 hole at the mark Notice that the hole is off-center
SKIP T H I S STEP IF YOU ARE BUILDING A RUBBER
BAND ON WING.
D D 24 Test fit the front wing bolt plate in place against the
W1SA rib It should be centered up and down on the LE and it
should be parallel to the work surface, with the hole off-center
towards the root of the wing Sand it if necessary to achieve a
good f i t between the LE and the joiner box When satisfied with
the fit, securely glue it in place with either med or thick CA or
epoxy Add 1/4" balsa triangle along the spar and a Fillet of glue
along the LE.
D D 22 Punch out three W1SA ribs and three W1SB ribs
(SPRTW01) and test fit the end W1SA and W1SB ribs into
position A little sanding may be necessary to make them fit
properly They should be tilted in (towards the tip) at the top using
the slanted end of the rib gauge to achieve the correct angle Glue
D D 25 Glue the remaining W1SA and W 1 SB ribs in place
The second W1SA should be against the wing bolt plate Glue the
bottom sheeting to each of these ribs and cut off any excess
sheeting, spars, LE, or TE flush with the end W1S rib
13