Installation, 1$ ihstallmq optlons – Kenwood TM-255E User Manual
Page 60
Attention! The text in this document has been recognized automatically. To view the original document, you can use the "Original mode".
1$ iHSTALLMQ OPtlONS
DETACHABLE FRONT PANEL KITS
(DFK-3, DFK-4, DFK-7A)
INSTALLATION
CAUTION: Always turn OFF the power and unplug the DC power
cable first.
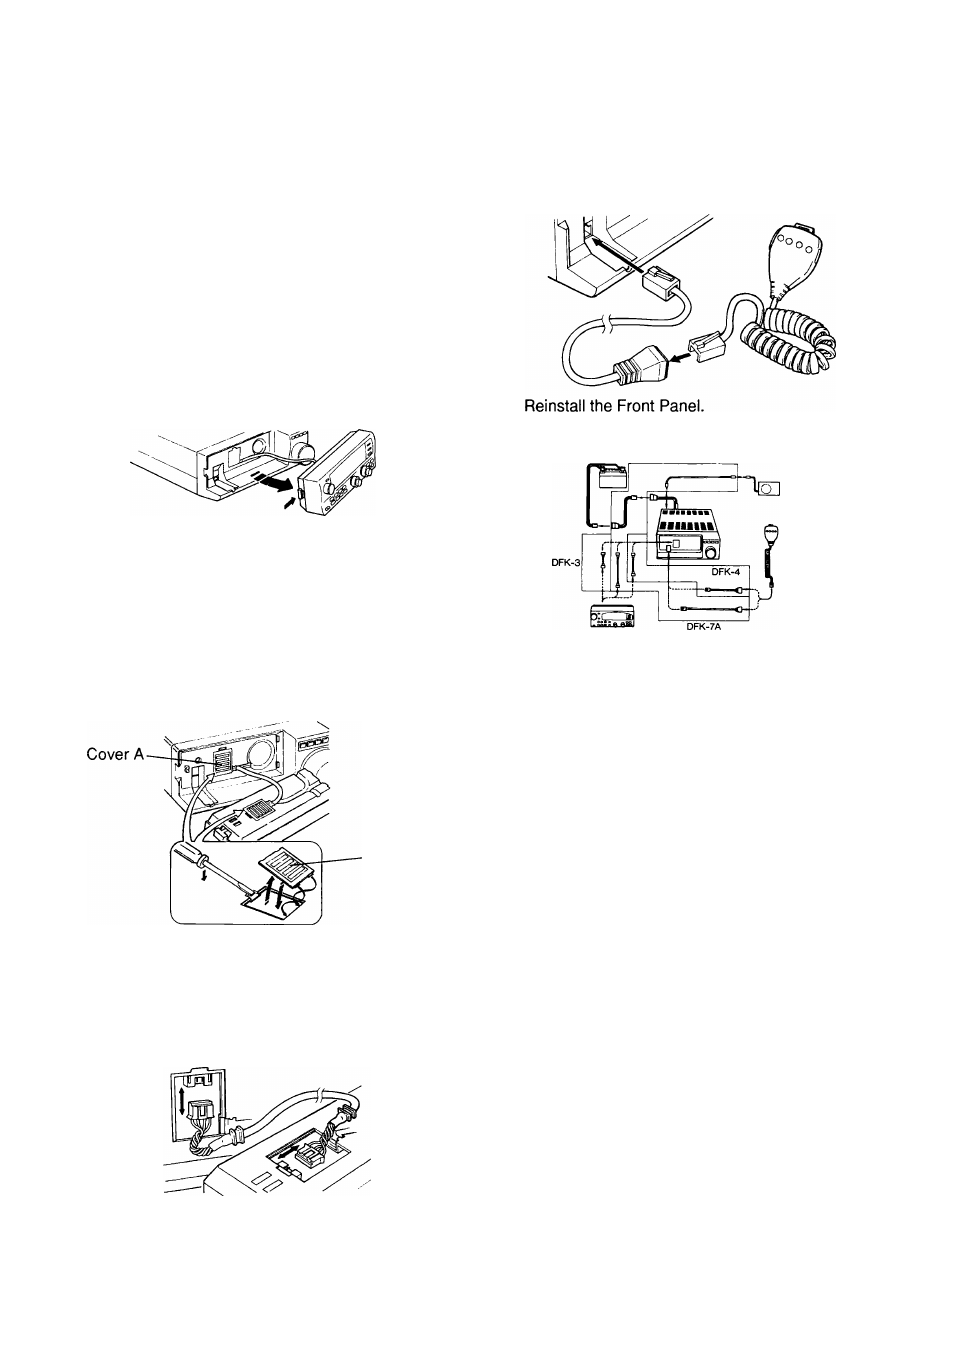
1 Remove the Front Panel.
Press the Release button on the left side of the
Front Panel to unlock the panel. Carefully pull the
Front Panel forward from the left, then remove it
completely.
• Handle the Front Panel carefully to avoid
applying excessive force to the thin cable
joining the Front Panel to the Main Unit.
Connect the microphone cable
(DFK-4/DFK-7A only).
Plug the microphone cable plug into the
microphone connector on the Main Unit. Press the
plug firmly into the connector until the locking tab
clicks into place.
Installation Example
2 Remove the covers.
Remove Cover A from the Main Unit, and Cover B
from the Front Panel.
• To remove the covers, insert a flat-blade
screwdriver into the gap, and pry the cover off
using the minimum force necessary.
Cover B
3 Replace the interconnecting cable.
Remove the 2 connectors, then replace the cable
with the optional cable. Reinstall Cover A on the
Main Unit and Cover B on the Front Panel by
positioning the cover's tab, then press the cover
into position.
OPERATION
After separating the Front Panel from the Main Unit,
the Main Tuning control will not be accessible if the
Main Unit is stored in a location that is removed from
the operating position. Therefore, if using SSB or
CW, it is necessary to change the frequency step of
the Alternate Tuning control.
The frequency step for SSB and CW is changed via
Menu A, No. 06. If you assign this function to the
microphone PF key, it will be easy to modify the step
size at any time. With this function assigned to the
microphone PF key, it is quite quick to select a large
frequency step, then change frequency by hundreds
of kHz with the Alternate Tuning control. Then
reduce the step size, and fine tune with the new
smaller step size selected.
Lock the Main Tuning control via Menu B, No. 68.
Also, lock the buttons controlled via Menu B, No. 69.
Note:
♦
Refer to tthe Detachable Front Panel Kit manuals for additional
information.
♦
The DFK-7 kit cannot be used with this transceiver. Use the
DFK-7A kit instead.
♦
Use only the supplied cables; do not use substitutions.
53