Install the range, Replace the wire cover, H anti-tip device installation – GE CS975SDSS User Manual
Page 45: 10 level the range, Installation instructions
Attention! The text in this document has been recognized automatically. To view the original document, you can use the "Original mode".
Installation Instructions
INSTALL THE RANGE
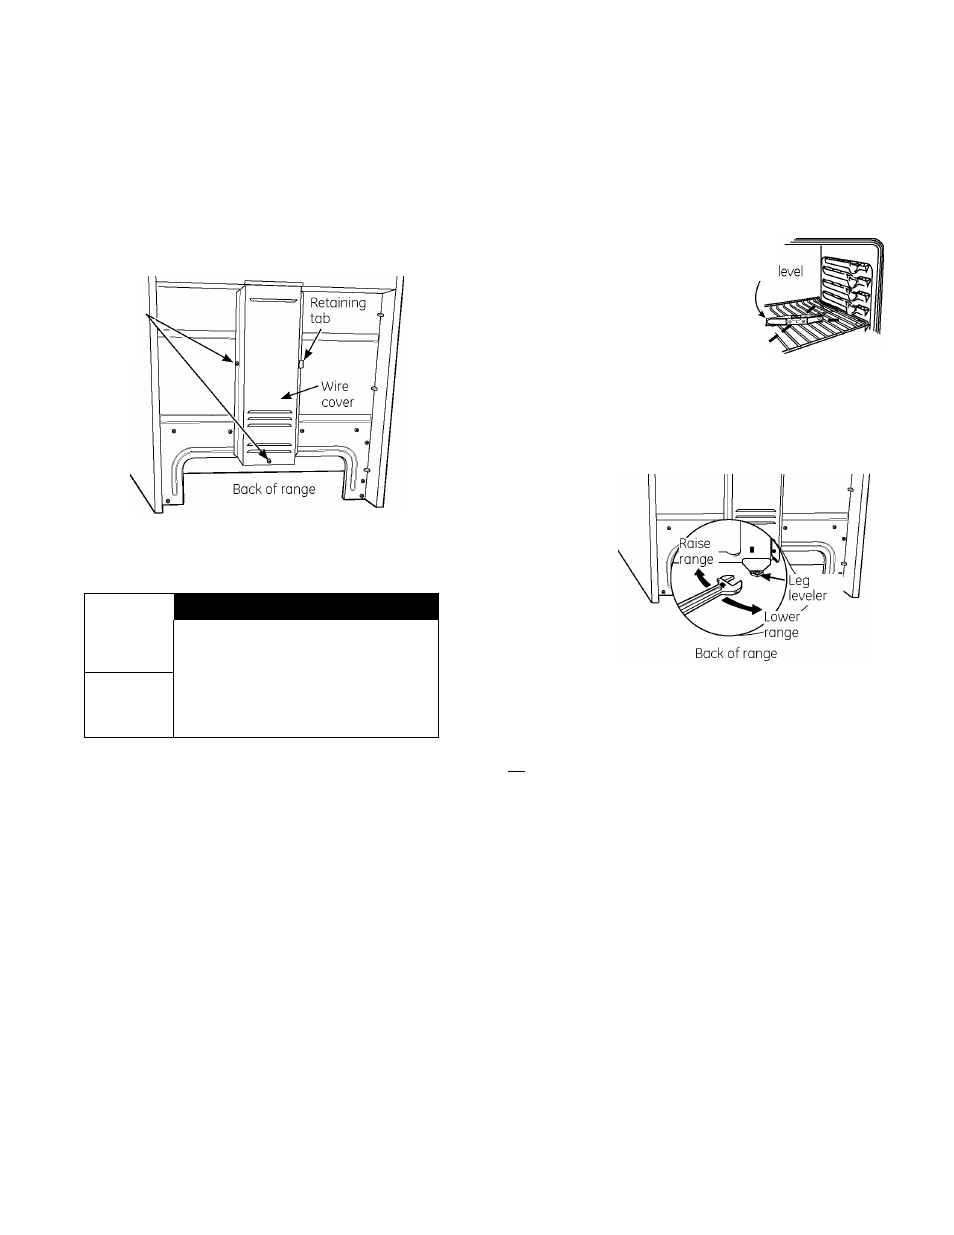
REPLACE THE WIRE COVER
Replace the wire cover on the range back by
sliding its right edge under the retaining tab
and replacing the two screws removed earlier.
Moke sure that no wires ore pinched between the
cover and the range bock.
2 screws
to replace
wire cover
H ANTI-TIP DEVICE INSTALLATION
>
A
WARNING
Tip-Over Hazard
• A child or adult can tip the range and be killed.
• Install the anti-tip bracket to the wall or floor.
• Engage the range to the anti-tip bracket by sliding the
range back such that the foot is engaged.
• Re-engage the anti-tip bracket if the range is moved.
• Failure to do so can result in death or serious burns
to children or adults.
To reduce the risk of tipping the range, the range
must be secured by a properly installed anti-tip
brocket. See installation instructions shipped with the
brocket for complete details before attempting to
install.
To check if the bracket is installed and engaged
properly, look underneath the range to see that the
rear leveling leg is engaged in the bracket. On some
models, the storage drawer or kick panel can be
removed for easier inspection. If visual inspection
is not possible, slide the range forward, confirm the
anti-tip bracket is securely attached to the floor or
wall, and slide the range back so the leveling leg is
under the anti-tip bracket. If the range is pulled from
the wall for any reason, always repeat this procedure
to verify the range is properly secured by the anti-tip
bracket.
10 LEVEL THE RANGE
E
Spirit
E
Install the oven rocks in the oven and position
the range where it will be installed.
Check for levelness by
placing a spirit level or a
cup, partially filled with
water, on one of the oven
rocks. If using a spirit level,
take two reodings—with
the level placed diagonally
first in one direction and then the other.
The rear leveling legs must be adjusted prior
to moving the range into position. They con
be adjusted from the bottom at the bock
of the range.
Adjust from
the bottom
bock of range
(worming
drawer models)
E Use on open-end or adjustable wrench to
adjust the leveling legs until the range is level.
E Replace the drawer or panel.
rFI After the range is level, slide the range away
from the wall so that the Anti-Tip device con be
installed.
45