H power cord and strain relief installation, Installation instructions – GE CS975SDSS User Manual
Page 42
Attention! The text in this document has been recognized automatically. To view the original document, you can use the "Original mode".
Installation Instructions
H POWER CORD AND STRAIN RELIEF
INSTALLATION
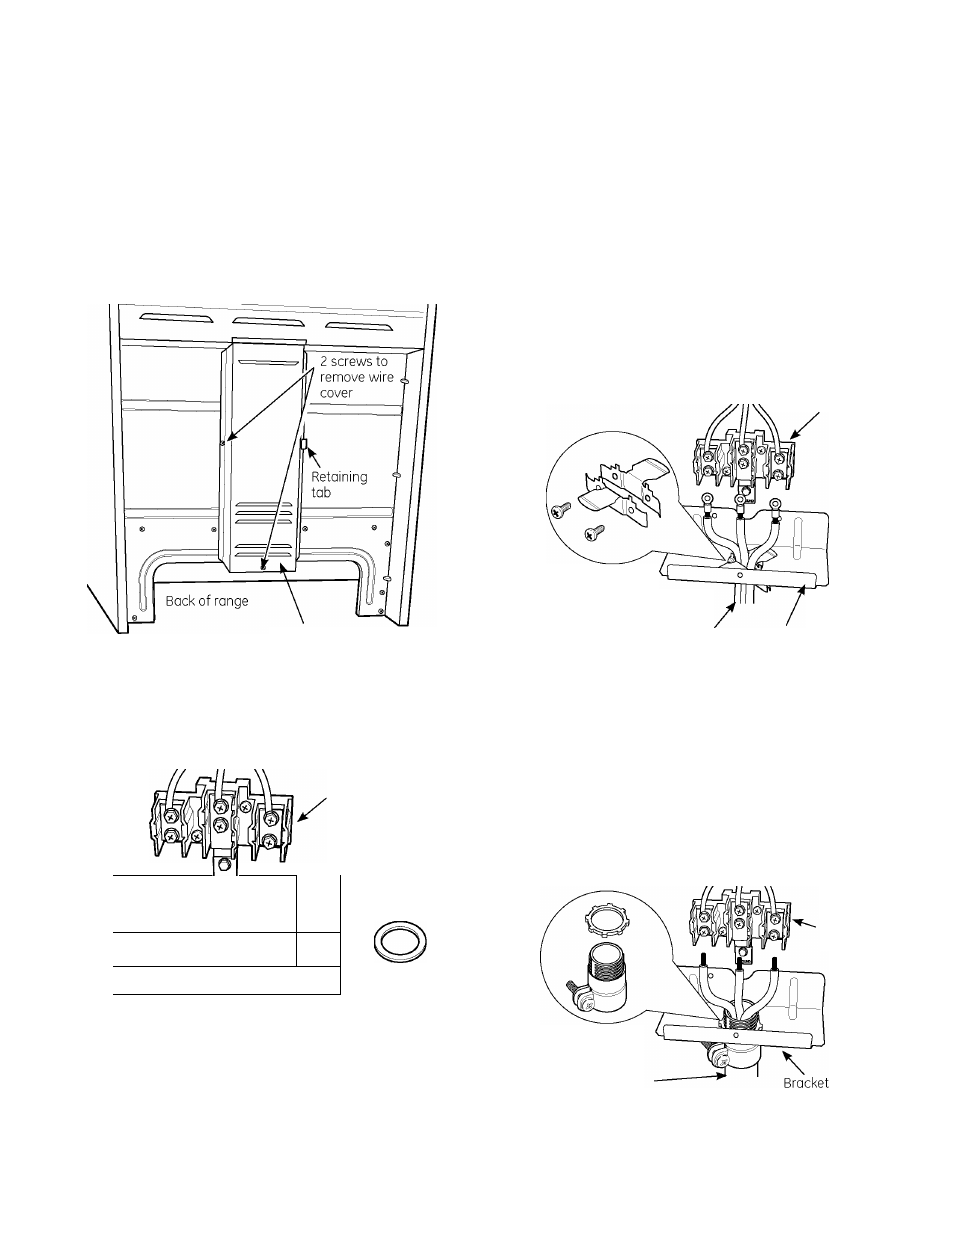
Remove the wire cover (on the lower bock
of the range) by removing two (2) screws using
a 1/4" nut driver.
Do not discard these screws.
wire cover
E
Remove the knockout ring located
on bracket directly below the terminal block.
To remove the knockout, use a pair of pliers
to bend the knockout ring away from
the bracket and twist until ring is removed.
Terminal block
(appearance may
vary)
\ no 0 .
\ ^ 0
-jj
Knockout ring
in brocket
Knockout ring
removed
E
E
For power cord installations only
(see the next step if using conduit), assemble
the strain relief in the hole. Insert the power
cord through the strain relief and tighten.
Allow enough slack to easily attach the cord
terminals to the terminal block. If tabs are
present at the end of the winged strain relief,
they can be removed for better fit.
NOTE: Do not install the power cord
without a strain relief. The strain relief
bracket should be installed before
reinstalling the rear range wiring cover.
Terminal block
Strain relief
Power cord Bracket
Skip to Step 4 or 5.
For conduit installations only, purchase a
squeeze connector matching the diameter of
your conduit and assemble it in the hole. Insert
the conduit through the squeeze connector and
tighten. Allow enough slack to easily attach the
wires to the terminal block.
NOTE: Do not install the conduit without a
squeeze connector. The squeeze connector
should be installed before reinstalling the rear
range wiring cover.
Terminal
block
Squeeze
connector
Conduit
Skip to Step 5 or 7.
42