Carl Goldberg GPMA1956 Eagle 2 ARF User Manual
Page 9
9
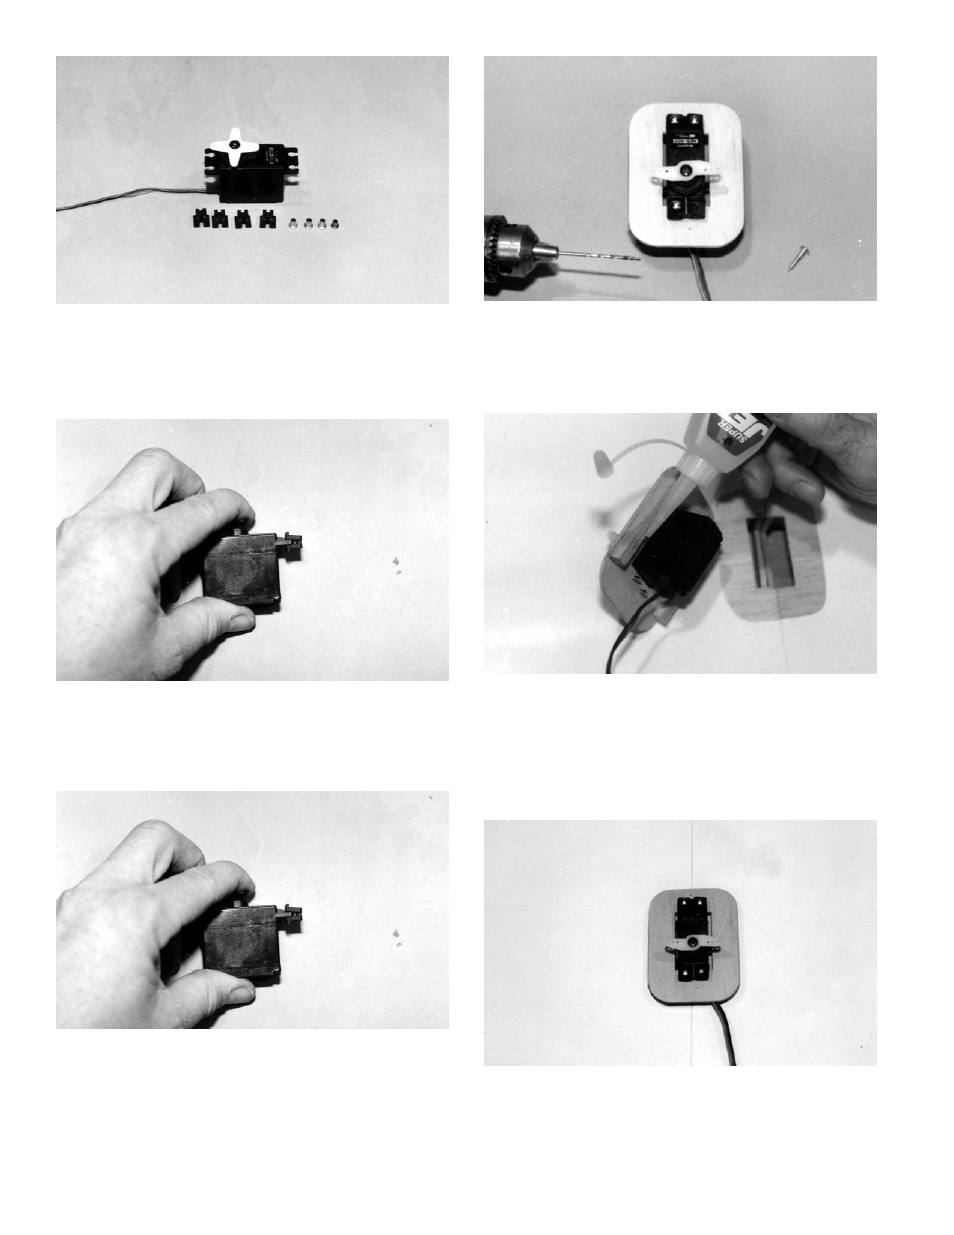
5.
Gather one servo, four rubber grommets,
and four eyelets from your JR radio box. If using another
brand of radio, use the parts called for in the radio instruc-
tions.
6.
Place the rubber grommets over each
mounting lug on the end of the servo. These rubber grom-
mets will prevent the lugs from breaking when the servo
moves around.
7.
Working from the bottom of the mounting
lug, put an eyelet into each hole. This prevents the mount-
ing screw from being over-tightened when the servo is
mounted.
8.
Place the servo into the servo-mounting
tray and enlarge the opening, if needed. Mark the location
of the mounting screws. Using a 1/16" drill bit, drill the
holes for the screws which have been supplied with your
radio. Then mount the servo into the servo tray, as shown.
9.
With the servo arm positioned nearest the
trailing edge, place the servo assembly in the wing open-
ing and check the fit. Enlarge the opening, if needed. The
wire should exit under the tray, allowing the servo to fit
down into the wing. When satisfied with the fit, apply CA
glue to each tray support and glue assembly in place.
NOTE: The servo arm on the top of your servo must be
similar to the one shown in the photo above. If it is not,
choose another arm from the selection in your radio box.
Twist the servo arm until it is positioned as shown above.