Nosegear block installation – Carl Goldberg GPMA1956 Eagle 2 ARF User Manual
Page 17
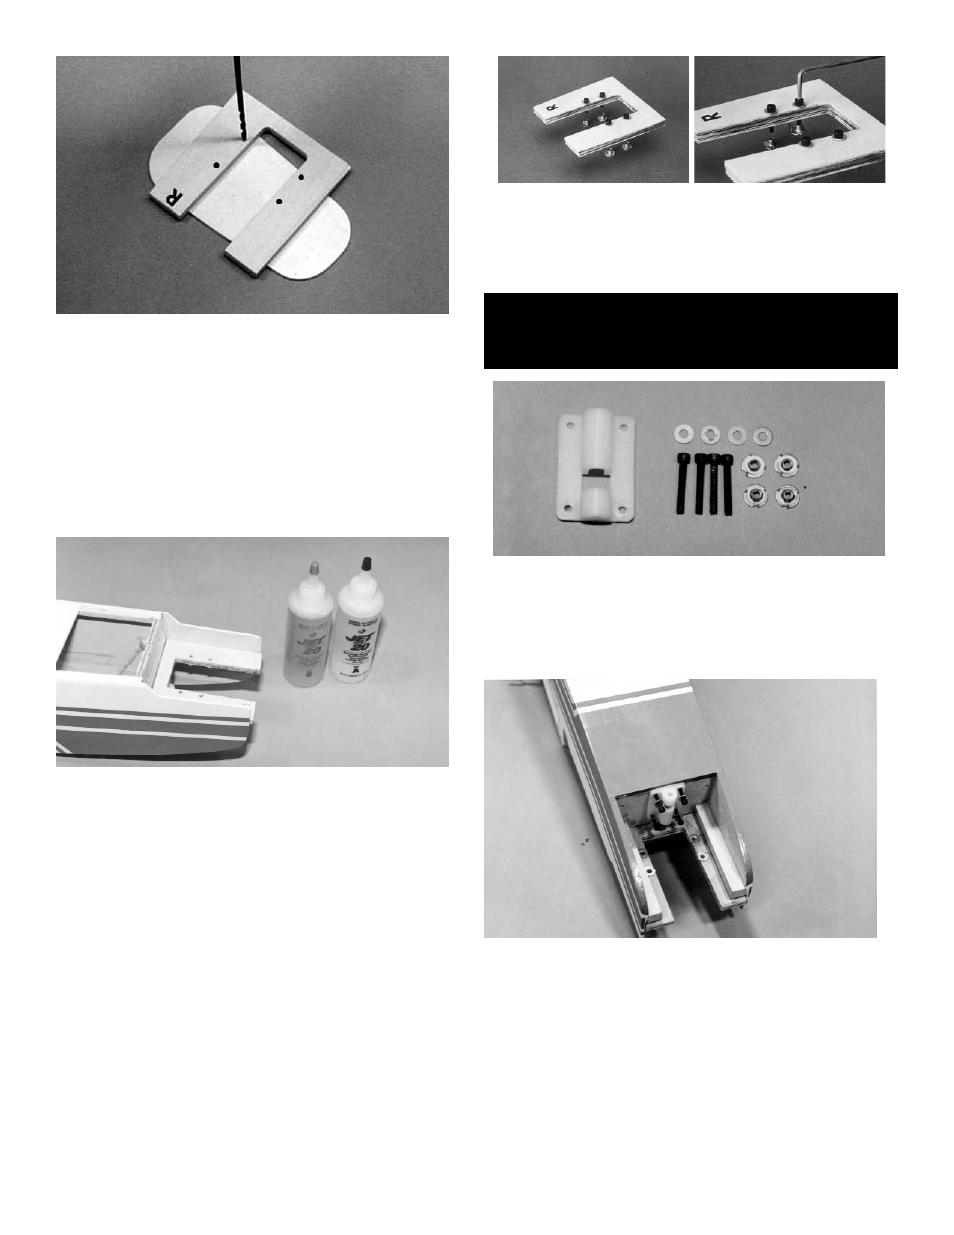
17
5.
Remove the engine from the motor mount
and the motor mount from the fuse. At the marked hole
locations, drill four 1/8" holes through the motor mount.
HINT: Place scrap ply under the motor mount to avoid
splintering when drilling.
6.
Using a toothpick, apply a drop of Vaseline
in each blind nut hole and on the top engine screw hole to
keep epoxy out of the openings.
7.
Mix up approximately 2-3 spoonfuls of
epoxy and making sure the "R" is facing up, glue the motor
mount in place. The epoxy should cover all areas of con-
tact between the motor mount and the rail on which it is sit-
ting.
8.
Finally, put a thin coat of epoxy over all the
wood surfaces: above and below the motor mount, on the
wood firewall, and on the fuse sides. This will protect these
areas from fuel and oil when your engine is running.
1.
Collect the following items:
(1)
Nosegear block
(4)
4-40 x ½ socket head screws
(4)
4-40 blind nuts
(1)
# 4 washer
2.
Turning fuse upside down and using the
Allen wrench supplied with this kit, screw the nosegear
block to the firewall with the 4-40 x ½" screws and the #4
washers. Screw the bolts part way until the ends are just
coming through the backside of the firewall. Refer to photo
for correct installation.
9.
After the epoxy dries, permanently install
four blind nuts in the bottom of the engine mount, using
socket head screws and washers to pull the blind nuts up
into the screw holes, as shown. After tightening the blind
nuts, remove the screws.
NOSEGEAR BLOCK
INSTALLATION