Carl Goldberg GPMA1956 Eagle 2 ARF User Manual
Page 12
12
9.
Holding the screws in place, turn the ele-
vator over and place the back plate (cut from the control
horn) over the screws. Tighten the screws, a little at a time,
until the wood just starts to dent. Set the stab aside for
now.
10.
Mark a centerline down the stab platform
area, as shown. Be sure to extend the line onto the cover-
ing on top of the fuse and onto the back of the fuse, so
that you will be able to locate the center once you have put
the stab in place.
11.
Using a twisting motion, insert the wing
dowels through the fuselage cabin. The dowels should
protrude an equal distance on either side of the cabin.
When satisfied with the location, glue in place.
OPTIONAL: Before flying your airplane, seal the exposed
ends of the wing dowels and any other unprotected wood
surfaces with fuel proof paint .
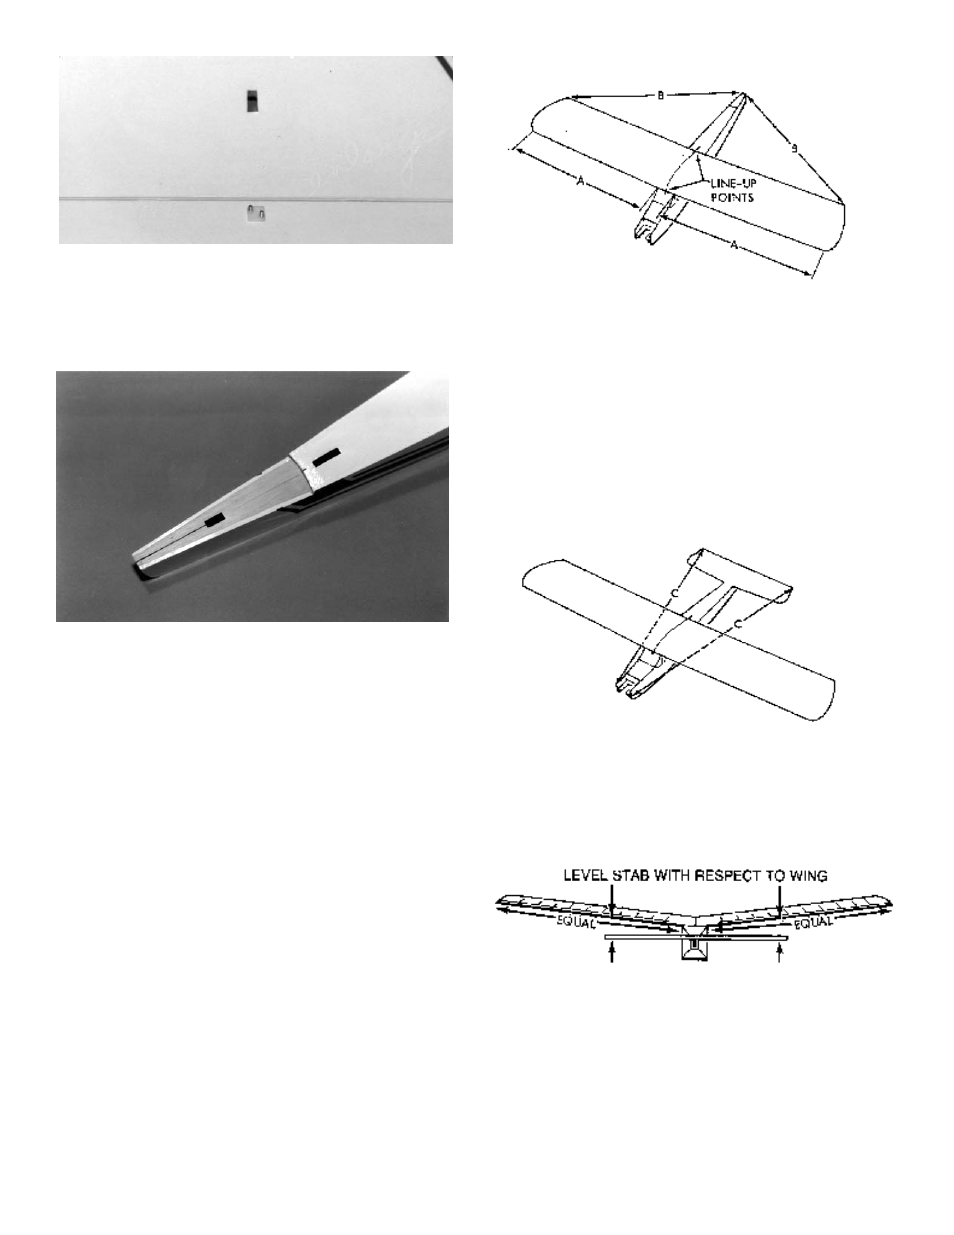
12.
Mount the wing on the fuse, using #64
rubber bands. Measure carefully, as shown above, from
the fuselage sides out to the wing tips ("A" arrows) to be
sure the wing is centered. Then measure from the wing
tips to the back end of the fuselage ("B" arrows) to make
sure the wing is square with the fuse.
13.
Using masking tape or a washable mark-
ing pen, mark the wing center at the leading and trailing
edges. Mark the top of the fuselage at the wing center-
point.
14.
Using no glue, and with the control horn
pointing down, trial fit the stab onto the fuse, adjusting it as
needed to line up with the wing. Measure from the stab
tips to the fuse front ("C" arrows) to make sure the stab is
square with the fuse.
15.
View the model from the rear, as shown,
to see if the stab is level, with respect to the wing. If not,
cut paper strips about ¼ x 1" and shim under the low side
until the stab is level.