Balancing your model – Carl Goldberg GPMA1956 Eagle 2 ARF User Manual
Page 35
35
ENGINE SET-UP
DO NOT ATTEMPT TO FLY YOUR MODEL UNTIL THE
ENGINE RUNS DEPENDABLY. It should idle without stop-
ping, and the transition through all engine speeds should
be smooth.
WARNING: The turning propeller can cause serious injury,
such as deep cuts. Avoid wearing loose clothing (such as
baggie shirts or neckties) or jewelry which could be caught
by or could fall into the spinning propeller. Children and
spectators should be kept away from a running engine. No
one should stand in line with the propeller. A broken pro-
peller blade becomes a bullet and can seriously hurt some-
one.
IMPORTANT: NEVER NEGLECT THIS STEP WITH ANY
AIRPLANE. If you try to fly a plane with the balance point
behind the recommended range, you run the risk of hav-
ing an unstable aircraft and the strong likelihood of a
crash. TAKE THE TIME TO PROPERLY BALANCE
YOUR MODEL!
There are four basic adjustments which contribute to mak-
ing your engine run well. First, familiarize yourself with the
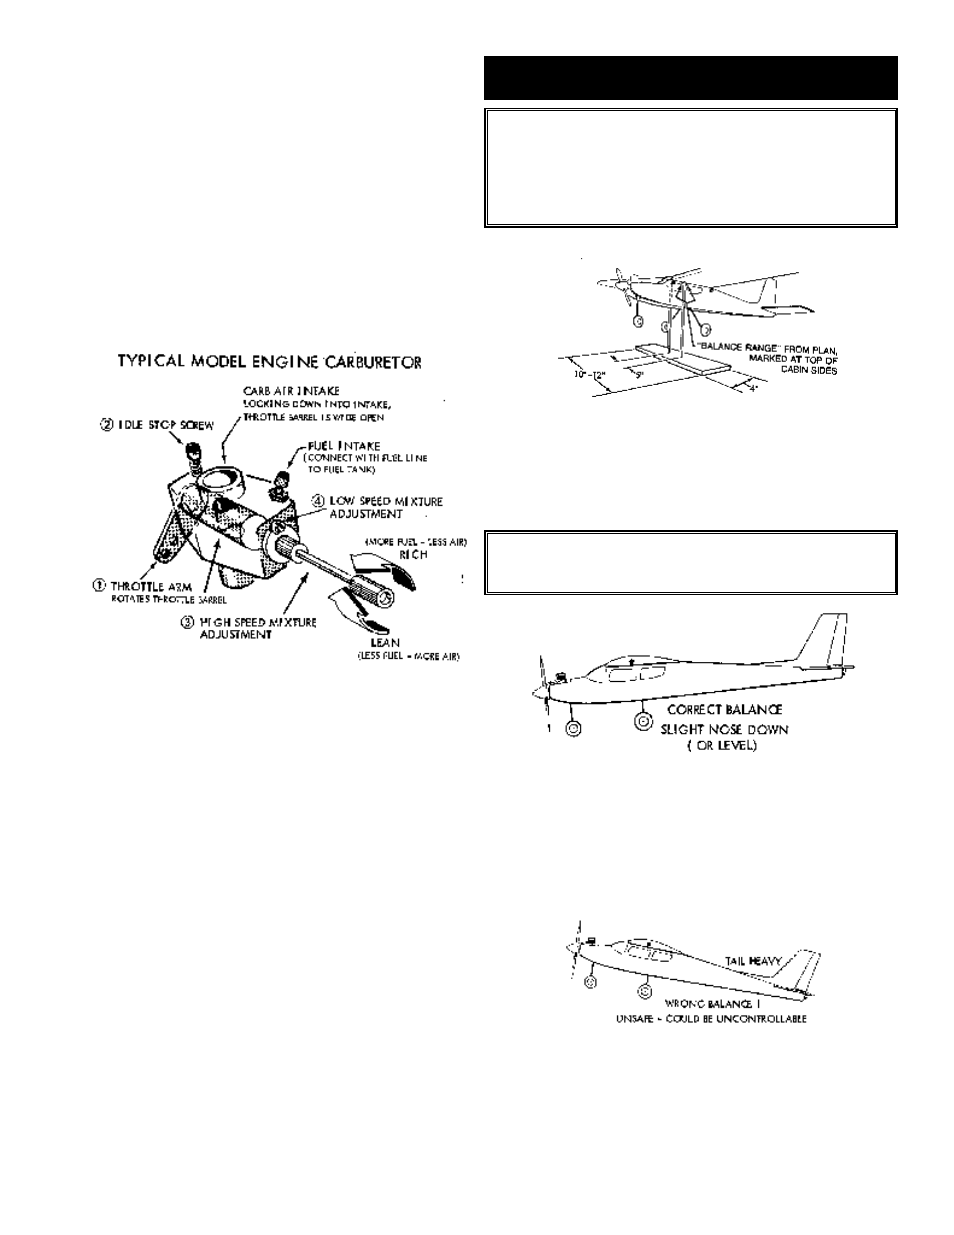
above drawing, locating the following four parts.
1.
Throttle "barrel" opening. The rotating
cylinder inside the carburetor is called the "throttle barrel."
It has a hole in the middle to admit air. By rotating the bar-
rel, the throttle can be "wide open" or completely "closed."
2.
Idle/Slow Speed/Stop screw. This screw
allows you to set how much the barrel can close.
3.
High Speed Mixer or Needle Valve. This
control regulates the mixture of fuel and air at high engine
speeds.
4.
Low Speed Mixer. This control regulates
the fuel/air mixture at idle engine speed.
Follow the break-in instructions included with your engine
make sure it is running well before you go out to fly
BALANCING YOUR MODEL
1.
Place the fully assembled aircraft on a
model balancing stand, as shown above. You can make
this simple set-up with a couple of ¼" dowels with rounded
tops, spaced 5" apart. Alternatively, lift the model under the
wing near the fuse by your finger tips.
NOTE: Attach the wing to the fuselage with #64 rubber
bands. Use seven rubber bands on each side of the
fuselage. Always check rubber bands prior to each flight.
2.
Referring to the recommended balance
range (4" back from the L.E.) move the position of the
plane on the balance stand until the model is level.
If you need to support the model outside
the recommended balance range, remove the wing and
shift the R/C equipment away from the heavy end of the
model and recheck until the model will balance within the
acceptable range.
3.
If shifting the R/C gear still doesn't balance
the model, add weight to the far end of the nose or tail,
respectively, until the model is correctly balanced. The
least weight is needed when added as far back or forward
as possible. Fasten the weight permanently in place.