Aileron servo installation – Carl Goldberg GPMA1956 Eagle 2 ARF User Manual
Page 8
8
8.
Using masking tape, tape the wing halves
together at the trailing edge and close to the leading edge
together, as shown. This will help keep the wing from twist-
ing.
9.
Next, place additional tape at several loca-
tions across the center seam of the wing, so that the
halves stay firmly together while the epoxy is setting.
NOTE: The wing dihedral will force one side of the wing up
off the tabletop. Place a book under the high side to help
support the wing and keep the halves in the proper posi-
tion. Caution: Do not distort the wing by blocking it too high
and do not touch until the epoxy dries.
NOTE: Each radio manufacturer has its own way to mount
the servos. Therefore, read the instruction manual includ-
ed with your radio to understand exactly how the servo
should be mounted.
1.
Collect the following parts:
(1)
Horn bracket
(1)
Servo tray
(2)
¼" sq. x 1-3/4" wood servo tray supports
(2)
Snap links
(2)
7" wires threaded on one end
(1)
Snap nut star tree.
(1)
Servo and the necessary mounting hard
ware (grommets, brass eyelets) supplied
with the radio.
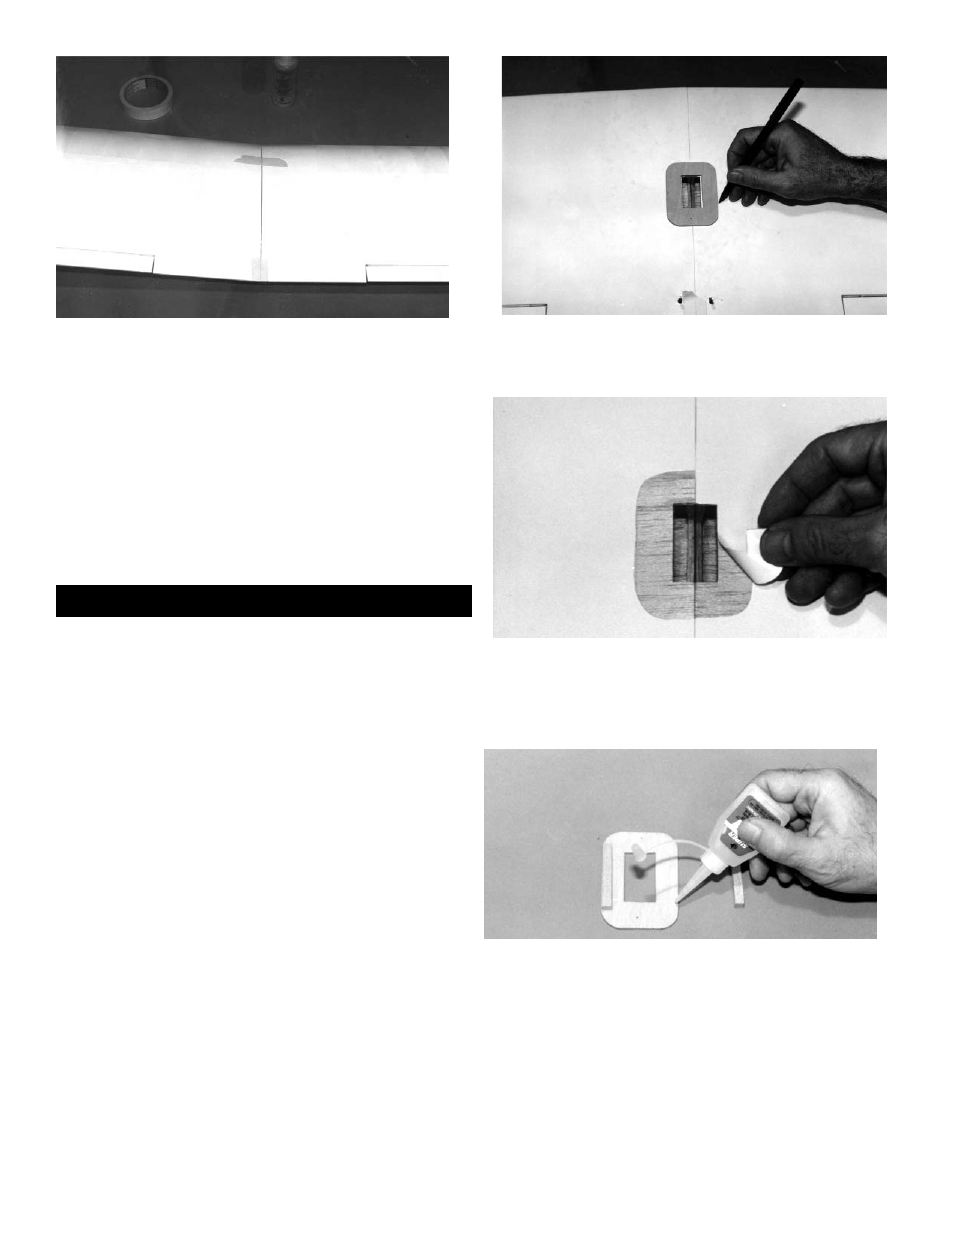
2.
Place the servo tray over the servo open-
ing in the center of the wing, as shown. Trace the outline
of the servo tray.
3.
Being extremely careful not to cut into the
wood underneath, cut the covering along the outline and
remove the covering in the area where the tray will fit.
4.
Using CA glue, glue the servo tray sup-
ports to the bottom of the servo tray, as shown.
AILERON SERVO INSTALLATION