Carl Goldberg GPMA1956 Eagle 2 ARF User Manual
Page 10
10
10.
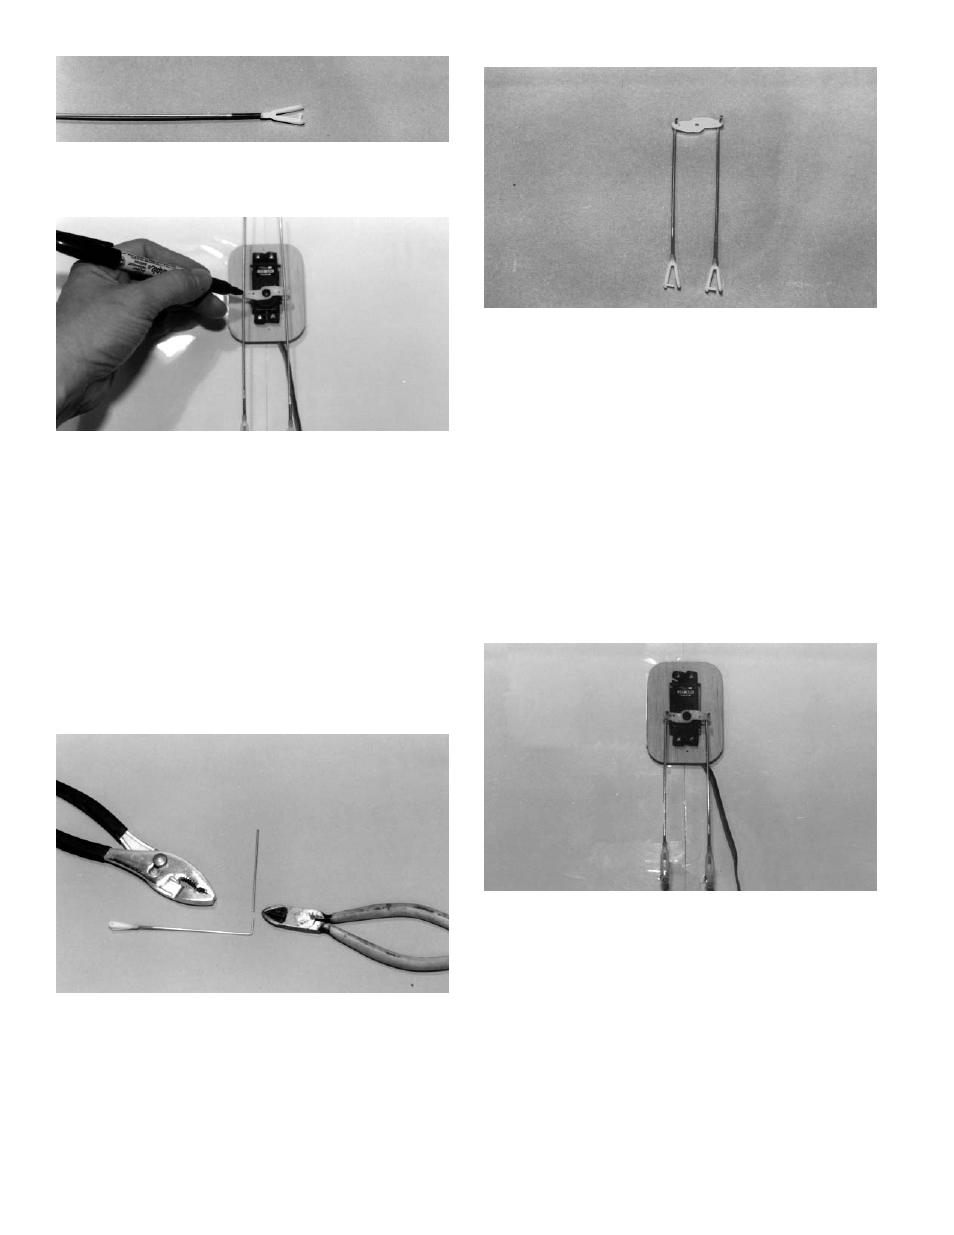
Thread the mini-snap links onto the two 7"
threaded wires until the wire shows in the middle of the
snap link.
11.
Thread the horn brackets on the aileron
torque rods. Be sure to screw them down until they are
flush with the top of the torque rods.
12.
Referring to the above photo, install the 7"
pushrod with the snap links connecting to the horn brack-
ets.
13.
To make pushrod installation easier, tape
the ailerons to the wing in the center (level) position .
14.
Lay the pushrods on the top of the servo
arm and mark where the rod meets the outside hole.
15.
Remove the pushrods from the horn bracket. Make
a 90° bend at the mark. Then, cut off the NON
THREADED end at approximately ½" from the
bend.
16.
For ease of installation, remove the servo
arm, as shown, and take two snap nuts from the snap nut
tree.
17.
Insert the pushrod through the bottom of
the servo arm and then push (snap) the snap nut on top,
to hold the pushrod is held in place. (Pliers may be help-
ful.)
18.
Starting at the top of the servo opening,
press the wide white vinyl tape down over the joined wing
seam. MAKE SURE THE MIDDLE OF THE TAPE COV-
ERS THE CENTER JOINT OF THE WING, WITH HALF
OF THE TAPE ON EACH SIDE OF THE SEAM. Apply the
tape all the way around the wing, stopping at the bottom of
the servo hole. Cut off any excess tape. Peel off the clear
tape on the surface of the white tape.
19.
Re-install the servo arm on the top of the
servo and reattach the push rods to the control horns. Be
sure to REMOVE THE TAPE FROM YOUR AILERONS, so
they will be able to move later, when you are setting up
your radio.
This completes your wing.