Motor mount installation – Carl Goldberg GPMA1956 Eagle 2 ARF User Manual
Page 16
16
2.
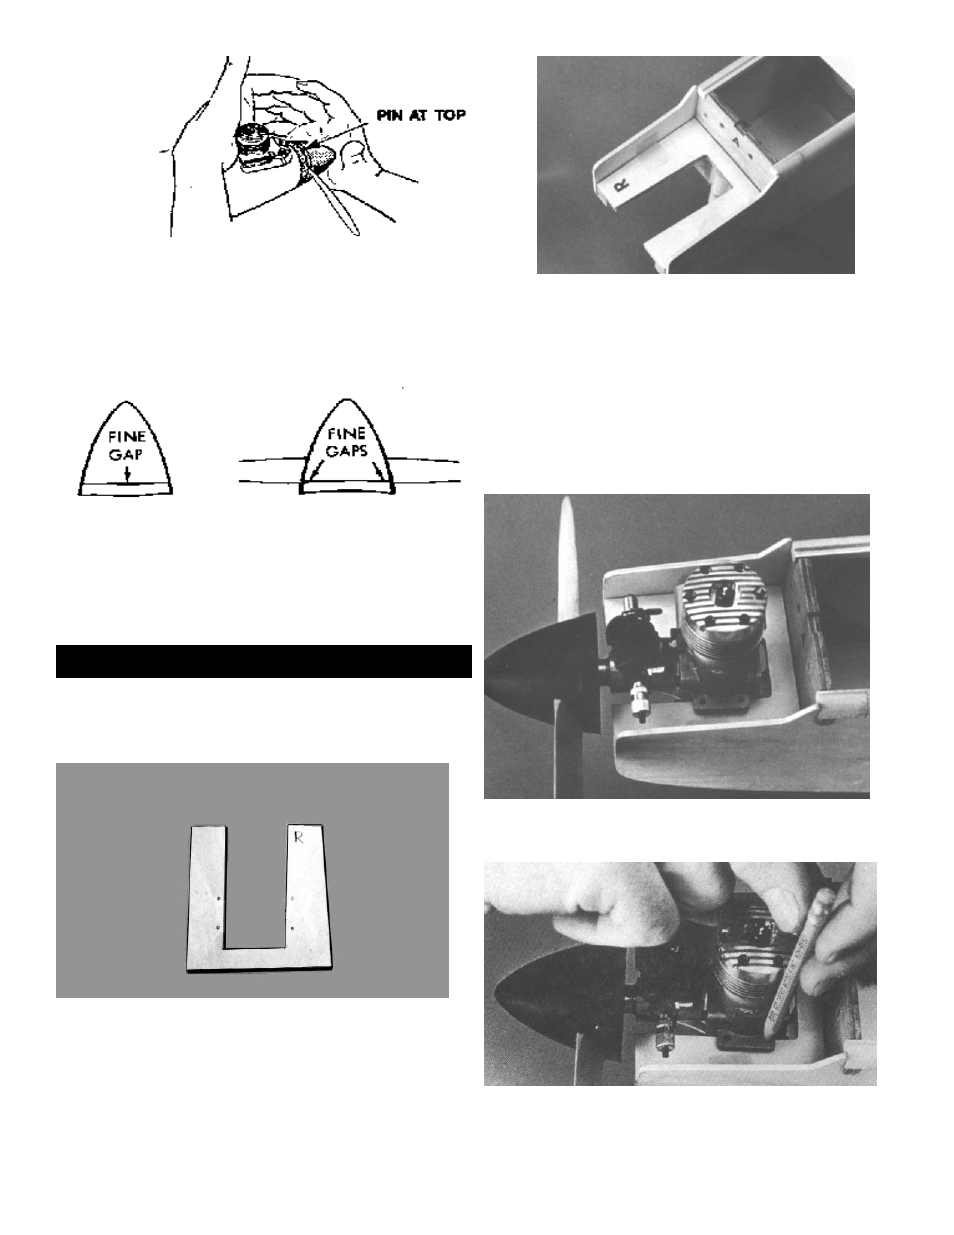
With the "R" facing up and on the right
side of the aircraft, as shown, place the motor mount in the
fuselage. but do not glue at this time. Position your engine
on top of the motor mount.
NOTE: The motor mount cutout will accept most stan-
dard size motors. However, if your motor is wider than
the mount, carefully trim equal amounts from both
sides of the opening, until your engine fits. Preserve
the right offset, as described above.
3.
Slide the engine to the rear of the opening
until the back of the spinner has clearance of approximate-
ly 1/8".
4.
When you are satisfied with the fit, use a
pencil to mark straight down through the engine mounting
holes onto the motor mount.
7.
Close the spinner by positioning the
spinner with the retaining pin at the top and
squeezing the backplate onto the nose cone.
Rotate the next pin to the top and repeat, until all
four pins are secure.
8.
Examine the spinner for good fit.
Make sure there is no distortion evident. Look
for a slight separation between the spinner cone
and the backplate, as shown above.
NOTE: Make sure the tail assembly is thoroughly
dry before removing the triangle and continuing.
1.
Place the wooden motor mount on
your work surface, exactly as shown above. The
cut out for the motor should offset, so that there
is a little more wood in the lower the right corner.
This will give your engine right thrust. Write the
letter "R" in the upper right hand corner to mark
the top and the right side of the motor mount.
MOTOR MOUNT INSTALLATION