First flight – Carl Goldberg GPMA1956 Eagle 2 ARF User Manual
Page 38
38
NOW THAT YOU'RE READY...
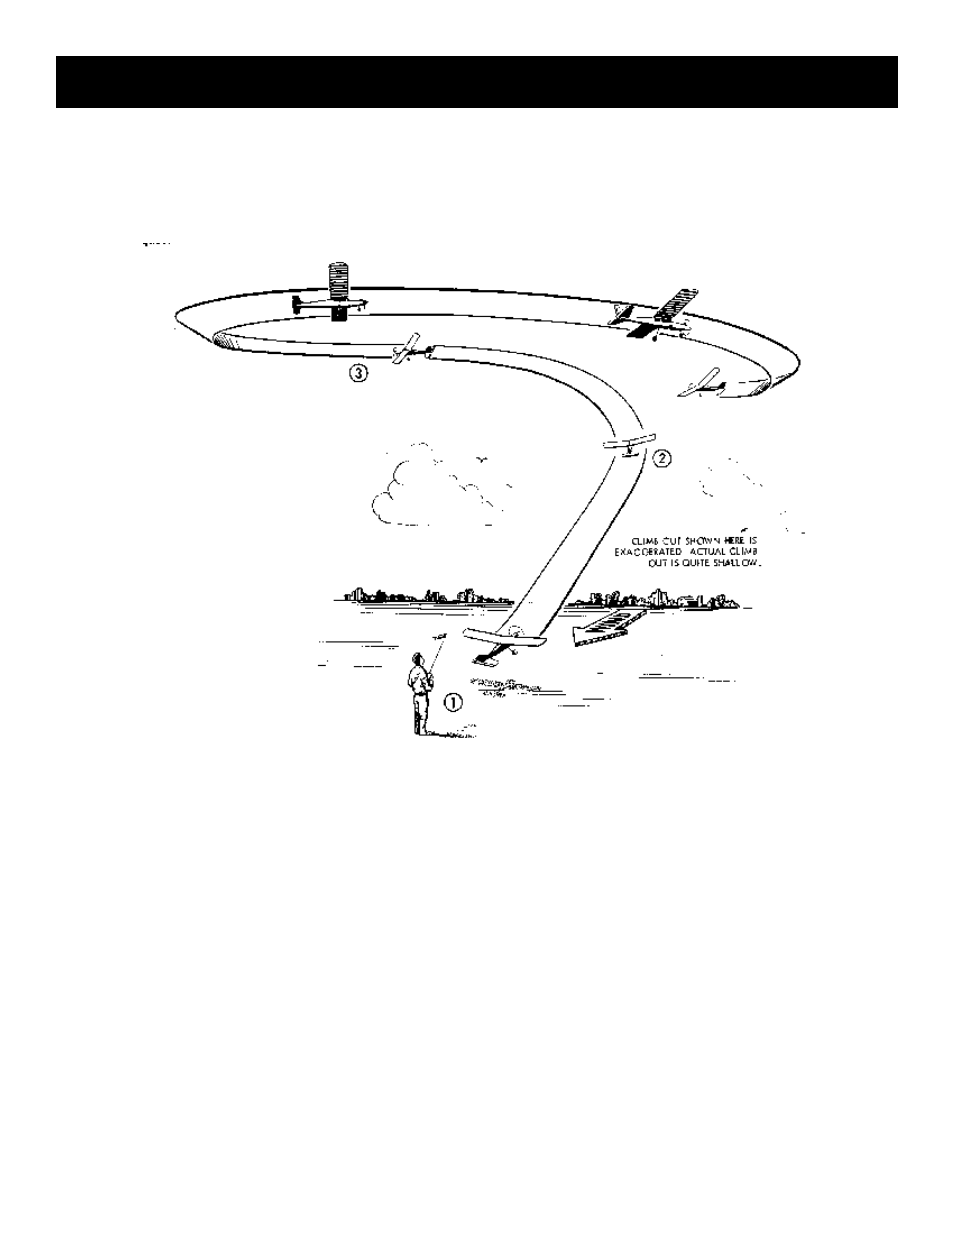
It is important to have a total flight plan in mind. Look at the fly-
ing sketches here to get an idea of the take-off direction and
space you will need when flying at your field.
1.
Start your engine. Point the model directly into the wind
and advance the throttle smoothly, steering on the ground with
rudder. The plane will gain speed rapidly.
Remembering to operate the controls smoothly, add
slight back stick pressure, if necessary, to keep the model from
descending. When it is about 100 feet away from you, it will start
to gently climb. Be patient; let it climb slowly, as a steep climb
will cause it to stall. Most crashes are due to moving the controls
too much, so be slow and gentle on the controls during "climb
out" and throughout the flight. Over-controlling tends to throw the
plane out of control and wastes power. Just keep the model fly-
ing in a gentle 5° to 10° climb into the wind. Keep the wings level
until you have reached an altitude of about 150 feet.
2.
Patiently allow the model to slowly climb to 150-200
feet, adding just a touch of left or right aileron stick pressure until
the model begins a very shallow turn in the direction you want to
go.
3.
Try to maintain this shallow turn. Do not let the turn get
too steep. The wind will tend to blow your plane further down-
wind. Try to keep it upwind at all times prior to your landing
approach. It is more difficult to fly a model when it is downwind,
and if a mistake is made, the model will end up further away,
making it harder to fly back to the field. To compensate for wind,
continue making upwind turns shallow, but make downwind turns
a little steeper.
The drawings on the next page illustrate some of the problems
that may occur in flight, as well as the proper corrective maneu-
vers.
There is no way to fully explain the principals of flight and the
techniques of flying in a few pages. Entire books have been writ-
ten about apparently simple subjects, such as the shape of the
wing. Furthermore, there is no substitute for an experienced R/C
flight instructor. The following information is not intended to
replace your instructor, but to help give you understanding of
basic flight concepts and techniques.
One of the most important, yet sometimes forgotten pre-flight
checks to always make sure the wing is securely banded to the
fuselage. Use at least seven #64 rubber bands on each side of
the wing.
Plan to make your first flight a short one. You will be surprised
how exhausting beginning flights can be. Plan to spend no more
than 2-3 minutes in the air the first few times you fly.
FIRST FLIGHT