Servo installation – Carl Goldberg GPMA1956 Eagle 2 ARF User Manual
Page 18
18
3.
Turn the fuse right side up and place the
4-40 blind nuts on the ends of the screws, with the teeth
pointed toward the firewall.
1.
Collect the following items:
(2)
Plywood servo trays
(3)
Servos
(12)
Servo rubber grommets
(12)
Servo eyelets
(12)
Servo screws
(1)
¼ x½ x 3-5/8 wood servo rail
2.
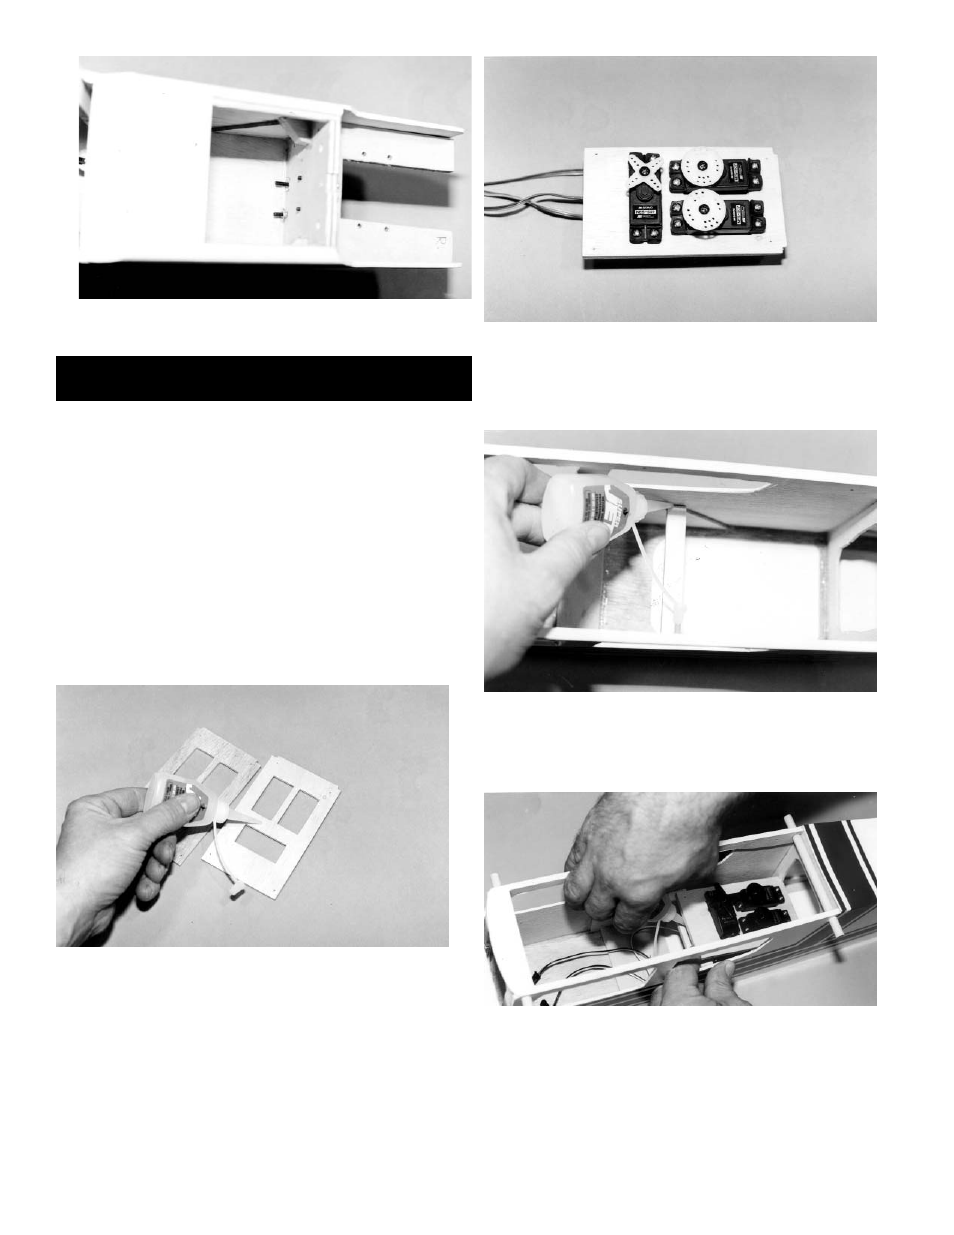
Set up the three servos in the same man-
ner as the wing servo was prepared. Review the Wing
Assembly section of the book, if necessary. Also refer to
the specific instructions included with your radio.
3.
Using Ca Glue, laminate the two plywood
servo trays together. Hold flat and allow to dry.for approxi-
mately one minute.
4.
Place the servos in the tray and install with
screws, as shown. Make sure the servo arms and wheels
on your servos look approximately like the ones in the
photo. If necessary, change the arms and wheels to
match.
5.
Position the ¼ x ½ x 3-5/8" wood servo
rail inside the fuselage, fitting it into the notches in the side
doublers. If the rail is too tight, sand to fit. When satisfied,
glue in place.
6.
Slide the servo tray into the fuselage, plac-
ing the back of the servo tray into the notches in the rear
cabin former. After making sure the tray is straight in the
fuselage, CA glue in place by putting glue on top of the rail
and at the notches in the rear cabin former.
SERVO INSTALLATION