Assembling – A&D Weighing SV-100H User Manual
Page 13
11
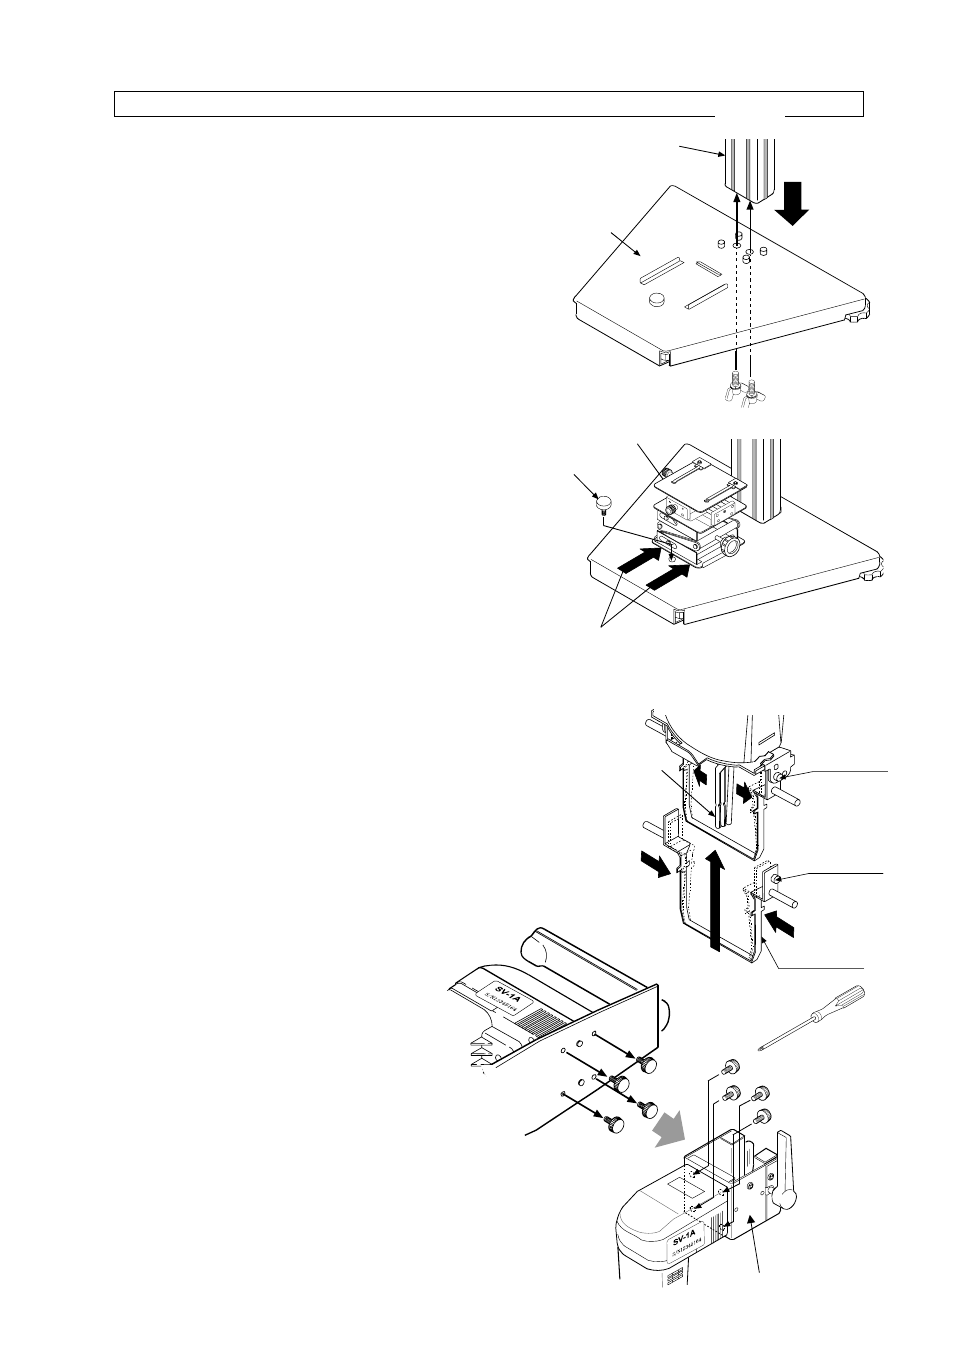
Assembling
Note: When assembling, handle the sensor plates
with care.
When removing or tightening the screws
located on the rear side of the sensor unit’s
handle, use the screwdriver that is provided
with the viscometer.
1 Remove the two screws from the bottom of the
supporting post. Install the supporting post onto
the base. From the underside of the base, secure
the post using the two screws previously
removed.
2 Remove the attachment screw from the base.
Install the X-Y-Z stage along the guide ribs from
forward of the base. Secure the X-Y-Z stage using
the screw removed. (Confirm the direction of the
X-Y-Z stage’s knobs.)
3 Install the protector on the sensor unit of the
SV-1A/SV-10A/ SV-100A.
Insert the protector’s rotational axis into the
sensor unit’s hole.
(Refer to the figure at the right.)
4 Remove the four screws from the
rear side of the sensor unit’s handle.
Using the four screws removed,
attach the sensor unit to the slider.
Tighten the screws completely, using
the screwdriver provided with the
viscometer, so that there will be no
measurement error due to movement
of the head.
Sensor
plate
Sensor unit
Example: SV-1A
Protector
1
Rotational
axis
2
1
3
3
Rotational
axis
Screws
Base
Supporting post
Screw
Install from forward
X-Y-Z stage
Slider
Screws
Screwdriver