Cub Cadet MMZ Rider User Manual
Page 20
Cub Cadet Commercial M60 Tank - 2002 and prior years
16
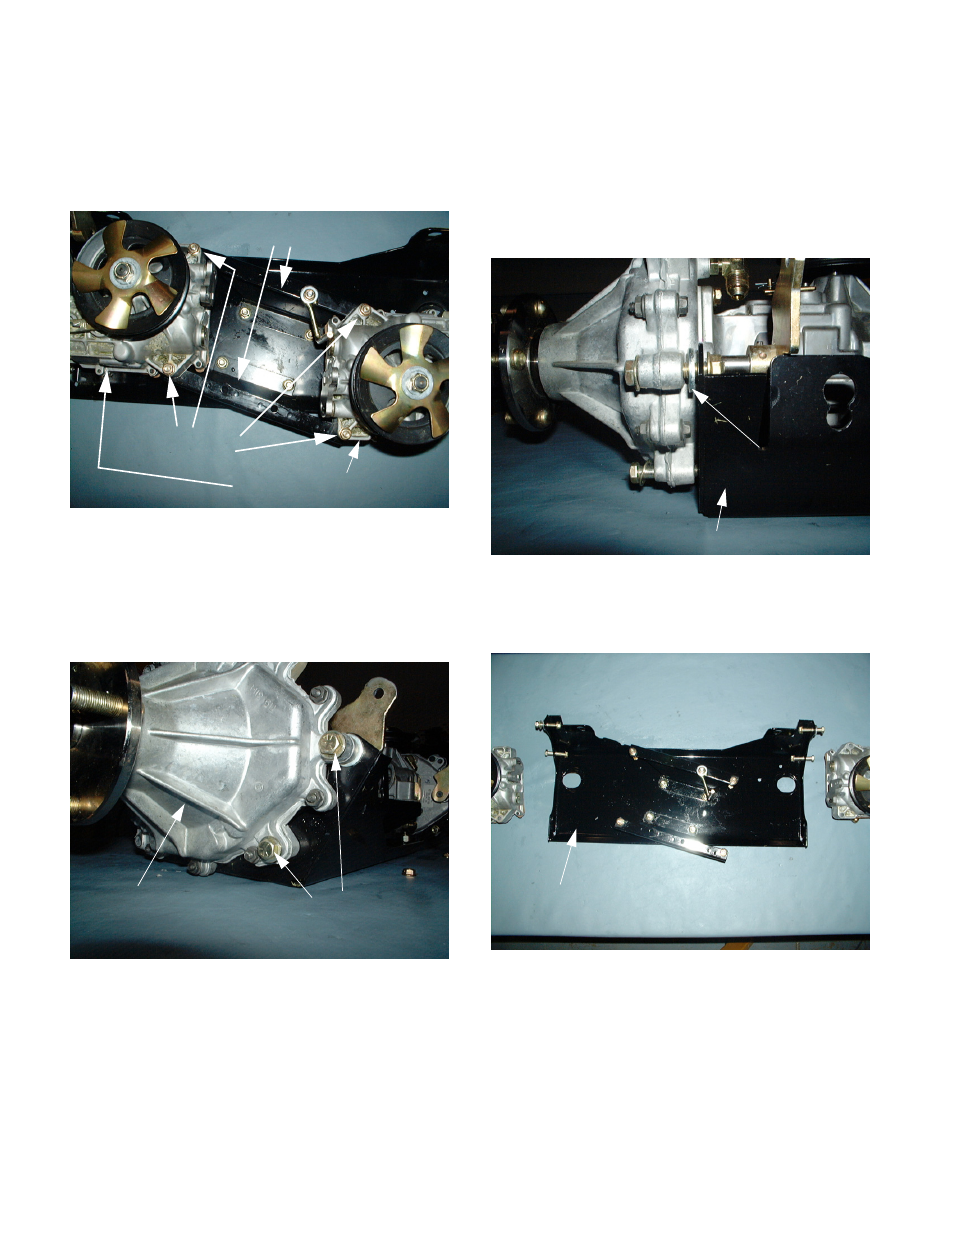
6.
Remove all four hex cap screws and flange lock
nuts that secure the hydrostatic pump assem-
blies to the center pump support brackets using a
1/2" socket and a 1/2" wrench. See Figure 5.
7.
Remove all four remaining hex cap screws, flat
washers and flange lock nuts securing the hydro-
static pump assemblies to the skid plate assem-
bly using a 1/2" socket and a 1/2" wrench. See
Figure 6.
NOTE: The thick flat washers are used to make
up the difference between the hydrostatic pump
assembly housings and the skid plate assembly,
at the upper rear mounting hole (closest to the
dump valve lockout holes). See Figure 7.
8.
Remove both hydrostatic pump assemblies from
the skid plate assembly. See Figure 8.
9.
Assemble the hydrostatic pump/transmission
assembly in the reverse order above.
Figure 5
Hex Cap Screws
and Lock Nuts
Center Pump Support
Brackets
Hydrostatic Pump Assembly
Figure 6
Hex Cap Screws,
Flat Washers, and
Lock Nuts
Hydrostatic
Pump
Figure 7
Thick Flat
Washers
Skid Plate
Figure 8
Skid Plate