Before recording, Volume, sound quality and surround effects, Erasure prevention – Panasonic SC-DK10 User Manual
Page 37: Erasing recordings, Preparatory steps
Attention! The text in this document has been recognized automatically. To view the original document, you can use the "Original mode".
Before recording
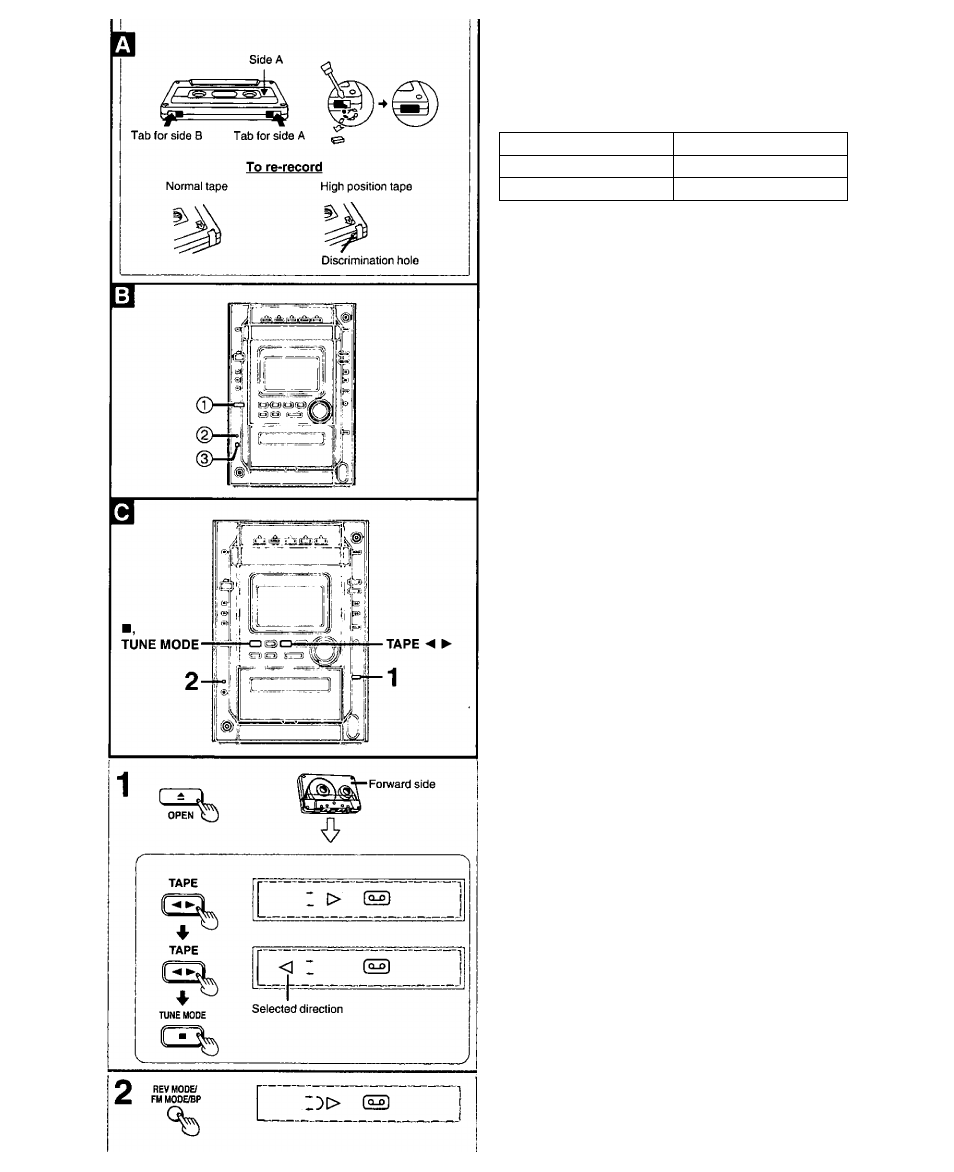
Selection of tapes for recording
The unit automatically identifies the type of tape.
Normal position/TYPE I
✓
High position/TYPE II
✓
Metal position/ TYPE IV
X
Metal position tapes can be used, but the unit will not be able to
record or erase them correctly.
Volume, sound quality and surround effects
• Recording level is set automatically.
• Multi-channel sources (3 to 5.1 channels) are automatically
down-mixed to 2 channels during recording.
Turn on dynamic range compression if sound is distorted
Audio-D.Range Compression, pages 50-53).
•All sound effects are automatically set to flat.
Erasure prevention
The illustration shows how to remove the tabs to prevent recording.
To record on the tape again, cover as shown, being careful not to
cover the high position discrimination hole.
Erasing recordings
Preparation:
(For China, the Middle East, South Africa and Asia)
Disconnect the microphones.
® Press [SELECTOR] to select “TAPE”.
@ Press [REV MODE/FM MODE/BP] to select the reverse mode.
(3) Press [• REC/STOP],
Preparatory steps
Do these steps before each recording.
Wind up the leader tape so recording can begin immediately.
1
Press [AOPEN] and insert the cas
sette to be recorded on.
The tape direction is automatically set to “£>”.
To record on the reverse side
Press [TAPE ◄ ►] twice, then press [■, TUNE MODE].
Select “TAPE” with [SELECTOR], then
Press [REV MODE/FM MODE/BP] to
select the reverse mode.
Each time you press the button:
T___
One side only records.
and
c:Zy-
Both sides record (fonward-^reverse).
Recording stops at the end of the reverse
side.
automatically changes to when [•REC/STOP] is
pressed.
U)
c
0
1
I
Ol
c
o
u
flOT5824