Waterworks Formwork Ceiling Mounted 15" Recessed Square Shower Head User Manual
Installation guidelines, Formwork
PRODUCT SUPPORT 800.927.2120 8am - 6pm EST
FORMWORK
15" Ceiling Mounted Recessed Showerhead
INSTALLATION GUIDELINES
Page 1 of 2
4.30.2014
These guidelines have been prepared for the professional contractor to aid in the installation of:
FORMWORK 15" Ceiling Mounted Recessed Showerhead (STYLE# FMSH10)
All dimensions are based on original specification and are subject to change and variation.
Please consult your Design Associate for current specifications.
Style No. FMSH10
SPECIFICATIONS:
Connection Type: 1/2" Female Hose Connection
Fitting Cutout in Tile Backing: 17-3/4" Square
Fitting Opening in Finished Ceiling: 13-1/8" Square
Recommended Pipe Size: 3/4"
Restricted Maximum Flow Rate: 2.5 gpm
Water Pressure: 20psi MIN - 80psi MAX
Water Pressure Recommended: 45psi
IMPORTANT:
¾ A diverter or wall valve (sold separately) control
on/off/volume and must be installed for each fitting
that will have water flowing to it.
¾ This is a two person installation.
¾ Prior to installation verify the locations of ceiling
joists.
¾ Proper blocking is required above the finished
ceiling. Installing between ceiling joists is ideal,
otherwise dropping the ceiling may be required.
¾ To ensure this product is installed properly, you
must read and follow these guidelines.
¾ The owner/user of this product must keep this
information for future reference.
¾ Be sure your installation conforms to federal, state,
and local codes. In the State of Massachusetts, all
installations must comply with the rules and
regulations set forth within 248 CMR.
¾ This product must be installed by a professional
licensed contractor and must be onsite prior to
rough-in, this allows the installer to visualize the
installation.
¾ Inspect this product to ensure you have all the parts
required for proper installation.
¾ The use of certain plumber's putty can stain stone or
tile surfaces.
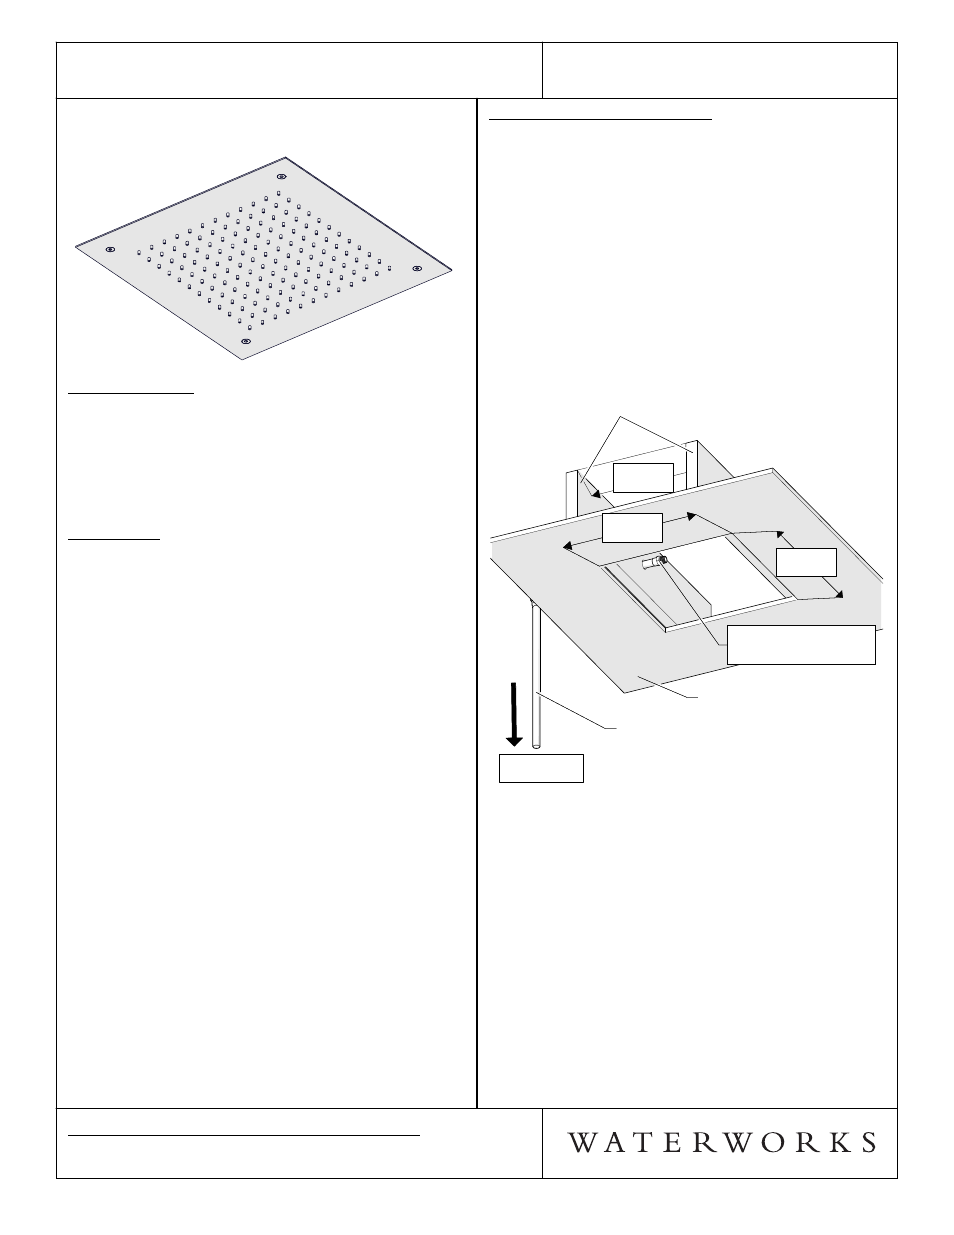
SHOWER BRACKET ROUGH IN:
¾ The ideal location for this showerhead is between 2
ceiling joists and centered in the shower stall.
¾ See Figure 1 for Steps 1 - 3.
1.
Determine the ideal location for the FMSH10 and cut
a 17-3/4" x 17-3/4" square opening into the TILE
BACKING BOARD.
2. Plumb 3/4" Copper Pipe from a control valve (SOLD
SEPARATELY) and through the CEILING JOIST,
centered, into the area, about 3" into the opening.
3. Sweat a 3/4" Pipe x 1/2" NPT Male Pipe Adapter
onto copper pipe (not included) on the end of the of
the copper pipe.
TILE BACKING BOARD
3/4" Pipe x 1/2" NPT Male
Pipe Adapter
(NOT INCLUDED)
3/4" COPPER PIPE
RECOMMENDED
CEILING JOISTS
TILE BACKING BOARD
3/4" Pipe x 1/2" NPT Male
Pipe Adapter
(NOT INCLUDED)
3/4" COPPER PIPE
RECOMMENDED
CEILING JOISTS
14-1/2"
[368 mm]
17-3/4"
[450 mm]
17-3/4"
[450 mm]
TO CONTROL
VALVE
FIGURE - 01
¾ See Figure 2 & Figure 3 for Steps 4 -6.
4. Install 2x4 BLOCKING between the CEILING JOISTS
with an open distance of 13-1/4" between and a
minimum of 2-1/4 and maximum of 2-3/4" from
finished ceiling.
5. Attach MOUNTING BRACKET with wood screws
(not included) or ceiling hangers (not included),
using the MOUNTING TABS.
6. Finish the ceiling so that the MOUNTING BRACKET
is flush with the finished ceiling.
¾ NOTE: THE FACE OF THE MOUNTING BRACKET IS
TO BE FLUSH WITH THE FINISHED CEILING.