Waterworks Highgate Low Profile One Hole Deck Mounted Lavatory Faucet with White Porcelain Lever Handles User Manual
Installation guidelines
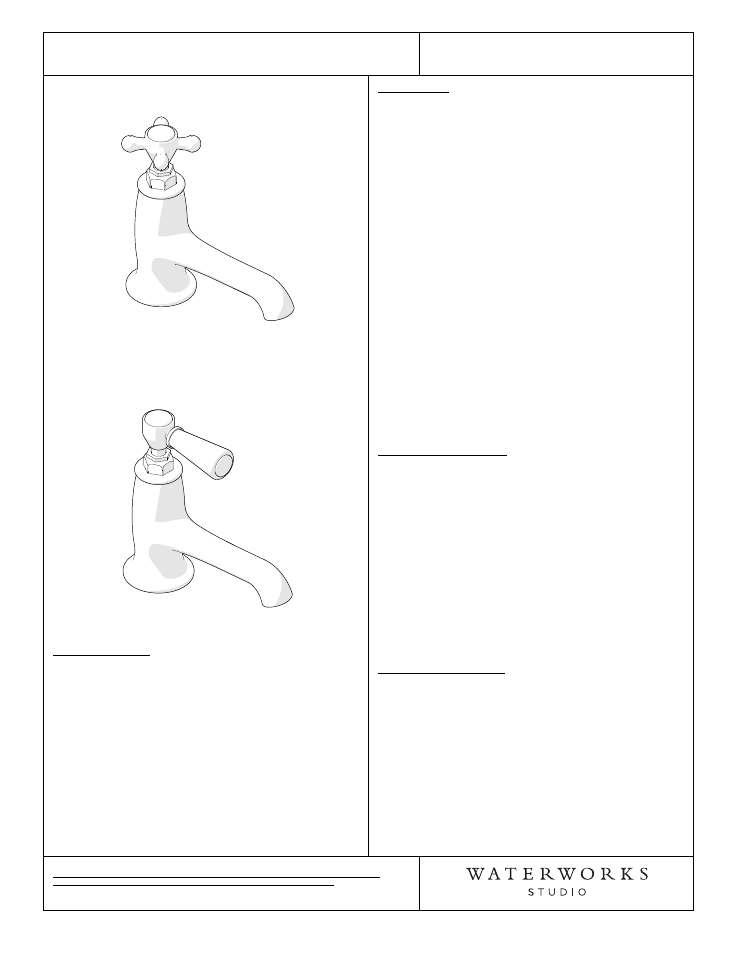
HIGHGATE
Low Profile One Hole Deck Mounted Lavatory
Faucet
INSTALLATION GUIDELINES
Page 1 of 3
6.11.2012
These guidelines have been prepared for the professional contractor to aid in the installation of:
HIGHGATE LOW PROFILE ONE HOLE LAVATORY FAUCET WITH METAL CROSS HANDLE
(STYLE# HGLS40) & WHITE PORCELAIN LEVER HANDLE (STYLE # HGLS50)
All dimensions are based on original specification and are subject to change and variation.
Please consult your Design Associate for current specifications.
Metal Cross Handle
Style No. HGLS40
White Porcelain Lever Handle
Style No. HGLS50
SPECIFICATIONS:
Drain Hole Diameter: 1-3/4"
Drain Style: Lift-Turn (Drain Included)
Fitting Hole Diameter: 1-3/8"
Inlet Connection Size: 1/2"
Inlet Connection Type: Straight Female Threads
Maximum Deck Thickness: 1-1/4"
Minimum Deck Thickness: 3/8"
Maximum Water Pressure: 80psi
Minimum Water Pressure: 20psi
Recommended Water Pressure: 45psi
Restricted Maximum Flow Rate: 1.5gpm
IMPORTANT:
¾
To ensure this product is installed properly, you
must read and follow these guidelines.
¾
The owner/user of this product must keep this
information for future reference.
¾
Be sure your installation conforms to federal state,
and local codes. In the State of Massachusetts, all
installations must comply with the rules and
regulations set forth within 248 CMR.
¾
This product must be installed by a professional
licensed contractor.
¾
Refer to the specifications and assembly drawings
attached. Product is sold partially assembled but
shown fully disassembled for illustrative and service
purposes only.
¾
Inspect this product to ensure you have all the parts
required for proper installation.
¾
Use only a strap wrench of protected/smooth-jaw
wrench on any finished surface.
¾
DO NOT use putty on deck fittings. Upper and lower
washers are provided.
SPOUT INSTALLATION:
¾
The maximum deck thickness is 1-1/4", a slab thicker
than 1-1/4" will require the underside to be routed
accordingly.
1.
Remove the rubber washer (10), metal washer (11),
and nut (12) from the spout threaded shank (9).
2. With the washer (4), place the spout (3), threaded
shank (9), and flexible supply hoses (16) through
the hole on the mounting surface.
3. From under the mounting surface, place the rubber
washer (10) and metal washer (11) back onto the
threaded shank, then thread the nut (12) and tighten
to secure the spout.
DRAIN INSTALLATION:
4. Remove the tailpiece (22) and mounting hardware
(18-21) from the drain body (17).
5. Set the drain body (17) in the lavatory drain opening
using putty or a clear adhesive silicone depending
on the mounting surface material*.
6. Re-install the mounting hardware (19-21) until fully
secured. You can discard the upper drain gasket
(18). Putty or clear adhesive silicone may be used to
ensure a water-tight seal between the lower drain
gasket (19) and lavatory*.