Installation guidelines – Waterworks R.W. Atlas Low Profile Three Hole Wall Mounted Lavatory Faucet with Metal Lever Handles User Manual
Page 3
PRODUCT SUPPORT 800.927.2120 8am - 6pm EST
RW ATLAS
Wall Mounted Lavatory Faucet
INSTALLATION GUIDELINES
Page 3 of 3
8.9.2012
These guidelines have been prepared for the professional contractor to aid in the installation of:
RW ATLAS WALL MOUNTED LAVATORY WITH METAL WHEEL HANDLES (STYLE# RWLS60) &
METAL LEVER HANDLES (STYLE # RWLS70)
All dimensions are based on original specification and are subject to change and variation.
Please consult your Design Associate for current specifications.
SEE SERVICE PART DOCUMENT FOR PART ORDERING, AVAILABLE ON WATERWORKS.COM
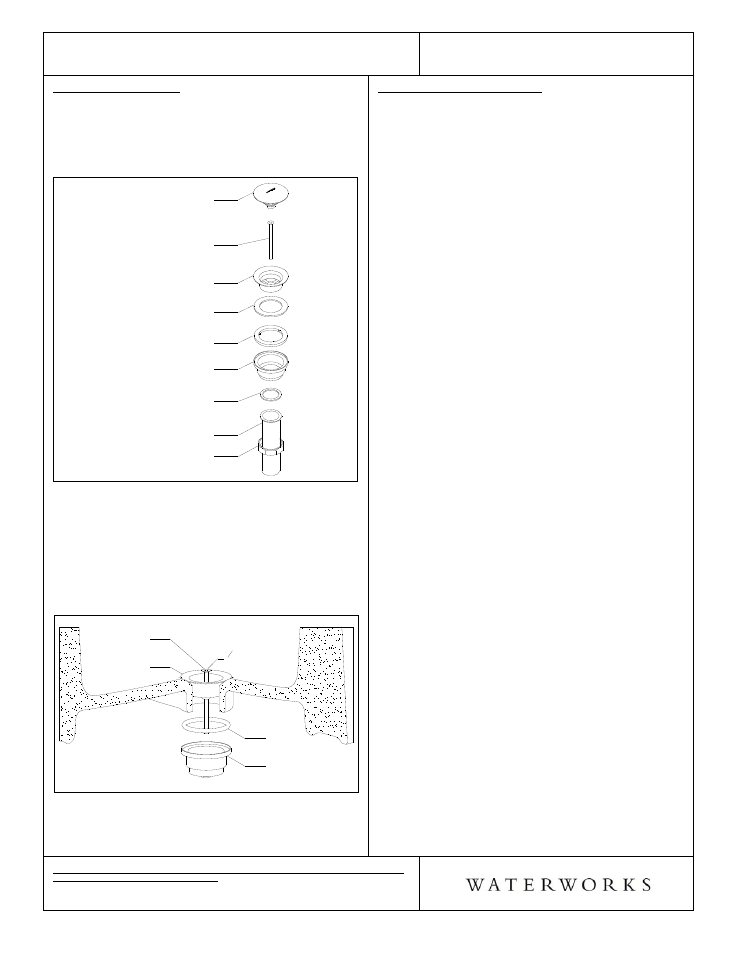
DRAIN INSTALLATION:
15. Unthread and remove the drain stopper and lower
drain body from the drain flange. The foam washer
can be discarded then remove the tailpiece from the
lower drain body. See Figure - 05.
Figure - 05
DRAIN STOPPER
SCREW
DRAIN FLANGE
FOAM WASHER
RUBBER GASKET
LOWER DRAIN BODY
TAILPIECE
RUBBER WASHER
TAILPIECE
NUT
16. Set the drain flange in the lavatory drain opening
using putty or a clear adhesive silicone depending
on the mounting surface material.* Re-install the
lower drain body with the screw, making sure to use
the rubber gasket provided and tighten until fully
secured. Putty or a clear adhesive silicone may be
used to ensure a water-tight seal between the
gasket and lavatory.* See Figure - 06.
Figure - 06
SCREW
DRAIN
FLANGE
RUBBER
GASKET
LOWER
DRAIN
BODY
5
32
" or 4mm
Hex Key
17. Re-install the tailpiece using the washer and nut
then re-install the drain stopper.
INSPECT THE INSTALLATION:
18. Remove the flow restricting aerator using a flat head
screwdriver or a coin, then carefully open the hot
and cold valves to flush out any debris in the supply
lines. See Figure 3.
19. Inspect all connections for leaks.
20. Close the drain and fill the sink with water to make
sure the drain stopper and gasket operates and
seals properly.
21. Re-install the flow restricting aerator making sure
the washer is in place.
¾ The octagon collar on the spout and all of the hex
collars can be rotated after installation to orientate
to correct position.
* Putty contains oils and can cause permanent
discoloration on certain materials such as marble,
granite and any porous surface.
¾ If further assistance is required, please contact
Product Support at 1-800-927-2120 (8am-6pm EST).
¾ See service part document for parts ordering,
available on WATERWORKS.COM.