Installing the auxiliary ksyn3 synthesizer, Caution – Elecraft KRX3 User Manual
Page 23
23
Installing the Auxiliary KSYN3 Synthesizer
The KSYN3 is supplied with a stiff metal plate covering the front of the pc board. This plate keeps the board
from vibrating, especially if the K3 is operated with its internal speaker at high volumes. Do not attempt to
remove the plate. It is attached to the board with adhesive.
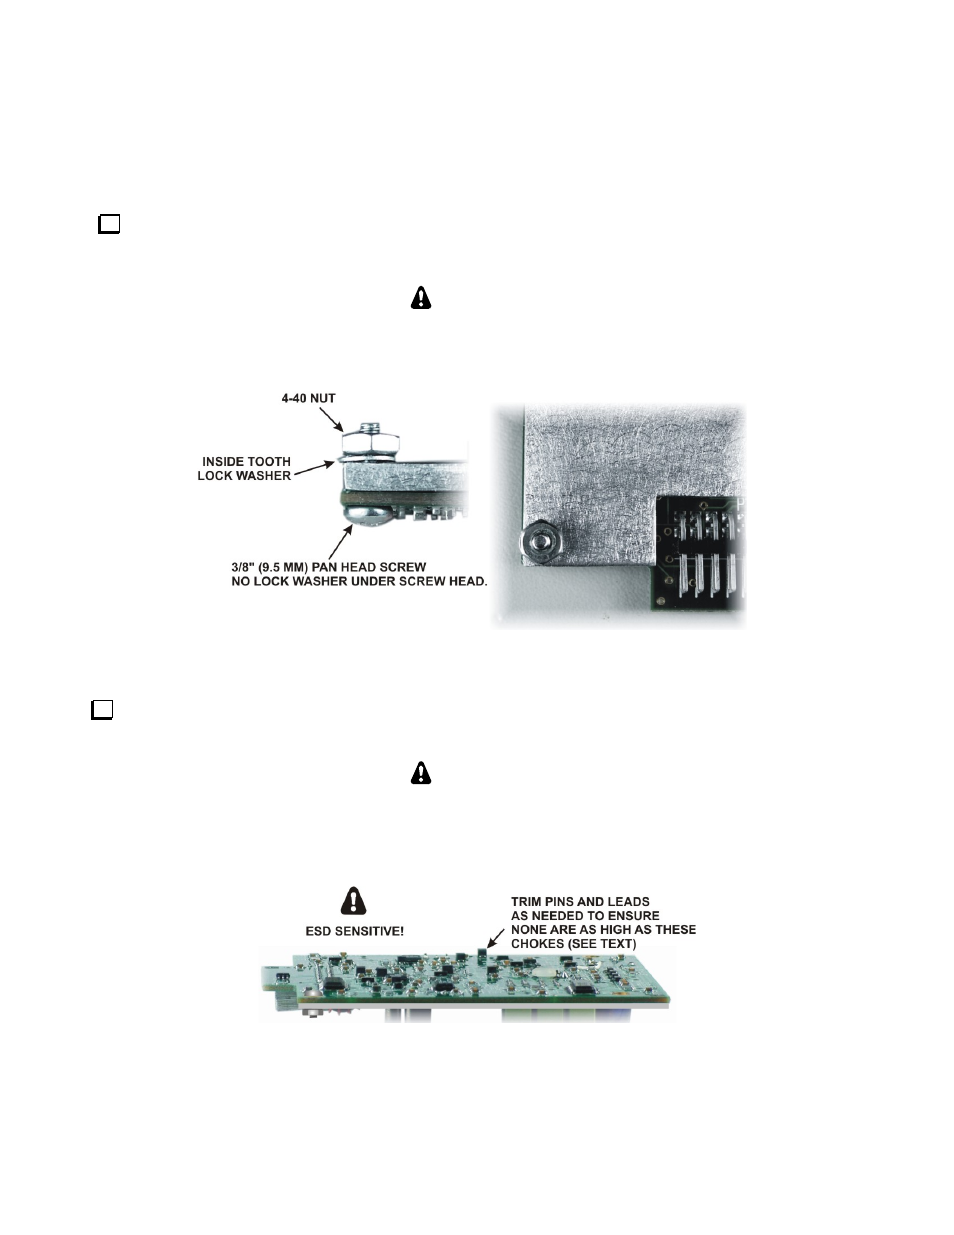
Remove the KSYN3 board from its ESD protective packaging and confirm that the screw, washer and nut
are mounted on the bottom corner of the KSYN3 board as shown in Figure 25. Note that the nut is on the side
with the stiffener plate.
CAUTION
Do not tighten the hardware beyond the point where it begins to compress the lock
washer. Over-tightening may compress the thin adhesive between the stiffener plate and
the pc board, causing short circuits under the stiffener plate.
Figure 25. Stiffener Plate Fastener on KSYN3 Board.
Inspect the bottom of the KSYN3 board to ensure no leads are higher than the chokes as shown below. The
chokes are the highest of the black surface-mount components on the board. Use your diagonal cutters to trim
any excessively long leads close to the board.
CAUTION
The objective of trimming any long leads is to be certain no bare leads touch the front
panel shield when the board is installed in the next step. Do not add spacers or insulating
material between the board and the front panel shield. It is important for proper
shielding of the circuits that the board sits very close to the front panel shield.
Figure 26. Checking Lead Lengths on Aux KSYN3 Board.