Installation procedure – Elecraft KRX3 User Manual
Page 11
11
Installation Procedure
K3 KIT BUILDERS:
If you were directed here to install the KRX3 Subreceiver as part of the
initial K3 assembly, remove the top cover as shown below, and then go directly to Checking and Modifying
Resistor R91 on page 21 since you have already installed the Auxiliary DSP board.
Disconnect power and all cables from your K3.
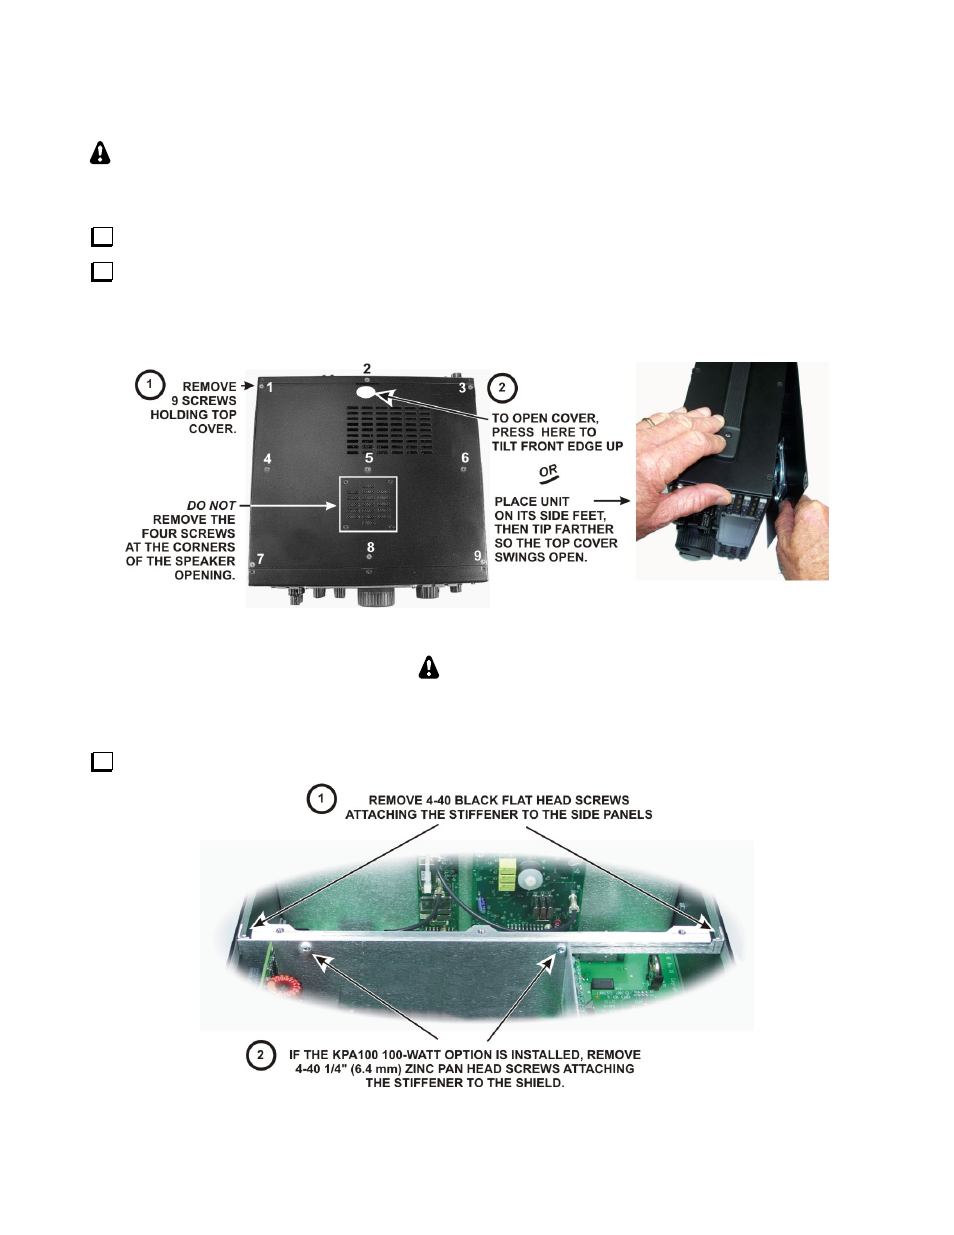
Remove the nine screws to free the top cover as shown in Figure 2. After the cover is open, lift it
gently to reach the speaker wire connector. Unplug the speaker then set the top cover aside in a safe
place. If you have the K144XV 2-meter option installed, slip the speaker wire under the chassis stiffener
bar that runs across the top of the K3 along the depression in the top of the K144XV module.
Figure 2. Removing K3 Top Cover.
CAUTION
Touch an unpainted metal ground or wear a grounded wrist strap before touching
components or circuit boards inside the K3. See Preventing ESD Damage on page 5 for
more information.
Remove the chassis stiffener bar that runs across the top of the K3 (see Figure 3)
Figure 3. Removing the Chassis Stiffener Bar.