Thermcraft XST-3-0-36-3V User Manual
Page 175
Installation and Operation Handbook
Installation
2416 Controller
1-3
1.1.3
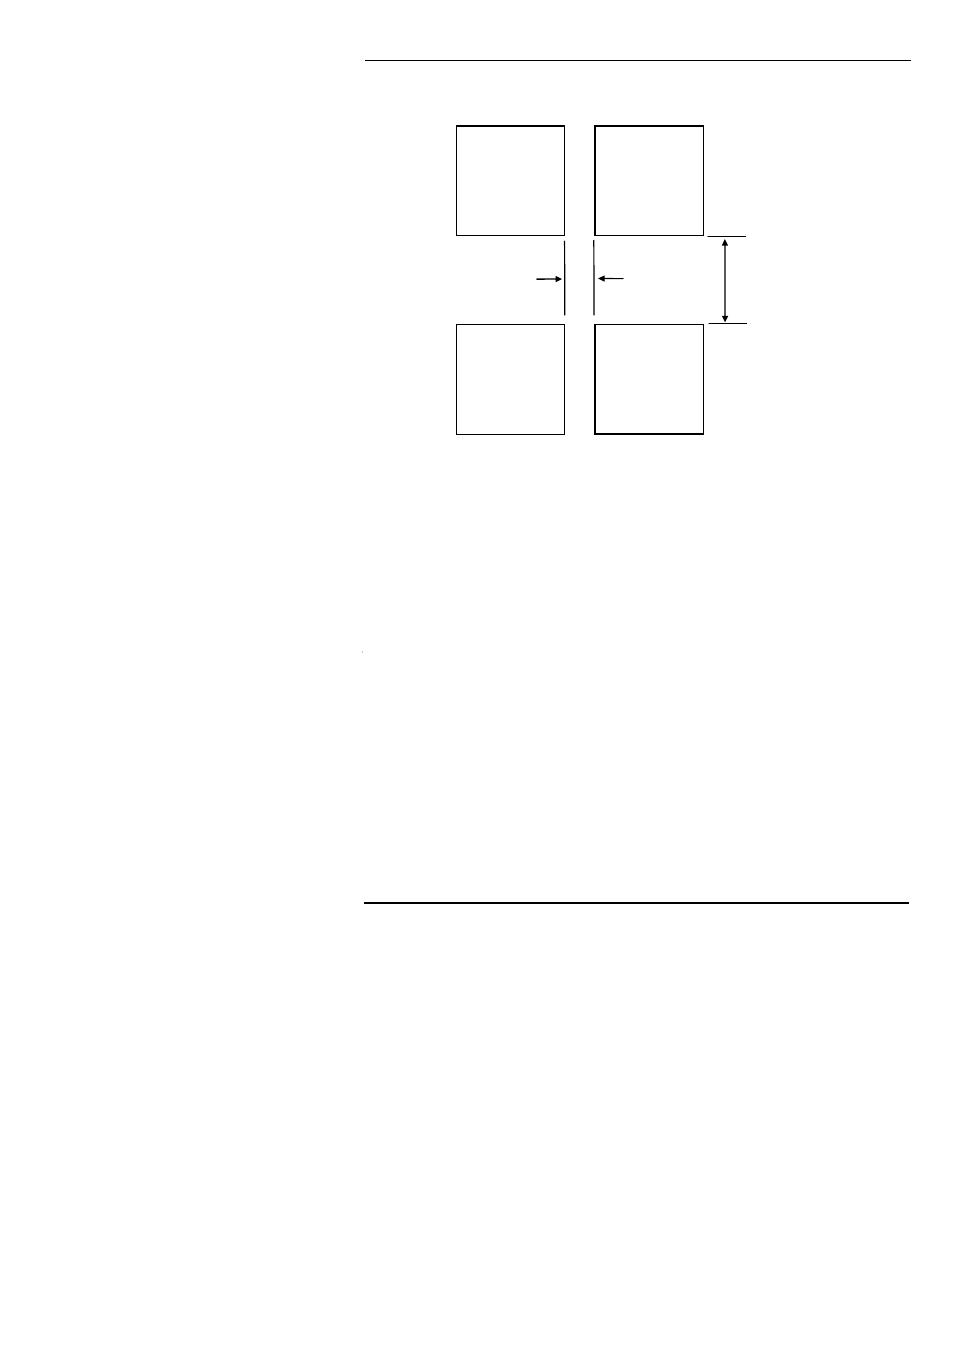
Panel cut-out and recommended minimum spacing of controllers
Figure 1-3 Panel cut-outs and minimum spacing
1.1.4
To install the controller
1. Prepare the control panel cut-out to the size shown in Figure 1-3.
2. Insert the controller through the panel cut-out.
3. Spring the upper and lower panel retaining clips into place. Secure the controller in
position by holding it level and pushing both retaining clips forward.
4. Peel off the plastic film protecting the front of the indicator.
Note: If the panel retaining clips subsequently need removing, in order to extract the
controller from the control panel, they can be unhooked from the side with either your fingers
or a screwdriver.
1.1.5
Unplugging and plugging-in the controller
If required, the controller can be unplugged from its sleeve by easing the latching ears
outwards and pulling it forward out of the sleeve. When plugging the controller back into its
sleeve, ensure that the latching ears click into place in order to secure the IP65 sealing.
38mm (1.5in)
10mm (0.4in)
Panel cut-out
45 x 45mm
1.77 x 1.77in
-0
+0.6
-0
+0.02