Rear mud flap installation, Front mud flap installation – Rally Armor 2015+ Subaru Outback User Manual
Page 2
IMF 34/36
Version 1.0 Release Date 10.27.2014
2
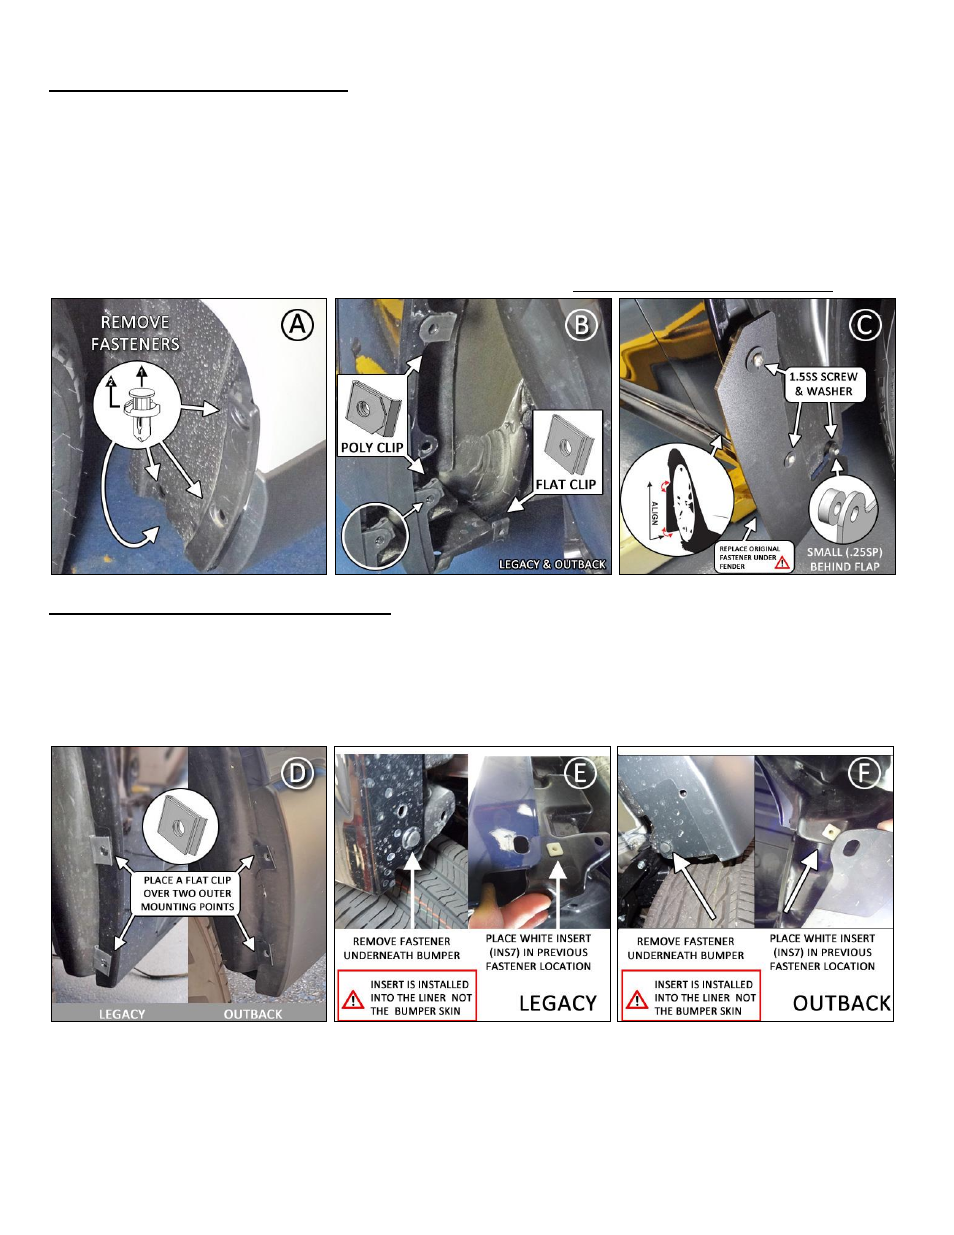
Front Mud Flap Installation
• (Figure A) Begin by parking the vehicle on an even surface. Turn the steering wheel as to allow access to the inner wheel well area.
Remove the 4 OEM fender liner fasteners. Pull liner away to gain access to the interior fender area.
• (Figure B) Place 2 “Poly” edge clips (PolCl) over the two upper mounting tabs (as shown). Place “Flat” U clip (UClip) over the inner
side skirt mounting hole. Replace liner over the mounting points. Replace original fastener underneath.
• (Figure C) Place the mud flap with the logo facing the rear of the vehicle, against the corresponding mounting points on the fender
liner. Place a washer (SmWash) over a screw (1.5SS) through the flap into the each of the mounted clips. Important: For the lower
inner mounting point, place a small spacer (.25sp) behind the mud flap. Align outer edge of the flap by incrementally adjusting the
angle of the flap and bracket and walking away from the vehicle until the flap is perpendicular to even ground. Tighten all mounting
screws and bracket bolt only until snug and flush with the surface of the mud flap. Do not over tighten the mounting points.
Rear Mud Flap Installation
• (Figure D) Place a “Flat” U clip (UClip) over each of the two outer bumper mounting points as shown.
• (Figure E -Legacy) Remove fastener underneath bumper cover. Place INS7 (white insert in the wheel well liner mounting point. Slide
wheel well liner back into the bumper. Ensure insert is visible in liner through the mounting point in the bumper skin.
• (Figure F- Outback) Example of Figure (F).