Rally Armor 04-09 Mazda3/Speed3 User Manual
Page 3
3
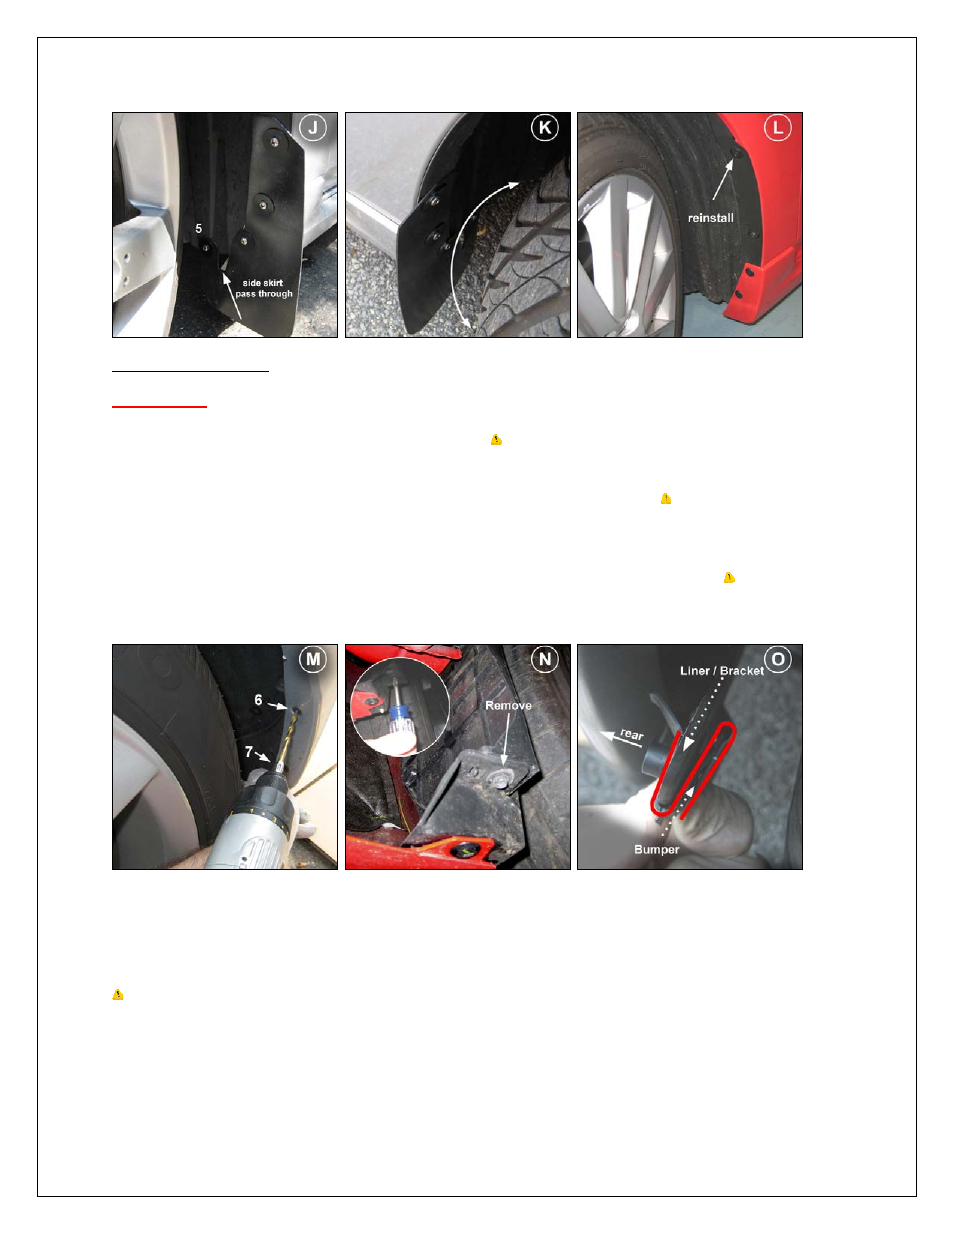
Rear Mud Flap Installation
Important Note:
The MazdaSpeed 3 mud flap application utilizes two mounting points that are riveted closed from factory. In
order to install the rear mud flaps, the rivets must be removed using a drill. This process can be performed without rear tire
removal although some users may find it easier to remove them.
Tip :
The vehicle can be jacked up so as to avoid removing
the tires. This will lower the wheel allowing for better access to the inner wheel well area.
Step 1) Drill out and completely remove the two rear factory rivet points # 6 and #7 (Figure M).
Tip : You can start with a
smaller diameter bit and gradually work towards a bigger size in order to prevent the drill bit from walking.
Step 2) Working under the rear of the vehicle, remove the liner attachment bolt using a Philips screwdriver (Figure N). Moving
back towards the area where the rivet points were removed, move the inner liner plastic bracket located behind bumper
enough to allow you to place the rear portion round edge clip (RoCl) over the bracket as follows (Figure O).
Tip : There are
two slots on the round edge rear installation clip. The outer slot is for the bumper while the inner opposite slot is for the
liner/bracket area.
Step 3) Place the outer edge of the clip over the bumper aligning mounting points #6 & #7 and reinstall liner into the cavity of
the bumper (Figure P).
Step 4) Place rear mud flap with logo facing the rear bumper. Place short screw (1SS) through washer (FenWash) then through
corresponding mud flap mounting points #6 and #7. Hand thread into the round edge clips (Figure Q).
Step 5) Moving to the rear of the vehicle, install the rear mounting bracket (RBRKT1) using the OEM bolt previously removed.
Tip :
Leave OEM bolt slightly loose in order to ease final installation (Figure R).
IMF9