Rally Armor 08-13 Mitsubishi EVO X User Manual
Page 2
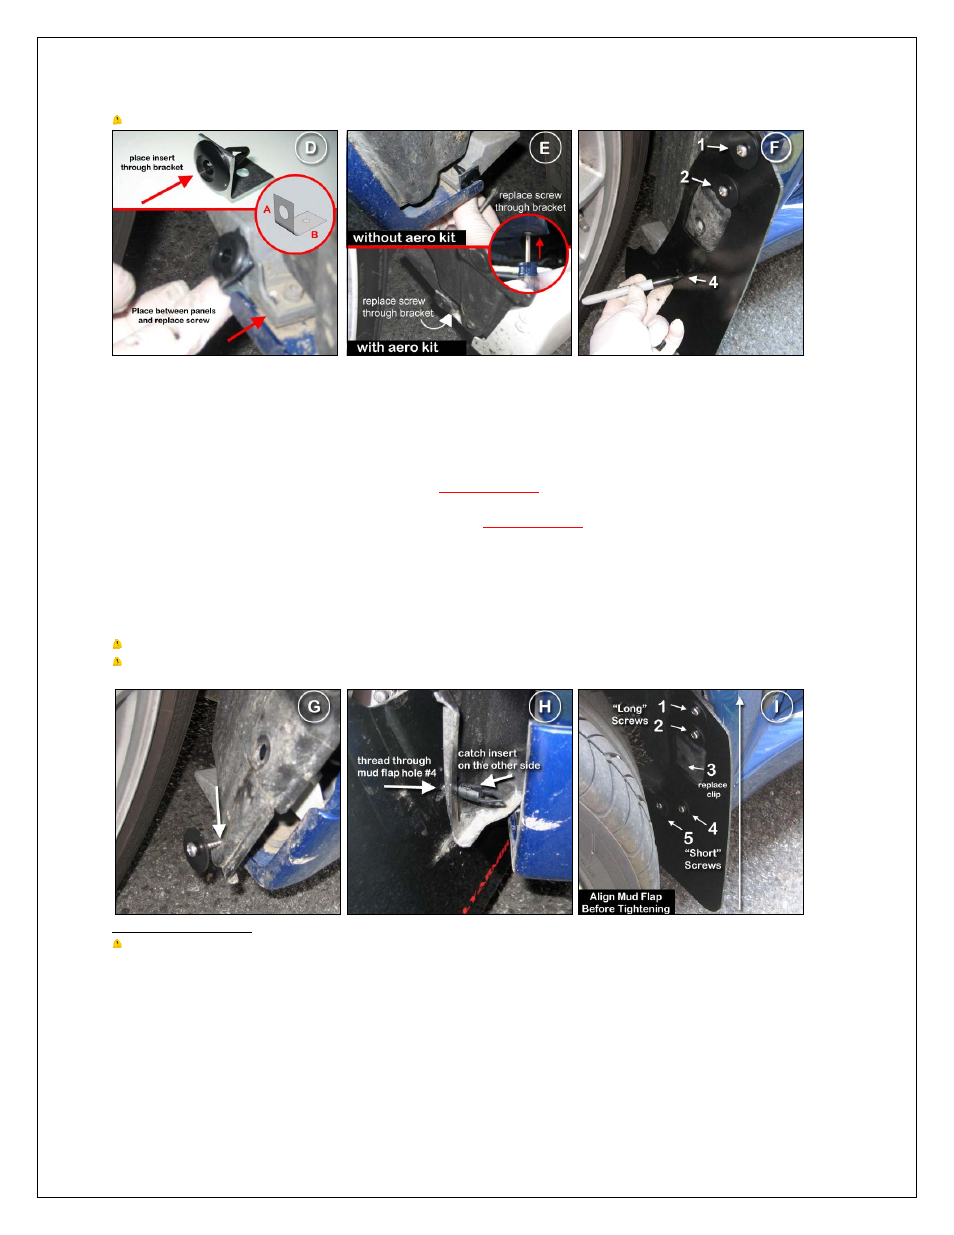
Tip: Experienced installers can hold and place mud flap against vehicle and mark hole # 4 without having to thread points #1 and #2.
9. To create mounting point #4, locate the center of your mark as a guide and place sharp tip of short screw (1SS) against the side of the liner
facing the tire with Phillips screwdriver. Place hand behind the liner and perform a few firm turns to pierce the liner as shown (Figure G). Turn
screw until the tip is just visible on the liner side facing the rear of the vehicle then remove screw.
10. Place front mud flap with logo facing the rear of the vehicle. Align mud flap holes with their corresponding mounting slots on the vehicle.
Using a short screw (1SS) through a washer (Wash) through mounting point #4 on the mud flap, place an insert (Ins) over the tip of the screw
and hold against the body of the liner while continuing to turn screw making sure that the insert is flush against the liner (Figure H). Replace
liner with mud flap back against vehicle as previously installed.
*Do not fully tighten.*
You will adjust the mud flap before final bolting.
11. Using a long screw (1.5SS) through a washer (Wash) thread mounting points #1 and #2 through mud flap. Using a short screw (1SS)
through a washer (Wash) thread mounting point #5 on short L bracket.
*Do not fully tighten.*
You will adjust the mud flap before tightening.
12. Replace factory fastener #3 removed previously (Figure I).
13. Align mud flaps by walking away to view the mud flap from the rear of the vehicle. Confirm the edges of the flap are perpendicular to the
ground. If needed, make slight adjustments by shifting the upper/lower portions of the flap. Check each adjustment by walking away from the
vehicle and assessing the mud flap in relation to the ground and the body of the vehicle. When flap is correctly aligned, tighten all hardware
only until snug.
14. Repeat the instructions for the other side of the vehicle to complete front mud flap installation.
Tip: The hardware is quite strong and self threading but over‐tightening the clips beyond their limit is not recommended.
Tip: To check any non standard wheel clearance, turn the steering wheel from lock to lock while viewing the wheel well area at different
intervals.
Rear Mud Flap Installation
Tip: Although removal of th
crewdriver and jacking up the rear of the vehicle thereby lowering the wheel and facilitating access to the area for easier installation.
1. Remove the two outer factory fasteners #1 and #2 by unscrewing the inner snap and prying the outer assembly off the bumper. Fast
is removed by prying out the inner tab first then removing the outer assembly (Figure J).
2. From under the rear bumper of the vehicle, remove the factory clip connecting the lowe
3. Place polygon clips over the rear mounting points #1 and #2 then replace liner (Figure L).
2
e rear tire can ease installation, removal is not necessary. The installation can be completed using an offset
s
ener #3
r portion of the liner to the rear bumper (Figure K).