Rally Armor 2013+ Ford Focus User Manual
Page 4
IMF 27
Version 1.1 Release Date 05.12.2013
4
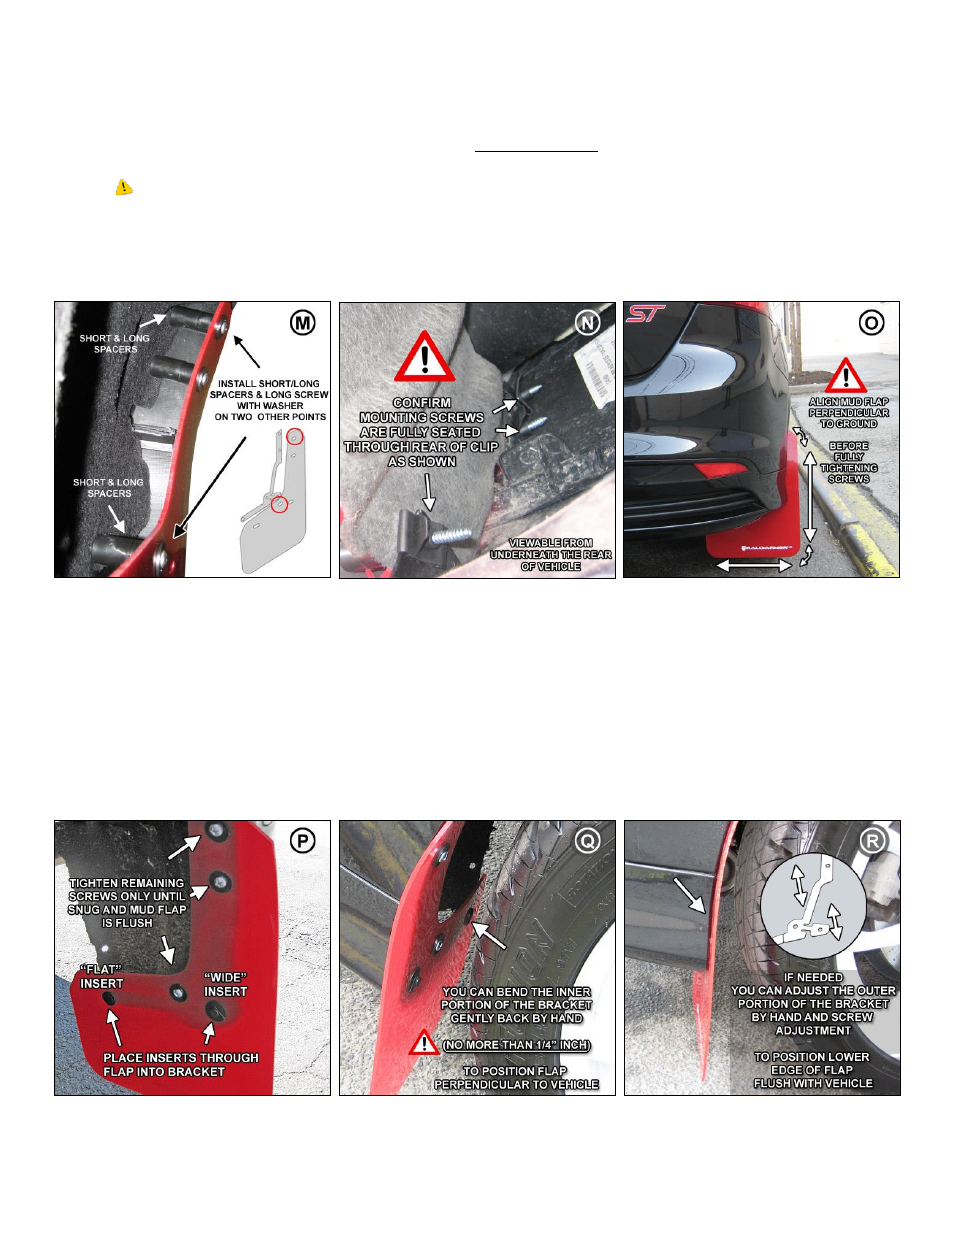
• (Figure M) Install a long screw (3SS) and small washer (SmWash) with a short and long spacer in the same manner through the two
other mounting points with the flap mounted on vehicle as shown. Do not fully tighten
• (Figure N) Working from underneath the rear of the vehicle, perform a visual check to ensure the screws are threading into the clips
as shown.
TIP: If the screw tip has threaded into the rear area of the clip, the rear portion of the clip will slowly seat against the
mounting point as you tighten, even if the washer is flush with the flap.
• (Figure O) Align outer edge of the flap by incrementally adjusting the angle of the flap and bracket and walking away from the vehicle
until the flap is perpendicular to even ground.
• (Figure P) Tighten remaining screws until washer is flush against the flap. Ensure the screws are threaded from the rear of vehicle as
shown in Figure N, the rear portion of the clip will slowly seat against the mounting point as you tighten, even if the washer is flush
with the flap. Install the wide insert on the outer mounting point and the flat insert on the inner point as shown. The inserts must be
seated flush against flap. Hold the rear of the flap with two fingers, seat the base of the insert flat against flap, then push the inner
locking mechanism with your thumb afterwards.
• (Figure Q) (Optional) You can adjust your rear mud flap to lay perpendicular with the length of the vehicle by gently pushing the rear
portion of the bracket back.
• (Figure R) You can further adjust the flap along the bumper by adjusting the bracket and mounting screws by hand as shown.