Front mud flap installation – Rally Armor 2012+ Fiat 500 User Manual
Page 2
IMF25
IMF25
Version 1.0 Release Date 3.4.2013
2
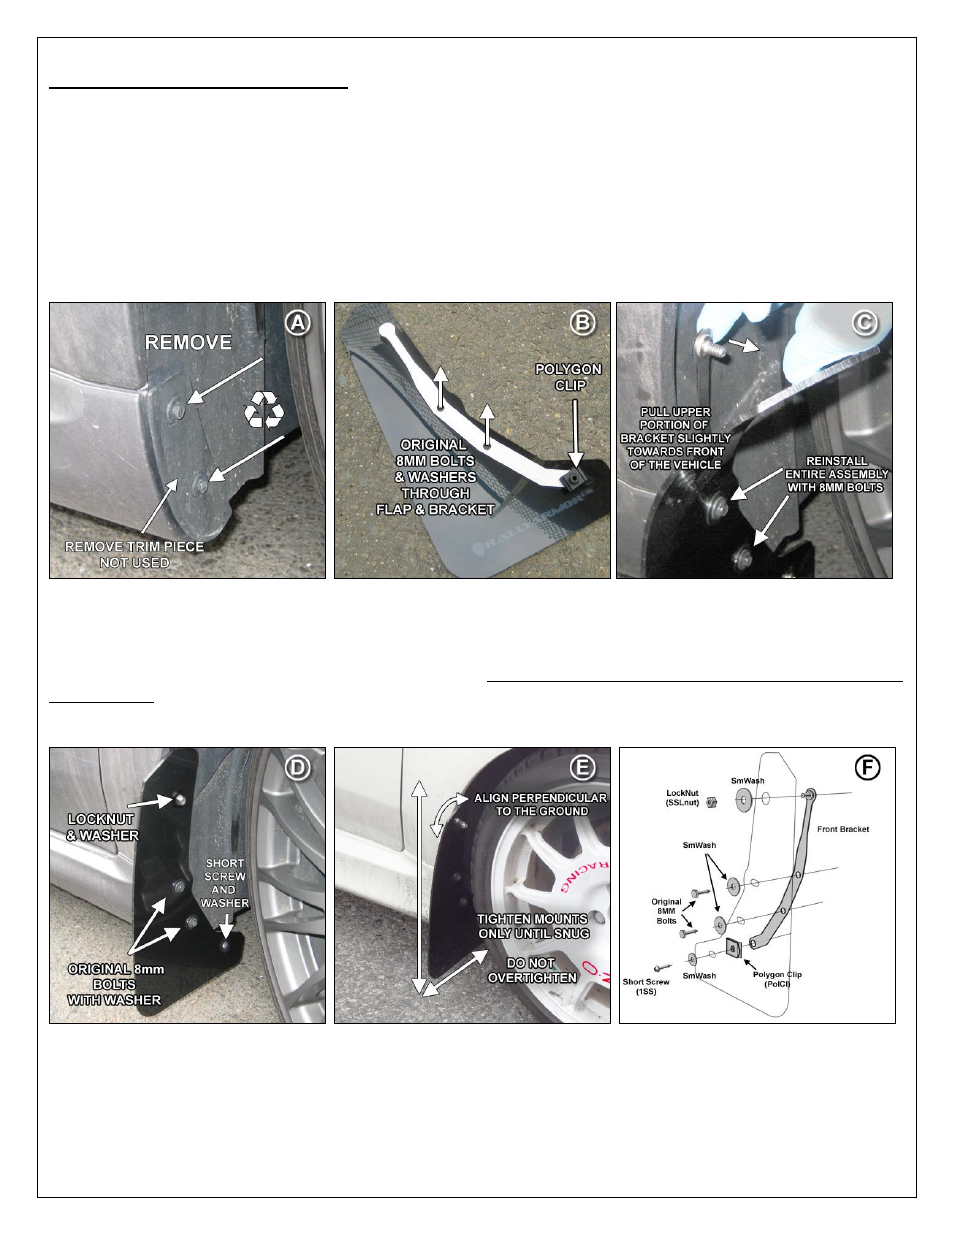
Front Mud Flap Installation
Begin by parking the vehicle on an even surface. Turn the steering wheel toward the side you are working on to allow access to the
inner wheel well area.
• (Figure A) Remove both 8mm side skirt bolts and trim piece. You will re-use the fasteners to mount a portion of the mud flap.
• (Figure B) Place polygon clip (PolCl) over round edge of bracket. Place a washer (SmWash) over original 8mm bolts and thread
through the existing flap mounting point into the corresponding mounting points in the bracket.
• (Figure C) Place entire assembly against side skirt mounting area with the logo facing the rear of the vehicle, aligning both 8mm bolts
into their original location. Loosely thread both 8mm bolts. Pull upper portion of bracket slightly about half an inch as to bring closer to
edge of fender.
• (Figure D) Loosely thread lock nut (SSLnut) and washer (SmWash) on upper mounting point by hand first. Thread a washer (SmWash)
and short screw through lower mounting point on flap into polygon clip (PolCl) mounted on bracket.
• (Figure E) Align outer edge of the flap and bracket by incrementally adjusting the angle and width/coverage of the flap and walking
away from the vehicle until the flap is perpendicular to even ground. Tighten all mounting screws and bracket bolt only until snug. Do
not over tighten
• (Figure F) Expanded diagram. Larger diagram is available on last page of these instructions.