Chassis intrusion switch, Installing the i/o panel, Removing the chassis intrusion switch – Dell PowerEdge SC 420 User Manual
Page 13
5.
Slide the I/O panel upward and remove the I/O panel from the system.
Installing the I/O Panel
1.
Align the I/O panel with the mounting hole on the front panel. See
2.
Slide the I/O panel down until it stops.
3.
Using a #2 Phillips screwdriver, install the screw that secures the I/O panel to the chassis.
4.
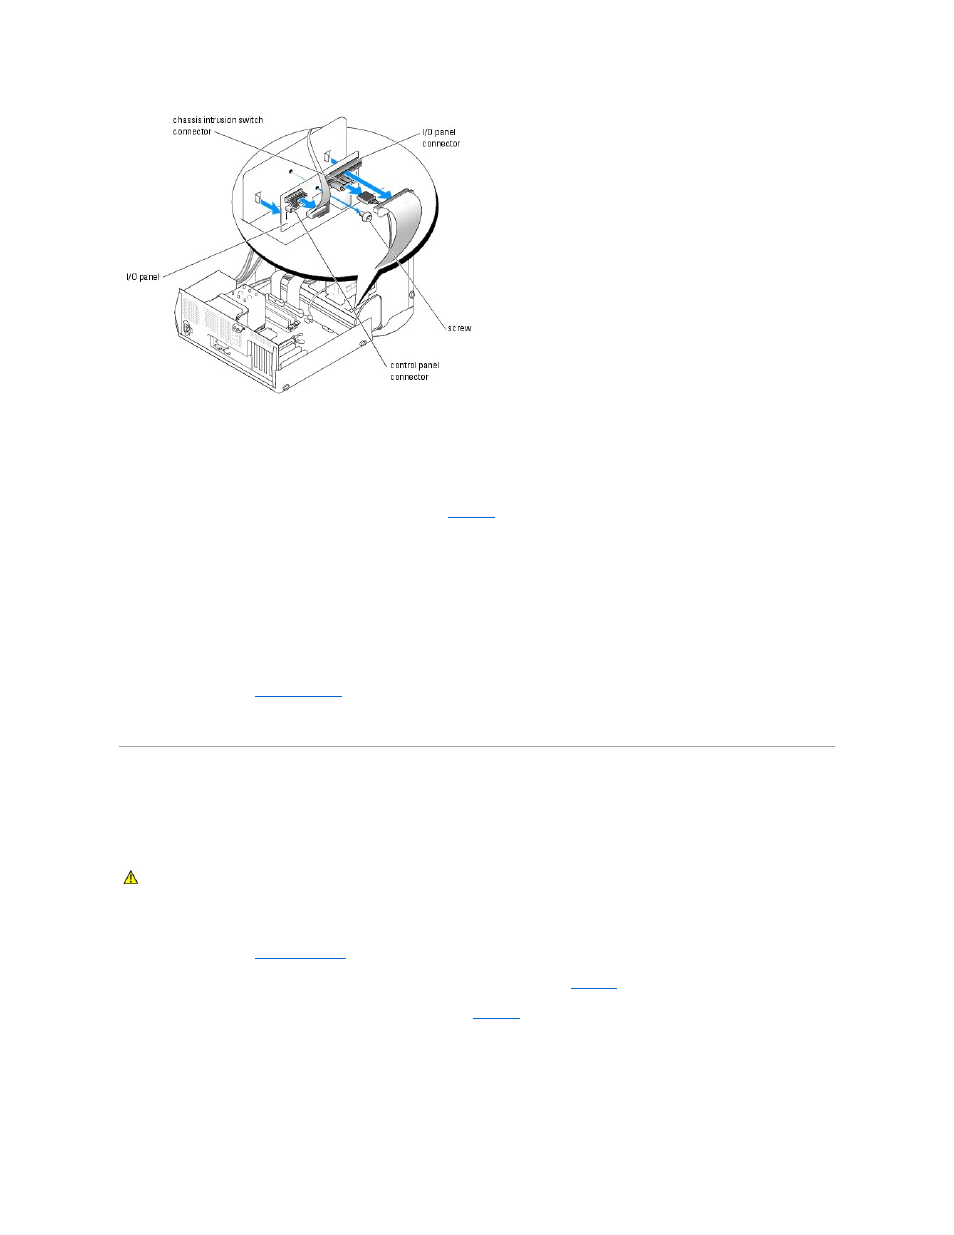
Connect the following cables:
l
I/O panel
l
Chassis intrusion switch
l
Control panel
5.
Close the system. See "
Closing the System
" in "Troubleshooting Your System."
6.
Reconnect the system to the electrical outlet, and turn on the system.
Chassis Intrusion Switch
Removing the Chassis Intrusion Switch
1.
Turn off the system and attached peripherals, and disconnect the system from the electrical outlet.
2.
Open the system. See "
Opening the System
" in "Troubleshooting Your System."
3.
Disconnect the chassis intrusion switch cable from the switch connector on the I/O panel. See
.
4.
Slide the chassis intrusion switch out of the securing bracket notch. See
Figure C-4. Removing and Installing the Chassis Intrusion Switch
CAUTION:
See your Product Information Guide for complete information about safety precautions, working inside the computer, and protecting
against electrostatic discharge.