Inch optical and tape drives, Installing a 5.25-inch drive – Dell PowerEdge SC 420 User Manual
Page 59
5.25-Inch Optical and Tape Drives
You can install an additional 5.25-inch drive of your choice in the second 5.25-inch drive bay. See
. If you are installing a tape backup unit (TBU), it
must be installed in the second bay.
Installing a 5.25-Inch Drive
1.
Unpack the drive and prepare the drive for installation.
For instructions, see the documentation that accompanied the drive. Also, see "
" for information on configuring the drive.
2.
If the drive does not have the drive rails attached, attach the drive rails to the new drive by aligning the screw holes on the drive with the screw holes
on the drive rails and then inserting and tightening all four screws (two screws on each rail). See
.
3.
Turn off the system, including any attached peripherals, and disconnect the system from the electrical outlet.
4.
Open the system. See "
Opening the System
" in "Troubleshooting Your System."
5.
Remove the front-panel insert for the empty drive bay. See "
6.
Slide the drive into the drive bay until the tabs on the rails click securely into position.
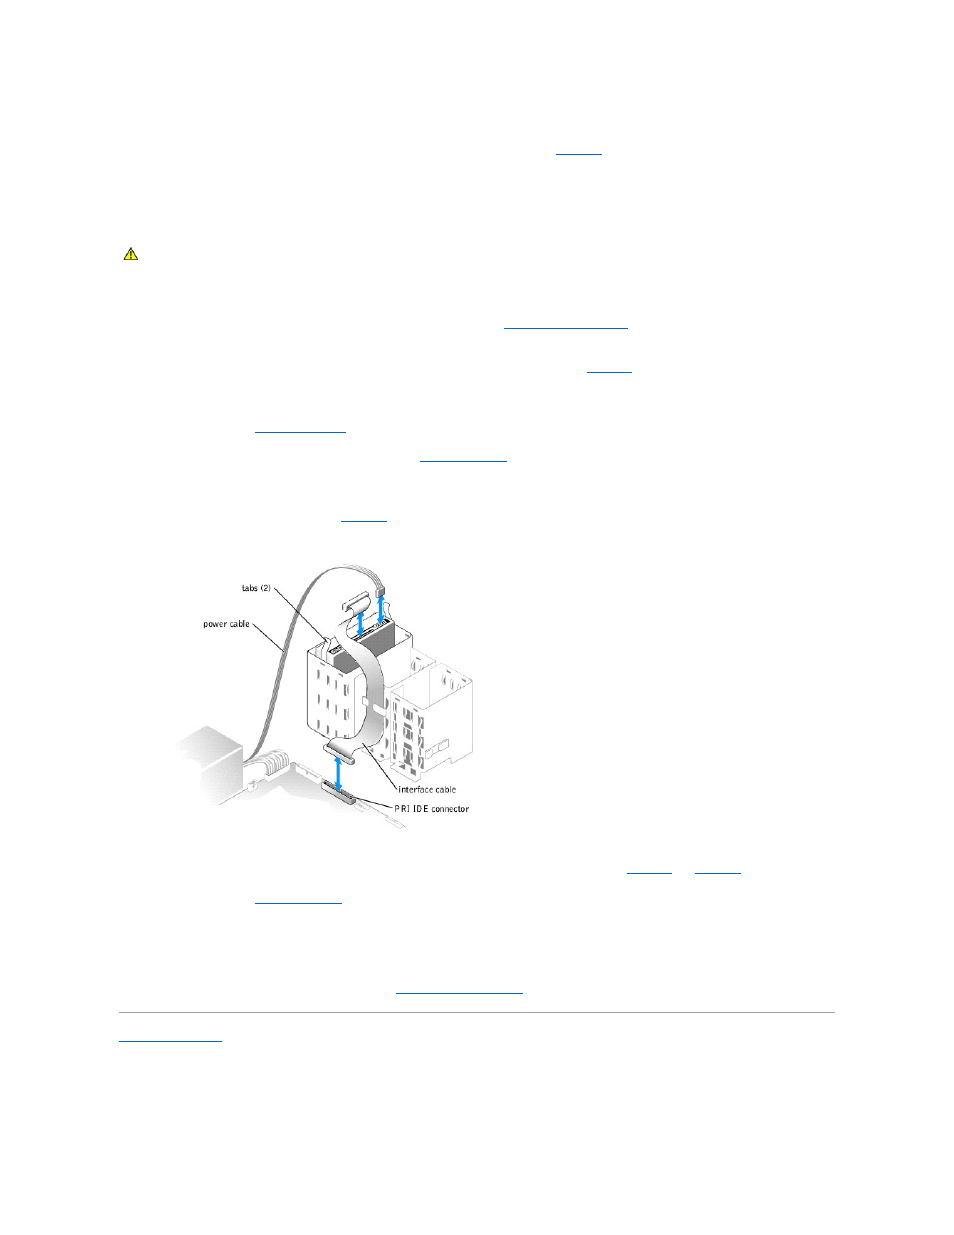
7.
Connect the power cable to the drive. See
Figure 7-7. Installing a 5.25-Inch Drive
8.
Connect the interface cable from the drive to the PRI IDE connector on the system board to the drive. See
and
Figure A
-3
.
9.
Close the system. See "
Closing the System
" in "Troubleshooting Your System."
10.
Reconnect the system to the electrical outlet, and turn on the system and attached peripherals.
11.
Enter the System Setup program and ensure that the drive's IDE controller is enabled. See "Using the System Setup Program" in the User's Guide.
12.
Test the drive by running the system diagnostics. See "
Running System Diagnostics
."
Back to Contents Page
CAUTION:
See your Product Information Guide for complete information about safety precautions, working inside the computer, and protecting
against electrostatic discharge.