Dell PowerEdge SC 420 User Manual
Page 51
1.
Turn off the system and attached peripherals, and disconnect the system from the electrical outlet.
2.
Open the system. See "
Opening the System
" in "Troubleshooting Your System."
3.
Pivot the processor cooling shroud away from the heat sink.
4.
Remove the processor heat sink.
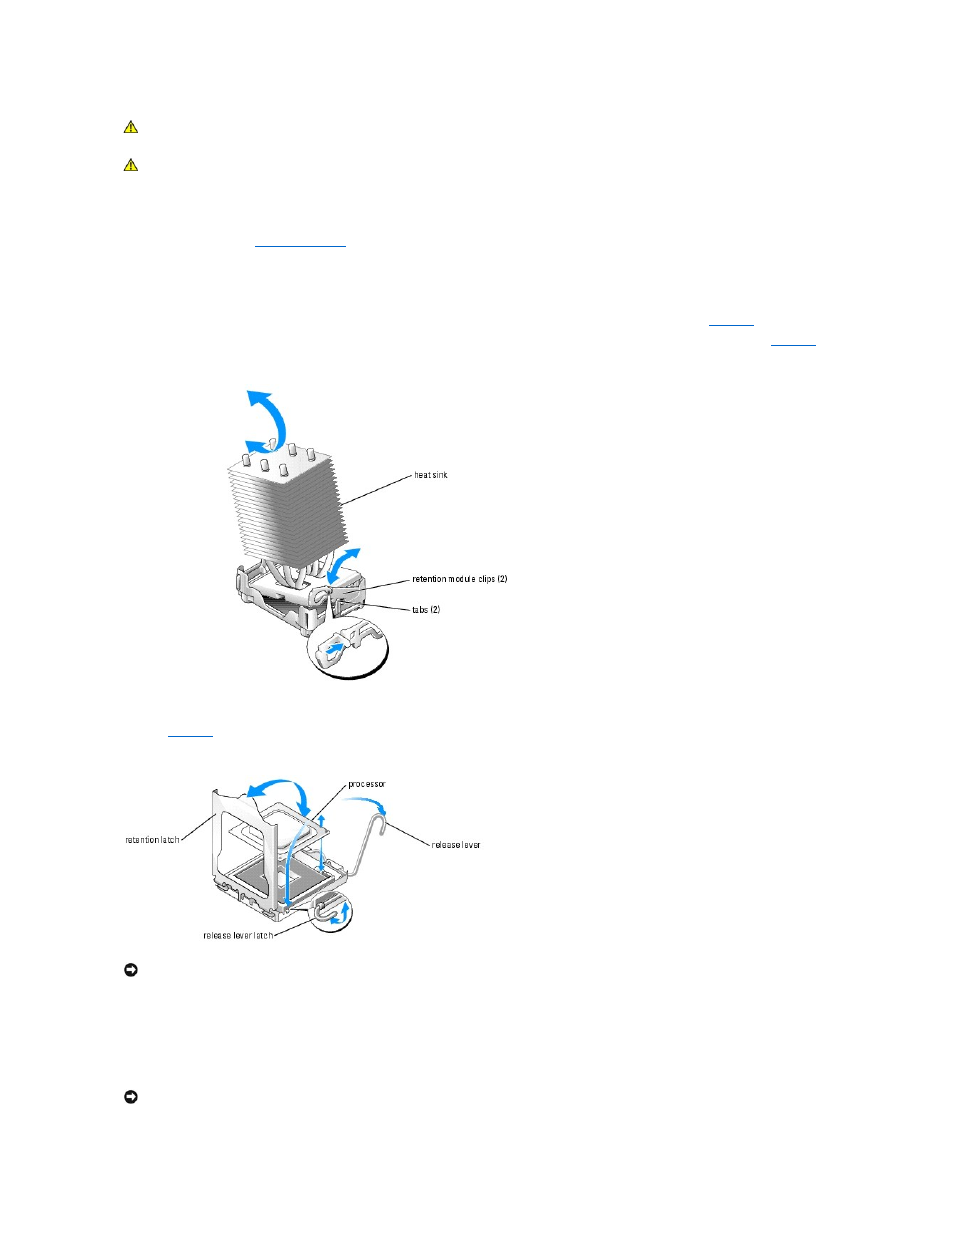
a.
Remove the two retention module clips by squeezing the tabs on the clip and lifting the retention module clip up. See
.
b.
On the retention module base, pull the tab away from the heat sink and rotate the heat sink away from the processor as shown in
.
Figure 6-4. Removing the Retention Module Clip
5.
Push the processor socket release lever down and away from the release lever latch, and then lift the release lever until the retention latch is released.
See
.
Figure 6-5. Removing the Processor
6.
Pivot the retention latch away from the processor, and then remove the processor from the socket.
Leave the release lever and retention latch in the release position so that the socket is ready for the new processor.
7.
Align pin 1 (the imprinted corner) of the processor and pin 1 of the socket.
CAUTION:
See your Product Information Guide for complete information about safety precautions, working inside the computer, and protecting
against electrostatic discharge.
CAUTION:
The processor and heat sink can get very hot during normal operation. Ensure that they have had sufficient time to cool before you
touch them.
NOTICE:
Be careful not to touch or drop any foreign materials on the processor pins when you remove the processor from the socket.
NOTICE:
Processor pins are delicate. To avoid damage, ensure that the processor aligns properly with the socket, and do not use force when you
install the processor.