Removing the processor cooling shroud, Installing the processor cooling shroud – Dell POWEREDGE R805 User Manual
Page 37
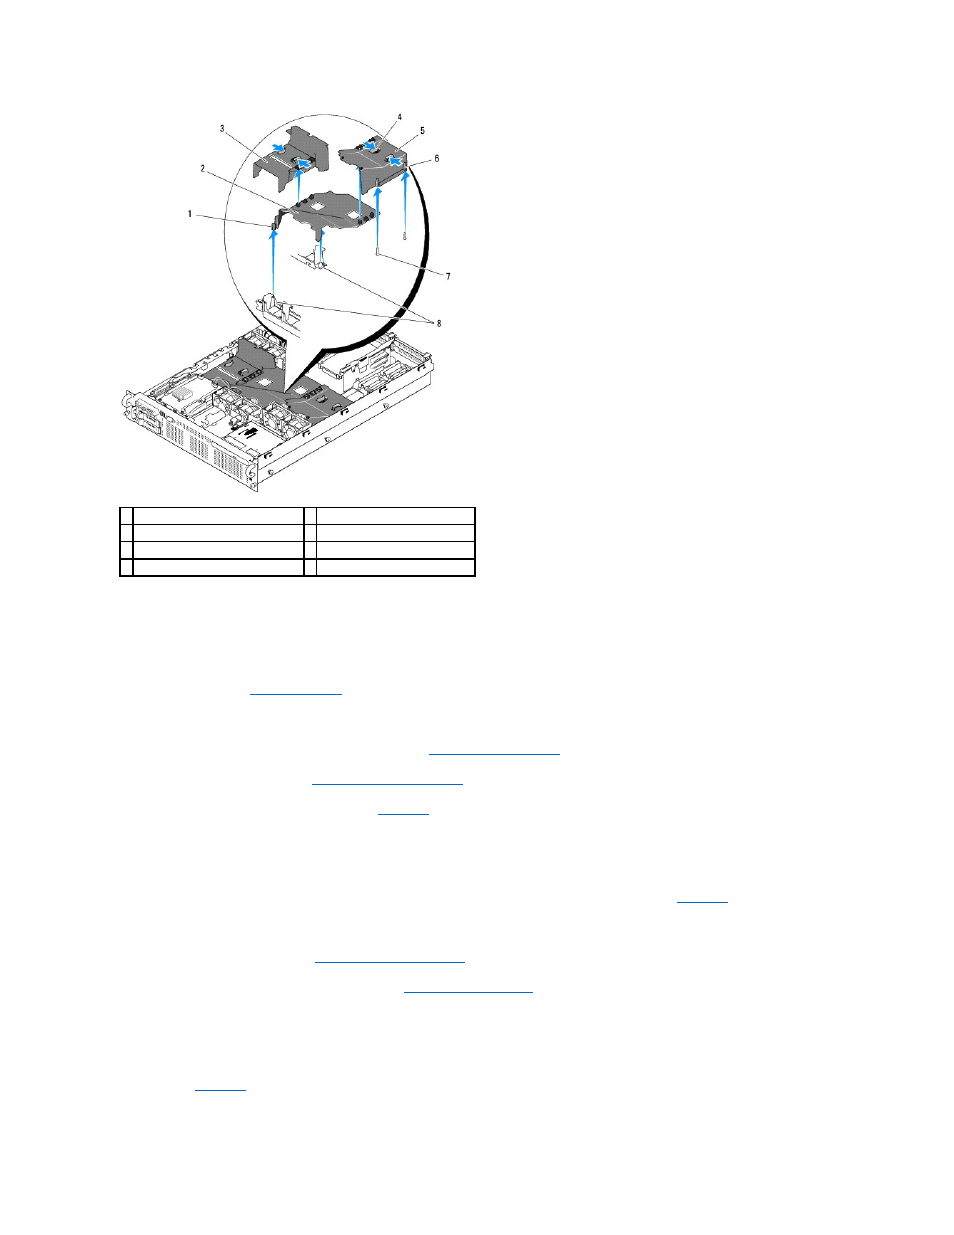
Removing the Processor Cooling Shroud
1.
Turn off the system, including any attached peripherals, and disconnect the system from the electrical outlet.
2.
3.
Detach and remove the two memory module cooling shrouds on each side of the processor cooling shroud.
4.
Remove the expansion cards from expansion-card riser 2. See
.
5.
Remove expansion-card riser 2. See
Removing Expansion-Card Riser 2
6.
Lift the shroud upward and out of the system. See
.
Installing the Processor Cooling Shroud
1.
.
2.
Lower the processor cooling shroud straight down onto the pins.
3.
Reinstall expansion-card riser 2. See
Replacing Expansion-Card Riser 2
4.
Reinstall the expansion cards into the riser 2 board. See
Installing the Memory Module Cooling Shrouds
1.
Align the pin collars at the bottom of the right ("B") memory module cooling shroud with the pins located on the right side of the "B" memory module
slots. See
.
2.
Lower the shroud straight down onto the pins and press down lightly to latch the shroud to the processor cooling shroud.
1 pin collar (2)
2 processor cooling shroud
3 memory module cooling shroud ("A") 4 release tabs
5 memory module cooling shroud ("B") 6 pin collar (2)
7 mounting pins (6)
8 mounting pins on fan brackets (2)