Replacing a hard-drive carrier, Removing a hard drive from a hard-drive carrier, Installing a hard drive into a drive carrier – Dell POWEREDGE R805 User Manual
Page 27
3.
Install the hot-plug hard drive.
a.
Open the handle on the hard-drive carrier.
b.
Insert the hard-drive carrier into the drive bay until the carrier contacts the backplane.
c.
Close the handle to lock the drive in place.
4.
Replace the front bezel, if it was removed in
Replacing a Hard-Drive Carrier
Two versions of hard-drive carriers are used with your system. The version for SATA hard drives has a single set of (four) mounting holes on the side rails. The
second version, called a SAS/SATAu hard-drive carrier, has an extra four mounting holes to enable either a "SAS" and "SATAu" mounting position. When using
the SAS/SATAu hard-drive carrier, observe these rules with regard to your system:
l
Use only SAS hard drives with SAS/SATAu drive carriers.
l
Use only the "SAS" mounting position on the carrier. (The SATAu position is reserved.)
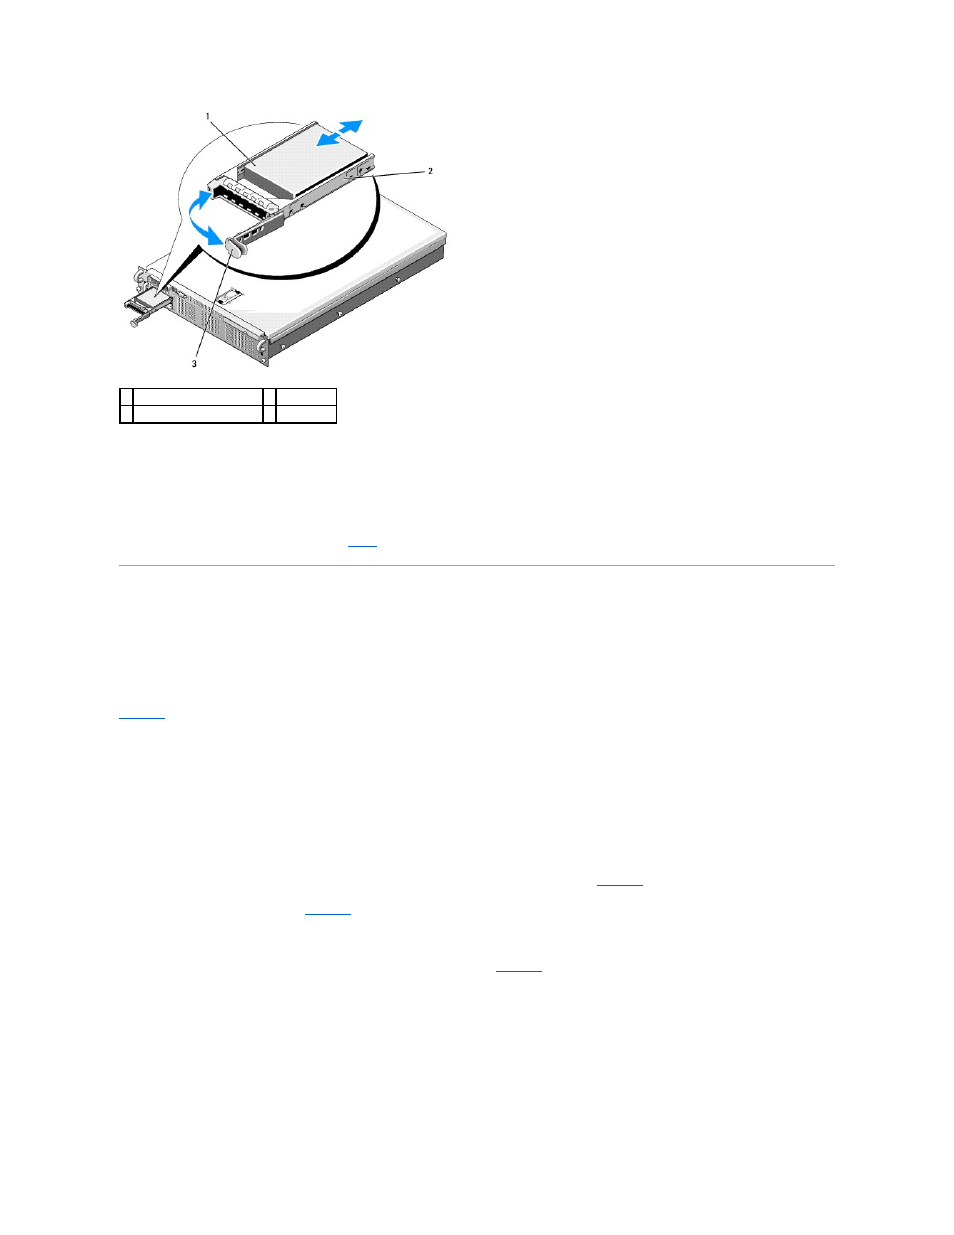
illustrates a SAS hard drive being installed in a SAS/SATAu hard-drive carrier.
Removing a Hard Drive From a Hard-Drive Carrier
Remove the four screws from the slide rails on the hard-drive carrier and separate the hard drive from the carrier.
Installing a Hard Drive Into a Drive Carrier
1.
Insert the hard drive into the hard-drive carrier with the connector end of the drive at the rear. See
2.
Viewing the assembly as shown in
, align the screw holes on the hard drive with the rear set of holes on the hard drive carrier.
When aligned correctly, the rear of the hard drive will be flush with the rear of the hard-drive carrier.
3.
Attach the four screws to secure the hard drive to the hard-drive carrier. See
Figure 3-6. Installing a SAS Hard Drive Into a SAS/SATAu Drive Carrier
1 hard drive
2 drive carrier
3 drive carrier release handle