Optical or tape drives, Figure 3, Installing an optical or tape drive – Dell PowerVault DP100 User Manual
Page 38
3.
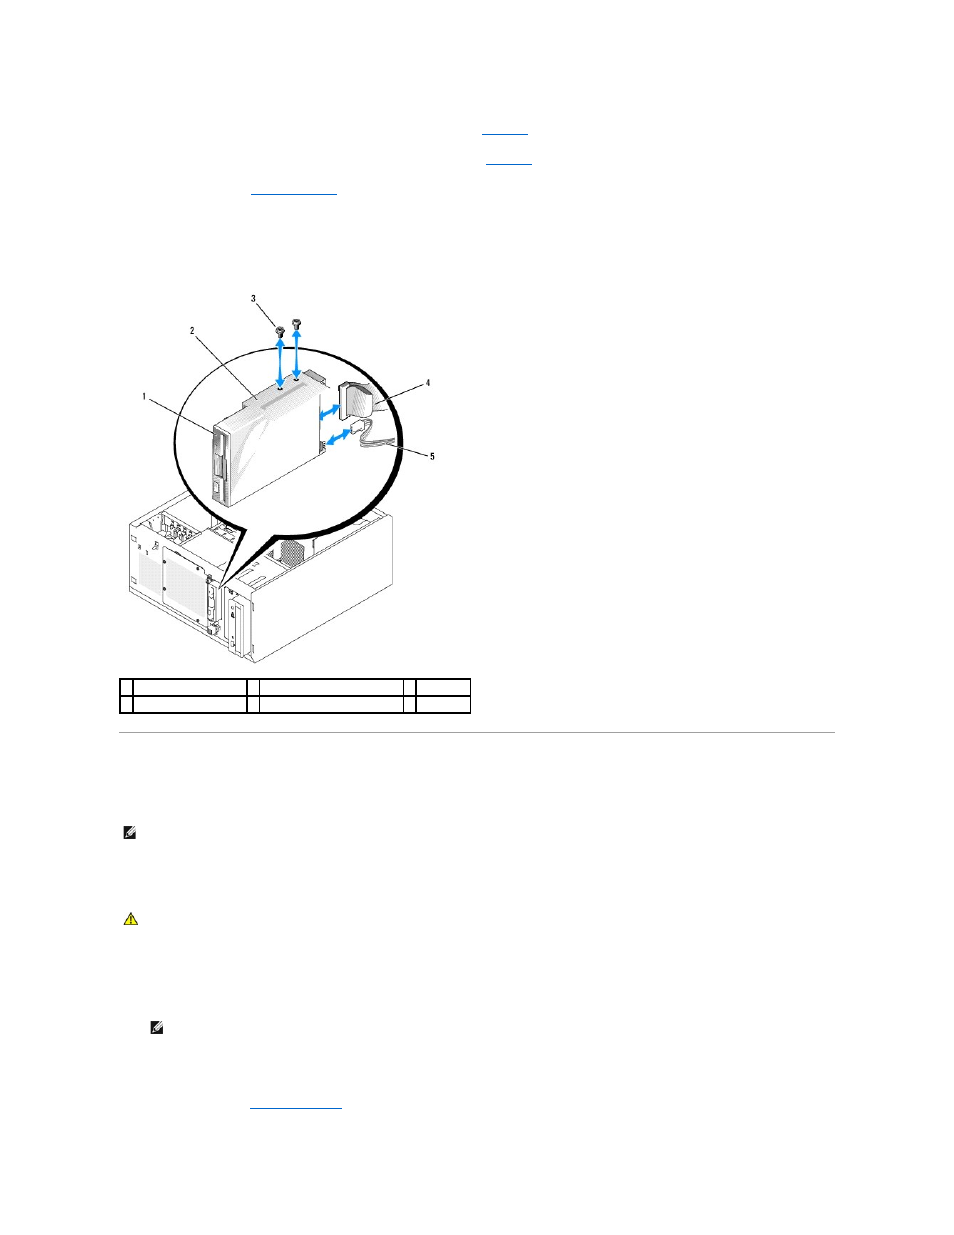
Install the two screws that secure the diskette drive in the drive bay. See
4.
Connect the power cable and the interface cable to the diskette drive. See
5.
."
6.
Stand the system upright.
7.
Reconnect the system to its electrical outlet and turn the system on, including any attached peripherals.
Figure 3-5. Removing or Installing a Diskette Drive
Optical or Tape Drives
An optical drive is standard in the first external drive bay. An additional IDE or SCSI tape drive can be installed in the second external drive bay. These drives
connect either to the system board or to an optional controller card.
Installing an Optical or Tape Drive
1.
Unpack the drive (and controller card, if applicable), and prepare the drive for installation.
For instructions, see the documentation that accompanied the drive.
2.
Turn off the system, including any attached peripherals, and disconnect the system from the electrical outlet.
3.
1 diskette (3.5-inch) drive 2 externally accessible drive bay 3 screws (2)
4 interface cable
5 power cable
NOTE:
Installing an additional optical drive in the second external drive bay is not supported.
CAUTION:
Only trained service technicians are authorized to remove the system cover and access any of the components inside the system.
Before performing any procedure, see your Product Information Guide for complete information about safety precautions, working inside the
computer, and protecting against electrostatic discharge.
NOTE:
If you are installing a SCSI tape drive, you must install an Ultra 3 SCSI controller card. The optional SAS controller card does not support a
SCSI tape drive.