Installing the system board – Dell PowerVault DP100 User Manual
Page 61
12.
Remove all PCI expansion cards from the expansion slots. See
13.
14.
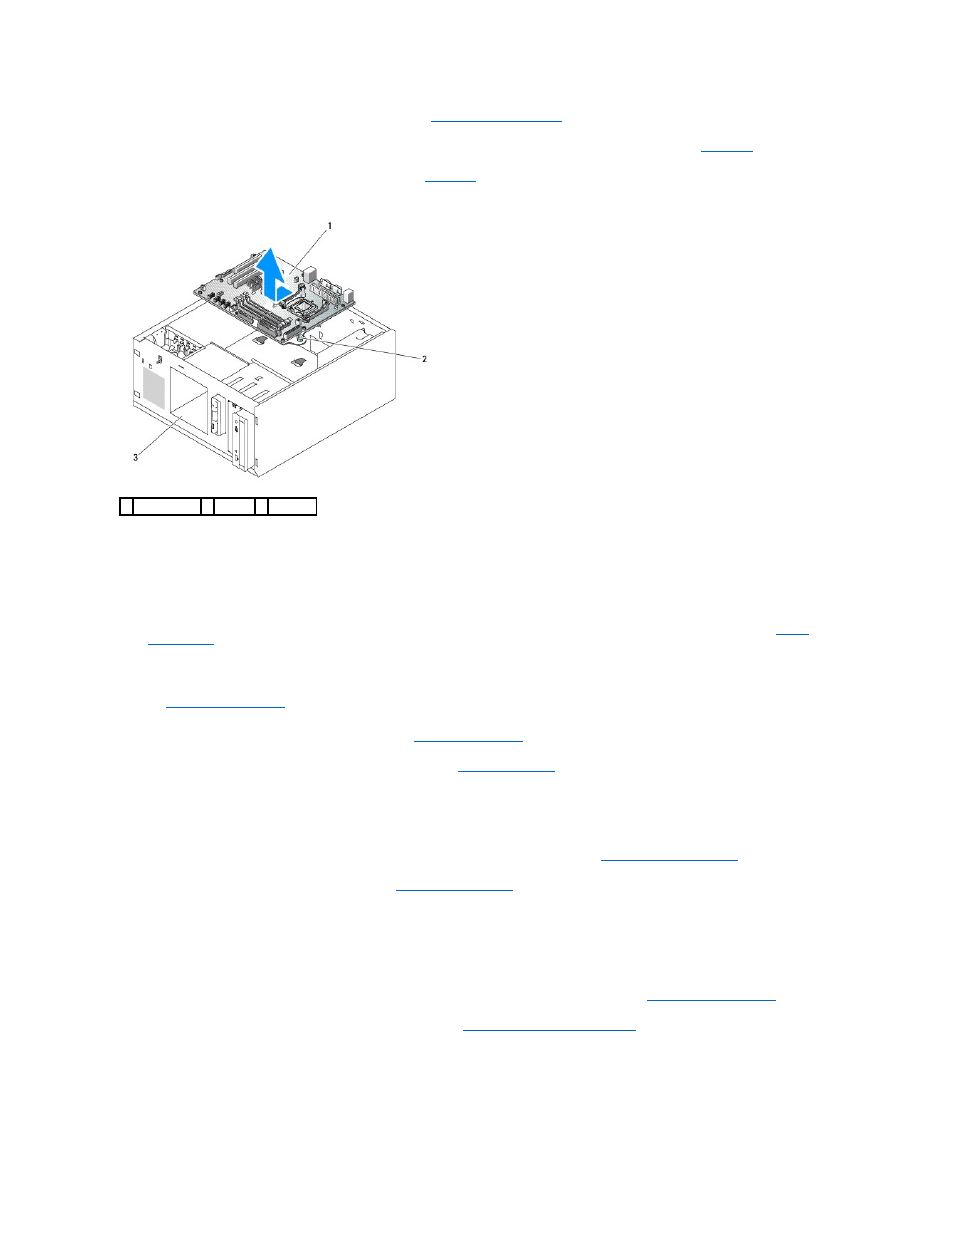
Carefully lift the system board up and out of the chassis. See
.
Figure 3-26. Removing the System Board
Installing the System Board
1.
Unpack the new system board.
2.
Ensure that the system board jumpers are set the same as on the board that you just removed, and change the settings if necessary. See
System
Board Jumpers
.
3.
Remove the memory modules from the original system board and transfer them to the new board, being careful to install the memory modules in the
same locations.
.
4.
Remove the processor from the original system board. See
5.
Reinstall the processor and heat sink on the new system board. See
.
6.
Making sure that no cables are trapped beneath the system board tray, lower the new system board into the chassis.
7.
Position the system board in place and gently press down on the board until the plunger locks.
8.
Install the back fan and connect the fan cable to the BACK_FAN connector on the system board. See
Installing the Back System Fan
.
9.
Connect the following cables to the system board. See
System Board Connectors
.
l
Optical-drive interface cable (PRIMARY_IDE connector)
l
Diskette-drive cable (FDD connector)
l
Control panel cable (FRONT_PANEL connector)
l
Front fan cable (FRONT_FAN connector)
10.
.
11.
Reinstall the drive bay and secure it with the four Phillips screws. See
Installing a Hard Drive in the Drive Bay
12.
Reconnect the SAS or SATA interface cable(s) to the system board or optional hard-drive controller card.
Ensure that you reattach the interface cables in their original locations.
13.
Reconnect the power cables to the hard drives in the drive bay, or to the optional SAS backplane.
1 system board 2 plunger 3 drive bay