Great Plains NTA3007HD Operator Manual User Manual
Page 83
Adjustments 79
04/04/2011
166-207M
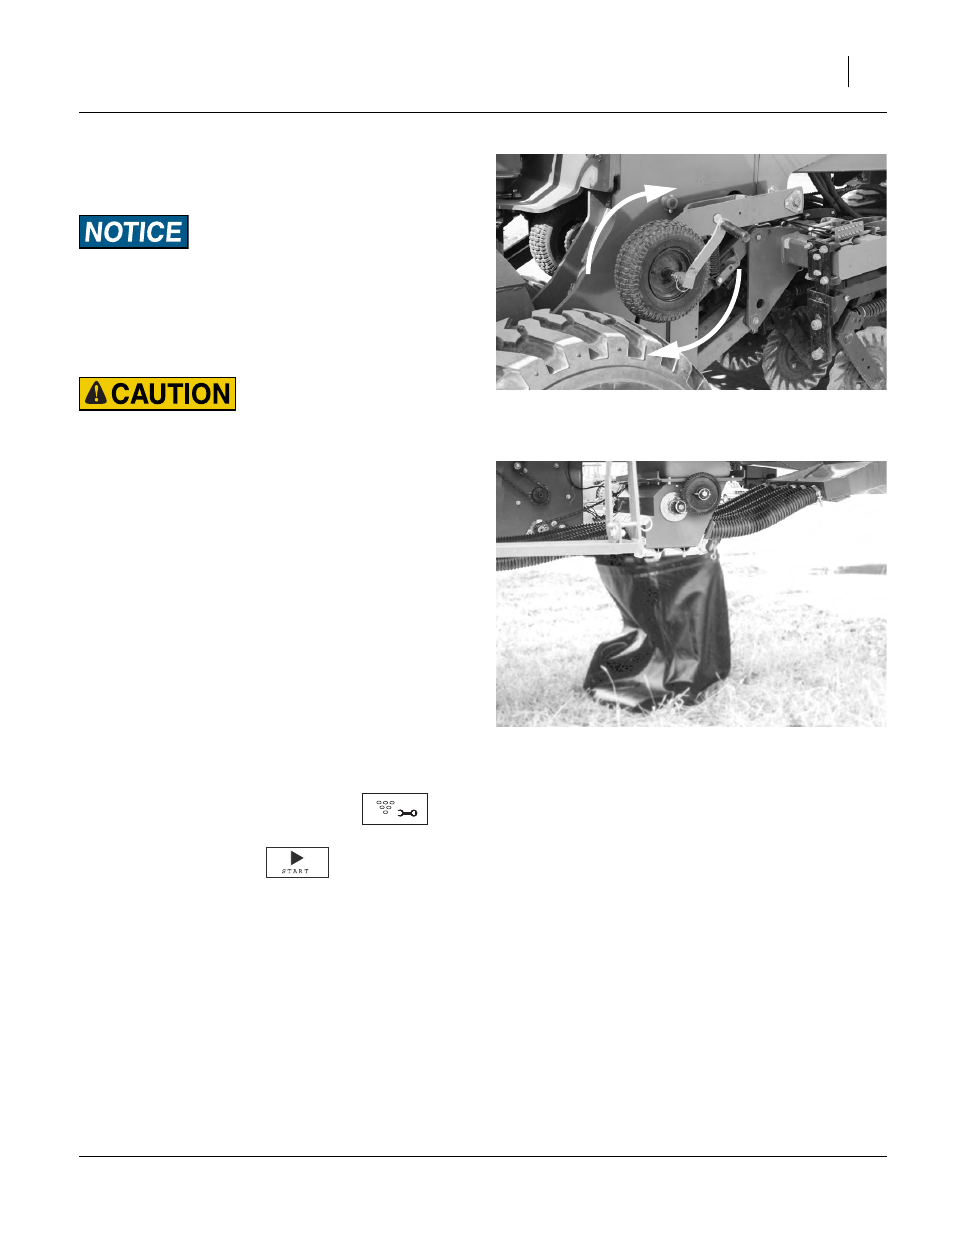
Insert calibration crank onto contact wheel shaft.
See “Calibration Crank” on page 57.
Rotate the calibration crank only in the:
CLOCKWISE direction on drill left, or;
COUNTERCLOCKWISE direction on drill right.
Operating in reverse can cause gearbox damage.
6.
Turn the calibration crank enough turns to be sure
the meter flutes are full and the system is metering.
Obey manufacturer or grower recommendations for safety
equipment and protective gear when using treated seeds.
7.
Wipe all material off the flanges around the meter
door.
8.
Accurately weigh an empty container large enough
to catch material coming out of the meter. The cali-
bration bag supplied with your drill weighs 1.53 kg
(3.36 lbs).
Refer to Figure 85
9.
Place container under open calibration door. If using
the calibration bag, loop bag handles over the door
handles and hook the bag to the front of the meter.
10. On the seed monitor terminal,
set the monitor to Calibration mode
.
enter [ 5 ] for the “# Meter Revs”, and
press the Start softkey
.
This “# Meter Revs” parameter does not affect the
monitor calibration because the monitor counts
actual meter shaft revolutions and uses that count to
compute the Calibration Constant.
The “# Meter Revs” parameter is used for a progress
bar displayed during calibration.
Null4:
Figure 84
Calibration Cranking, Left Side
29417
Null4:
Figure 85
Calibration Bag
26402