Hydrostatic relief valve maintenance, Relief valve inspection – Great Plains NP30A 30-foot Operator Manual User Manual
Page 118
114
NP30A or NP40A
Great Plains Manufacturing, Inc.
407-502M
2014-05-20
Hydrostatic Relief Valve Maintenance
Relief valves require scheduled replacement and
periodic inspection.
Relief Valve Inspection
Inspect relief valves seasonally, and during periodic
maintenance. Check for cap present (step 2) prior to
each application from a fresh tank of anhydrous.
1.
Bleed the line at a relief valve before a detailed
inspection. See “System Discharge” on page 110.
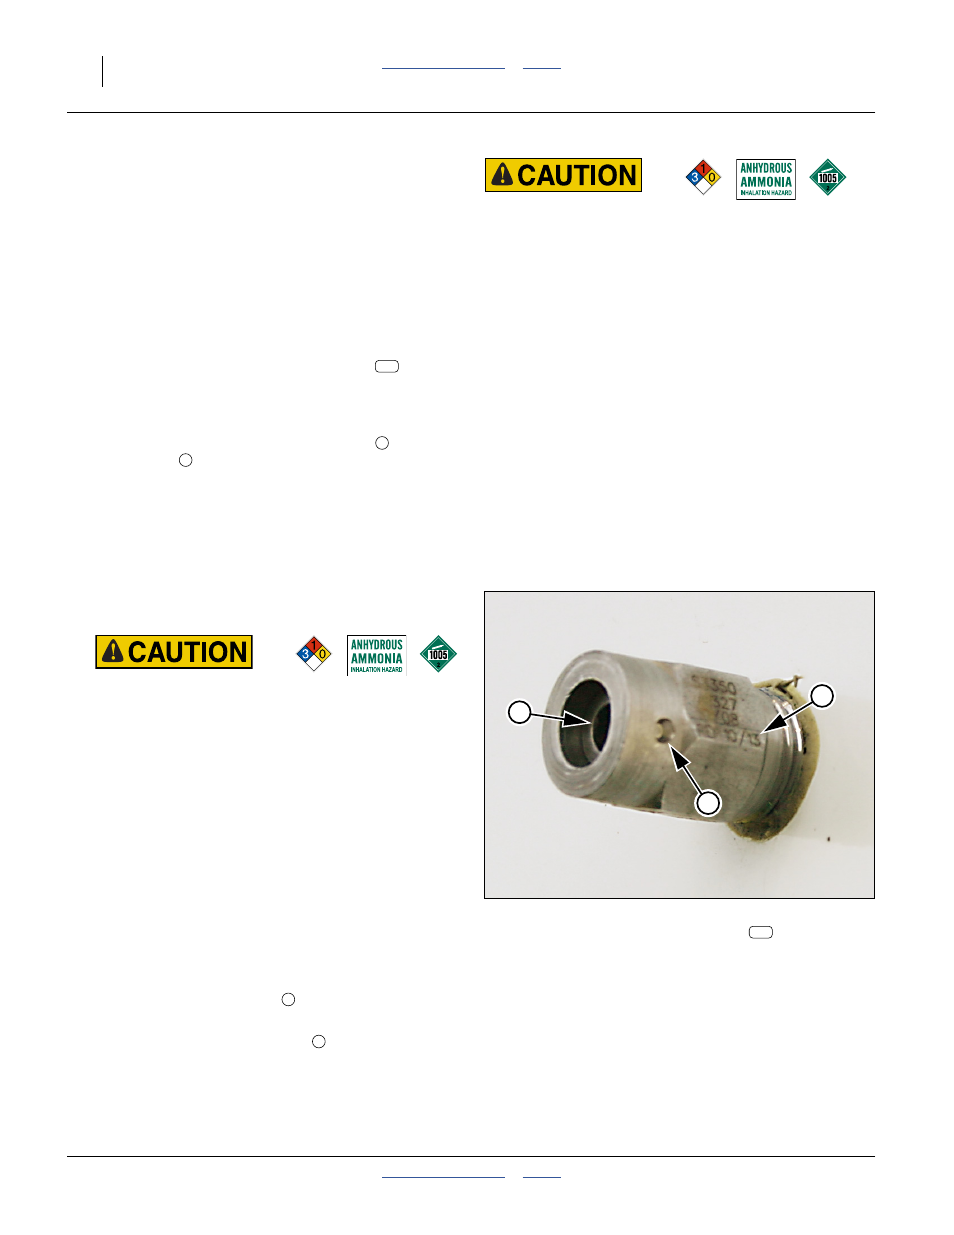
Refer to Figure 89 (depicting cooler relief valve
2.
Check that the rain/dust cap is in place and fully
seated.
Do not operate with a missing cap. The cap keeps
the spring mechanism, outlet (vent port)
and
weep holes
free of contaminants that could
prevent valve operation in an over-pressure situation.
A missing or dislodged cap also indicates that the
valve may have operated, or may be malfunctioning.
Understand and correct the reason for a dislodged or
missing cap prior to field operations.
Replacement caps are:
breakaway: Continental 400-DC
cooler: Squibb-Taylor 1325-8.
3.
Carefully remove the dust cap.
4.
Check the replace-by date
stamped on the valve.
If it has passed, replace the valve before next use.
5.
Clean any clogged weep holes
. If they cannot be
cleaned, replace the valve.
Ammonia Exposure and Loss Hazards:
Understand and correct the reason for any lifted or
missing hydrostatic relief valve caps. If a cap is out of
place, that line section may have been closed with liquid
NH
3
present, which later partially vented, dislodging the
cap.
Liquid NH
3
may still be present. Carefully bleed the line
section before taking any other action.
It is also possible that the valve disc has deteriorated, or
has debris under the seat and is venting or leaking at
normal operating pressures.
Any hydrostatic relief valve that fully opens (“pops”) must
be removed and re-tested (or simply replaced).
Ammonia Exposure Hazards:
▲ Wear safety equipment when inspecting or performing
maintenance on relief valves. Even if the line is bled, NH
3
liquid or vapor may still be present.
▲ Always bleed the system before removing a relief valve cap
or performing any more detailed inspection or valve
maintenance.
▲ Never stand in front of or look directly into a relief valve.
Use a mirror. If an overpressure event or valve malfunction
is imminent or in progress, you can expect multiple valve
activations. The initial activation can blow debris as well as
liquid ammonia into your face.
▲ Follow inspection and replacement instructions carefully.
Use the instructions on these two pages only if no separate
instructions were supplied with the original and/or
replacement valve.
1
2
Note: In severe conditions (such as exposure to salt,
corrosive chemicals or pollutants), or if a valve has
fully opened, you may need to replace a
hydrostatic relief valve sooner than 5 years.
Figure 90
Uncapped Relief Valve
31635
1
2
3
3
2