Marker adjustments, Marker disk adjustment, Nw t – Great Plains YP3025A Operator Manual User Manual
Page 64
60
YP3025A
Great Plains Manufacturing, Inc.
401-705M
02/16/2012
Marker Adjustments
There are three adjustments and two maintenance items
for markers:
• Disk Angle (following)
Even if your row spacing rarely changes, you may
need to adjust disk angle for soil conditions and plant-
ing speed.
• Shear Bolt Replacement (Maintenance, page 104)
If a marker hangs up on an obstruction, a bolt at the
fold is designed to fail.
• Marker Cylinder Bleed (Maintenance, page 104)
If marker operation is irregular, check that system is
not contaminated with air.
• Marker Extension (Marker Extension, page 166)
Once set for a specific row spacing, this only needs
periodic checking to ensure the clamp is secure.
• Marker Speed (Dual Marker Speed Adjustment,
page 164). Once initially set by your dealer, this rarely
needs modification.
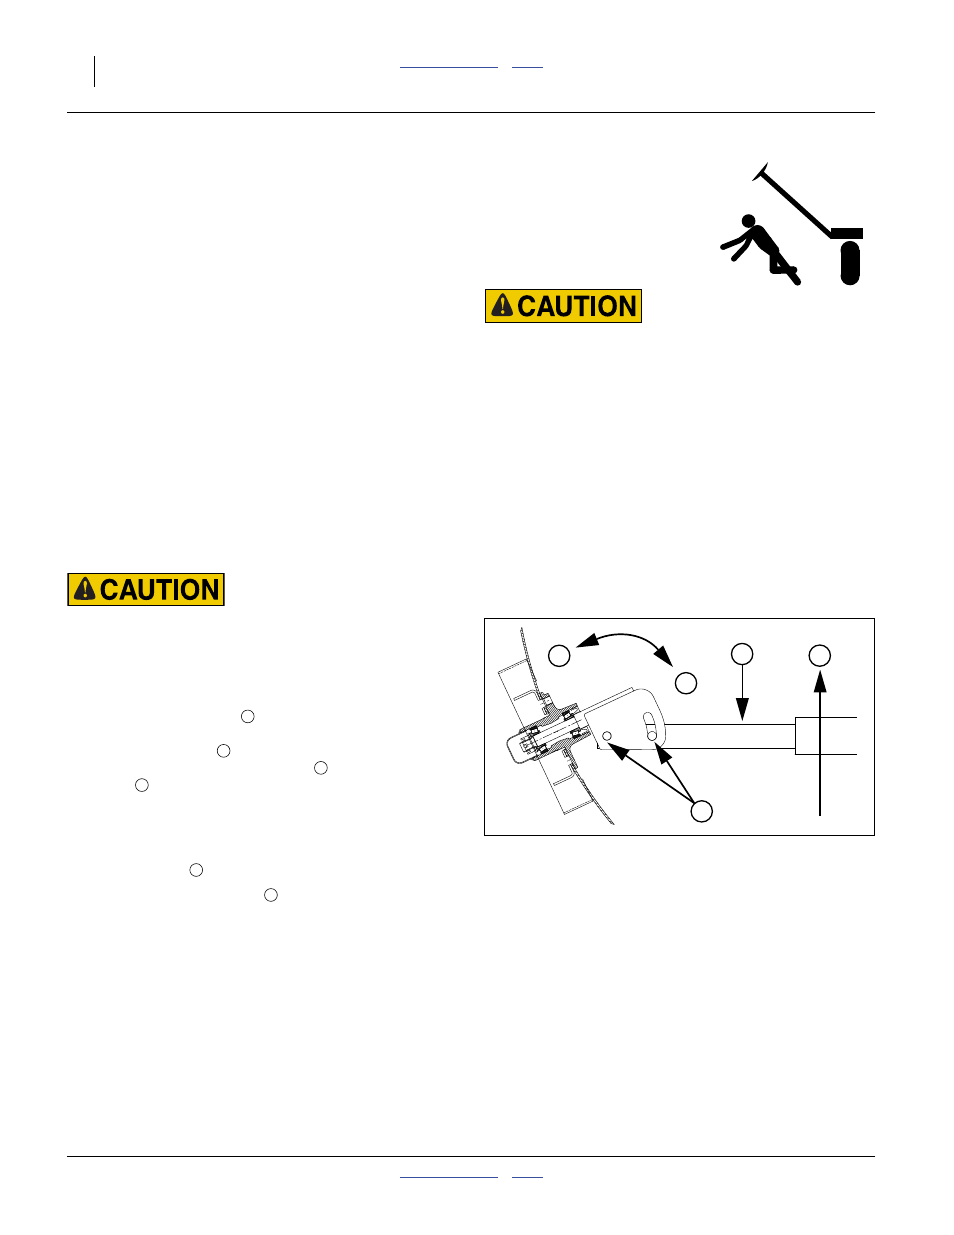
Marker Disk Adjustment
Sharp Object Hazard:
Use caution when making adjustments in this area. Marker
disks may be sharp.
To change angle of cut, and the width of the mark,
loosen
1
⁄
2
-inch bolts
holding the disk assembly.
For a wider mark
, increase the angle of the
marker with respect to the tube
. For a narrower
mark
, reduce the angle.
Note: Do not set a marker angle wider than need to make
a useful mark. Excess angle increases wear on all
marker components.
2.
Tighten bolts
Note: The direction of travel
tends to drive the disk an-
gle to Wide. If bolts are not tight enough, or loosen
over time, the disk will slip into the Wide mark con-
figuration.
Overhead Sudden Marker Movement Hazard:
You may be injured if hit by a folding or unfolding marker.
Markers may fall quickly and unexpectedly if the hydraulics
fail. Never allow anyone near the planter when folding or
unfolding the markers.
Null4:
Figure 63
Marker Disk Angle
11757
T
2
1
N
W
T
1