Set planter row count, Set planter row spacing, Row setup – Great Plains YP1630F-1670 Operator Manual User Manual
Page 126: Ab c, Ab c d
122
YP1630F
Great Plains Manufacturing, Inc.
401-832M
2012-12-27
Set Planter Row Count
The PM400 supports three row configurations
pre-defined by you. You may need only one.
Refer to Figure 124
At first power-up, the PM400 usually has an incorrect row
count for your planter.
10. Press the PLANTER SETUP
key.
Note that the Planter Configuration Indicator
is
under the “1” in the Configuration block
.
This change is for Configuration 1.
11. Press the Right Arrow
key to highlight the
Number of Rows
field
.
12. Press the ENTER
key to modify the # of Rows.
Refer to Figure 125
13. Use the Left and Right Arrow keys (
or
) to
select the digits to modify. Use the Up or Down
Arrow keys (
or
) to increment or decrement.
Change the row count to the table value for your
planter model and operating configuration.
14. Press the ENTER
key to save the correct row
count.
Set Planter Row Spacing
15. Press the Down Arrow key
to select the Row
Spacing field
.
16. Use the Left and Right Arrow keys (
or
) to
select the digits to modify. Use the Up or Down
Arrow keys (
or
) to increment or decrement.
Change the row spacing to the value for your planter
model (35 cm or 15 inches).
17. Press the ENTER
key to save the corrected row
spacing.
Row Setup
18. Use Right Arrow key
to navigate to the “I/O”
field
.
19. Use the Left and Right Arrow keys (
or
) to
select a seeding icon
for an odd numbered row.
20. Use the Up or Down Arrow keys (
or
) to
change it to a blockage icon
.
21. Repeat step 19 and step 20 for 15 more odd
numbered rows.
22. Press the ENTER
key to save the revised row
configuration.
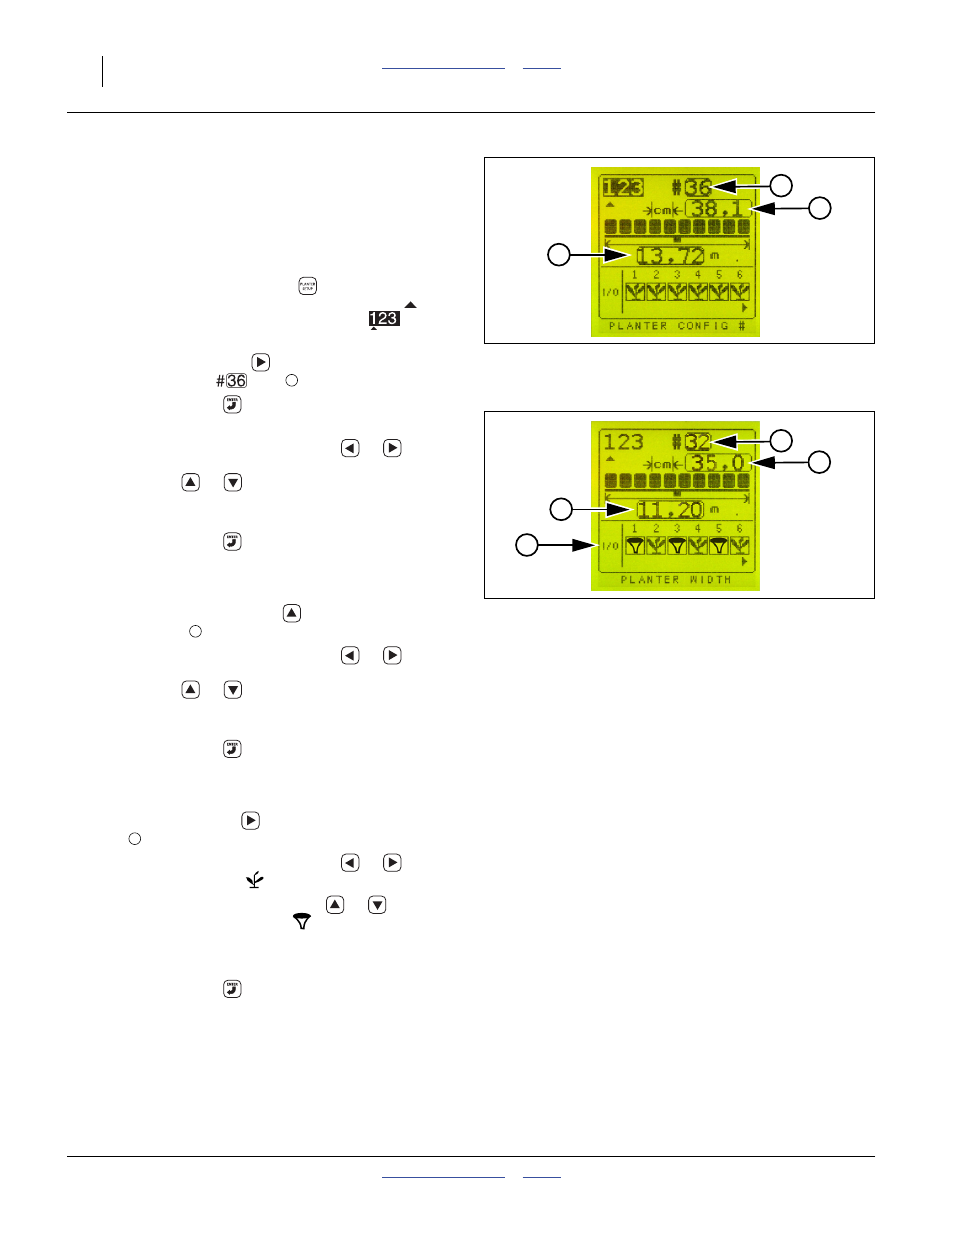
Figure 124
Planter Default Setup
31934
a
b
c
a
Figure 125
16-Row with Fertilizer Blockage
34561
a
b
c
d
b
d