Fr 1 2 – Great Plains NTA2007 Operator Manual User Manual
Page 83
Great Plains Manufacturing, Inc.
Adjustments
79
2012-01-05
166-372M
5.
Set Range (page 76): Set the Final Drive Range
gears per the seed rate chart or dry fertilizer chart.
6.
Load material (page 51): Make sure there is enough
material in the hopper(s) for at least
1
⁄
10
hectare (or
1
⁄
10
acre) plus an extra 35 to 45 kg (75 to 100 lbs.).
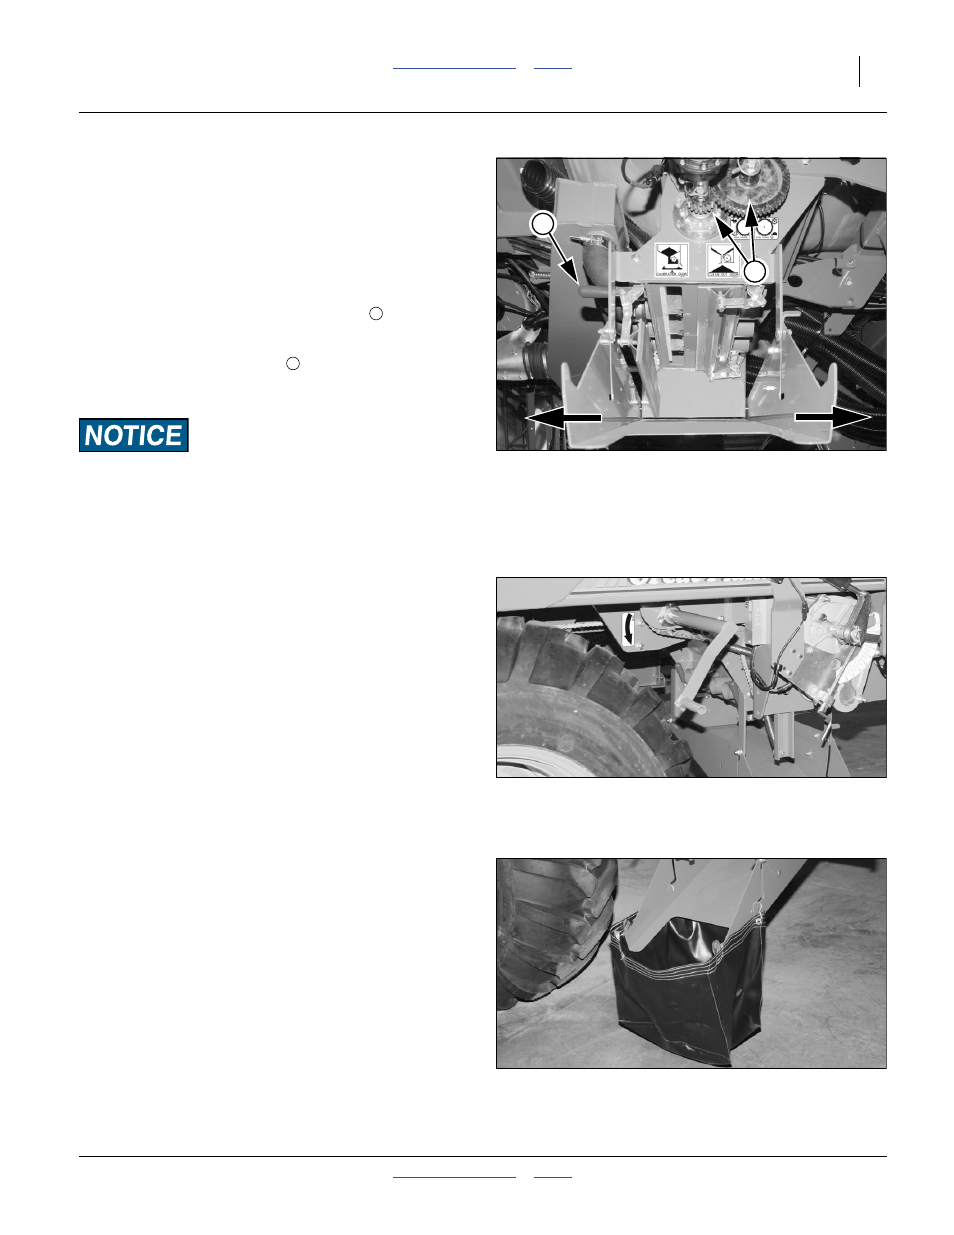
Refer to Figure 61
7.
Since only one calibration bag (page 57) is provided,
disable the meter that is NOT being tested, by
removing one of the final range gears
.
8.
Deploy meter chute (page 57).
9.
Open the calibration door
of the meter being
calibrated (page 50). The calibration door is the
bottom doors under the lower (flute) shaft.
Material Loss Risk:
Do not open clean-out door (the door under the
upper/agitator) shaft. Opening this door drains the hopper.
Once this door is open it is difficult to stop seed flow until the
hopper is empty, and it may be impossible to close with an
adequate air seal.
Refer to Figure 62 (note: Figure exaggerates size of cranking
directional decal)
10. Attach crank (page 56): Un-pin crank from storage
location, and place over hex shaft at cranking
location (right side of cart, between rear-most
gearbox and transport wheel).
11. Weigh bag (page 57): Obtain the calibration sample
bag and digital scale from the storage compartment.
Zero the scale and weight the empty bag, or set
“tare” using the empty bag. There is a hook for
weighing at the left side of the right ladder mount
(the ladder must be raised for convenient access).
Note: The empty bag weighs 0.91 kg (2.00 pounds) as
shipped from the factory.
12. Wipe all material off the flanges around the meter
door.
Refer to Figure 63
13. Hook bag to chute of meter under test. Place loops
over ears at outside end of chute. Place hooks in
chute latching slots.
For a manual gearbox, continue at step 14 on page 80.
For a servo (variable rate kit) gearbox, continue at
step 34 on page 83.
Figure 61
Calibration Door Open
31159
F
R
1
2
1
2
Figure 62
Hand Crank for Calibration
31171
Figure 63
Calibration Bag on Chute
31173