Mounting wheels, Test and adjust brakes, Mounting wheels test and adjust brakes – Great Plains NTA2007HD Operator Manual User Manual
Page 132
128
Great Plains Manufacturing, Inc.
NTA607/2007HD
166-283M
04/04/2011
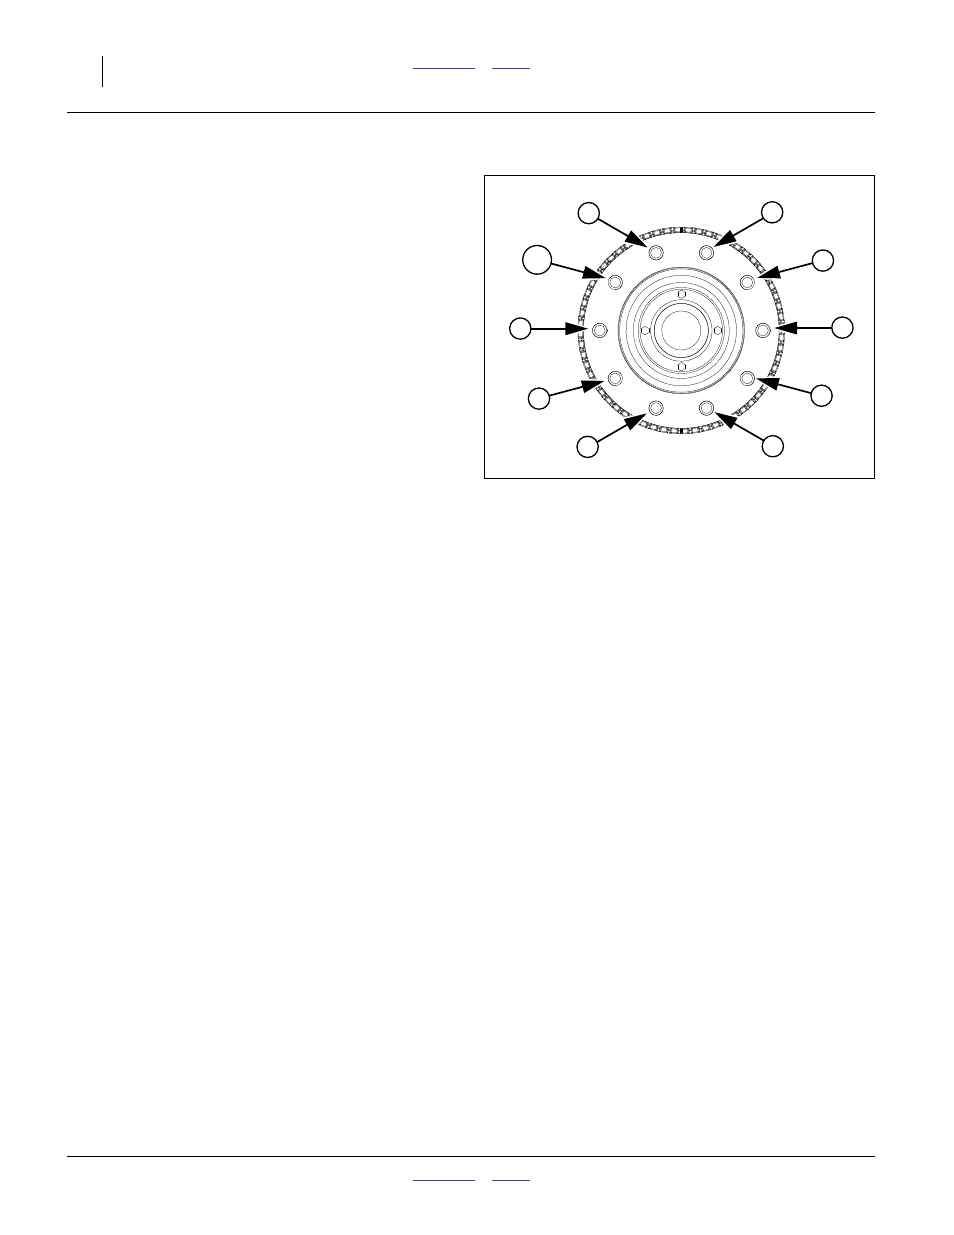
Mounting Wheels
56. Position a wheel on the hub from which it was dis-
mounted.
Refer to Figure 124
57. Start all lug nuts by hand. Choose a bolt stud to des-
ignate position #1.
58. Torque in stages, setting each lug nut to the speci-
fied torque in the order shown in the figure:
Stage 1: 27-33 N-M (20-25 ft-lbs)
Stage 2: 74-80 N-M (55-60 ft-lbs)
Stage 3: 114-127 N-M (85-95 ft-lbs)
Note: This staging and ordering of tightening is strongly
recommended to ensure proper seating of wheel
against hub.
59. Repeat step 57 and step 58 for the other wheel.
Test and Adjust Brakes
While the cart axle is still elevated, test both the service
and the parking brake systems.
60. Hitch a tractor equipped with trailer brake remotes.
Connect the braking systems. Put the tractor in Park,
but release any brakes that operate the trailer ser-
vice brakes.
61. Have someone spin one brake-equipped cart wheel,
and stand clear.
62. Slowly engage the tractor service brakes. If the
wheel does not stop spinning, this may merely indi-
cate that the self-adjusters have not yet seated.
Cycle a second time.
63. Check for unusual noises and failure to brake. Check
that the wheel spins freely with brakes released.
64. Spin the other cart wheel. Stop it with the tractor
brakes. Check braking action. The self-adjusters
may already be seated for this wheel.
65. Release all tractor braking that engages cart brak-
ing.
66. Spin the first wheel again. Engage the cart parking
brake for that side. With fresh brake linings, it may be
necessary to adjust the hand brake handle to
achieve over-center brake-set detent with acceptable
effort.
67. Repeat step 66 for the other side of the cart.
68. Check tire inflation, set parking brakes, and lower
cart onto its wheels.
Null4:
Null4:
Figure 124
Bolt Torquing Pattern
31385
3
9
5
2
4
8
1
7
6
10