SoundOff Signal TrafficMaster User Manual
SoundOff Signal Lighting
LED TRAFFIC MASTER Page 6
Page 5
LED TRAFFIC
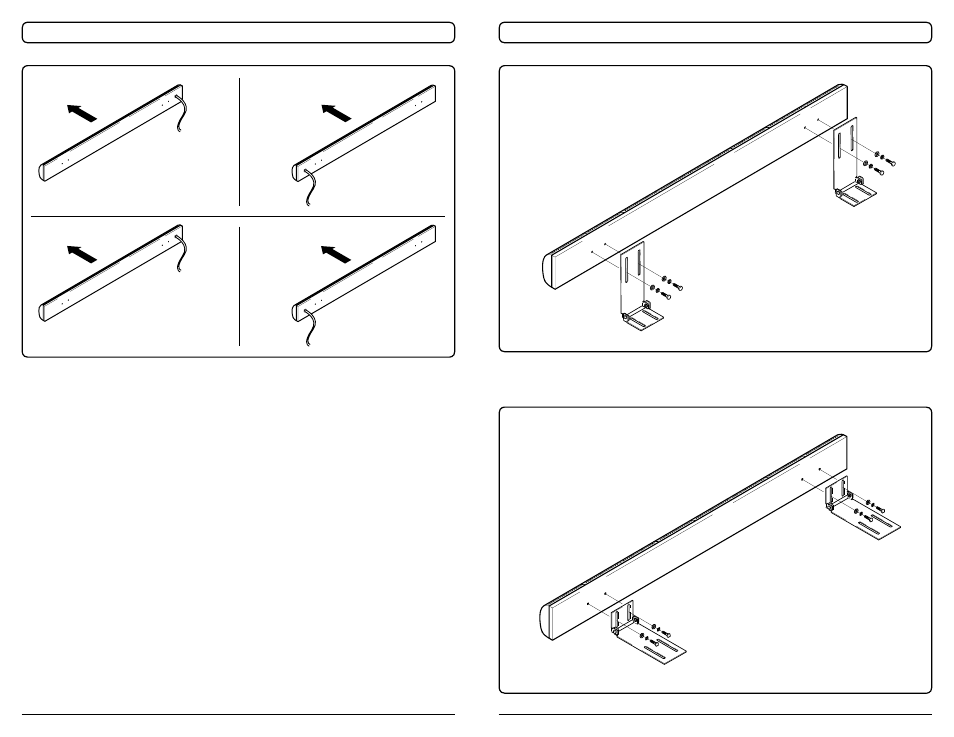
Figure 2. Mounting Configurations
(View shown from rear of LED Bar)
3. Mount the LED Traffic Master bracket on the front or rear of the light
bar frame as desired. Use either existing holes in the light bar frame, if
available, or drill holes as needed.
NOTE
Remember to properly seal all holes made in any light bar to
prevent water damage.
4. Turn the light bar right side up and attach the LED Traffic Master to its
mounting bracket as shown in Figure 4.
Use ONLY 5 x 10mm bolts.
5. Put the light bar on the vehicle roof making sure not to scratch the ve-
hicle. Check for clearance below the light bar as you proceed.
6. Reposition the light bar and secure it to the vehicle.
7. Tighten the bolts that hold the LED Traffic Master mounting bracket to
the light bar, checking that the brackets are aligned with each other.
Some adjustment of these brackets may be required to insure that the
directional signal is level. Adjust as necessary.
8. Position the LED Traffic Master in the center of the vehicle and tighten
the bolts that hold it to the mounting bracket.
Figure 3. Rear Deck Mounting
Figure 4. Light Bar Mounting
TO
REAR OF VEHICLE
TO
REAR OF VEHICLE
TO
FRONT OF VEHICLE
TO
FRONT OF VEHICLE
OPTIONAL WIRING
STANDARD WIRING
OPTIONAL WIRING
STANDARD WIRING
NOTE
Use 5 x 10mm Bolt ONLY when
attaching “L” Bracket to the
back of the LED Bar.
NOTE
Use 5 x 10mm Bolt ONLY when
attaching “L” Bracket to the
back of the LED Bar.