Fixed height brackets and hook mounting – SoundOff Signal Apex LED User Manual
Page 6
6. Secure each vehicle specific hook bracket by using the 8 supplied #8 x 1/2” Truss Head Sheet metal screws on each side.
7. Tighten each vehicle specfic hook bracket by turning the 1/4”-20 x 2.5 Hex head bolt clockwise until bar is snug and no side to
side or fore to aft movement occurs.
8. Route cables into vehicle. Use supplied rubber grommet in roof for sealing/protection of wires. It is recommended that silicone
be placed around grommet to ensure roof sealing.
WARNING - ROUTE WIRES ONLY IN LOCATIONS THAT ARE NOT SUBJECTED TO POTENTIAL WEAR. MAKE SURE TO
AVOID ROUTING WIRES IN THE DEPLOYMENT AREA OF YOUR AIR BAG. REFER TO YOUR VEHICLE’S OWNER’S
MANUAL FOR AIR BAG DEPLOYMENT ZONES.
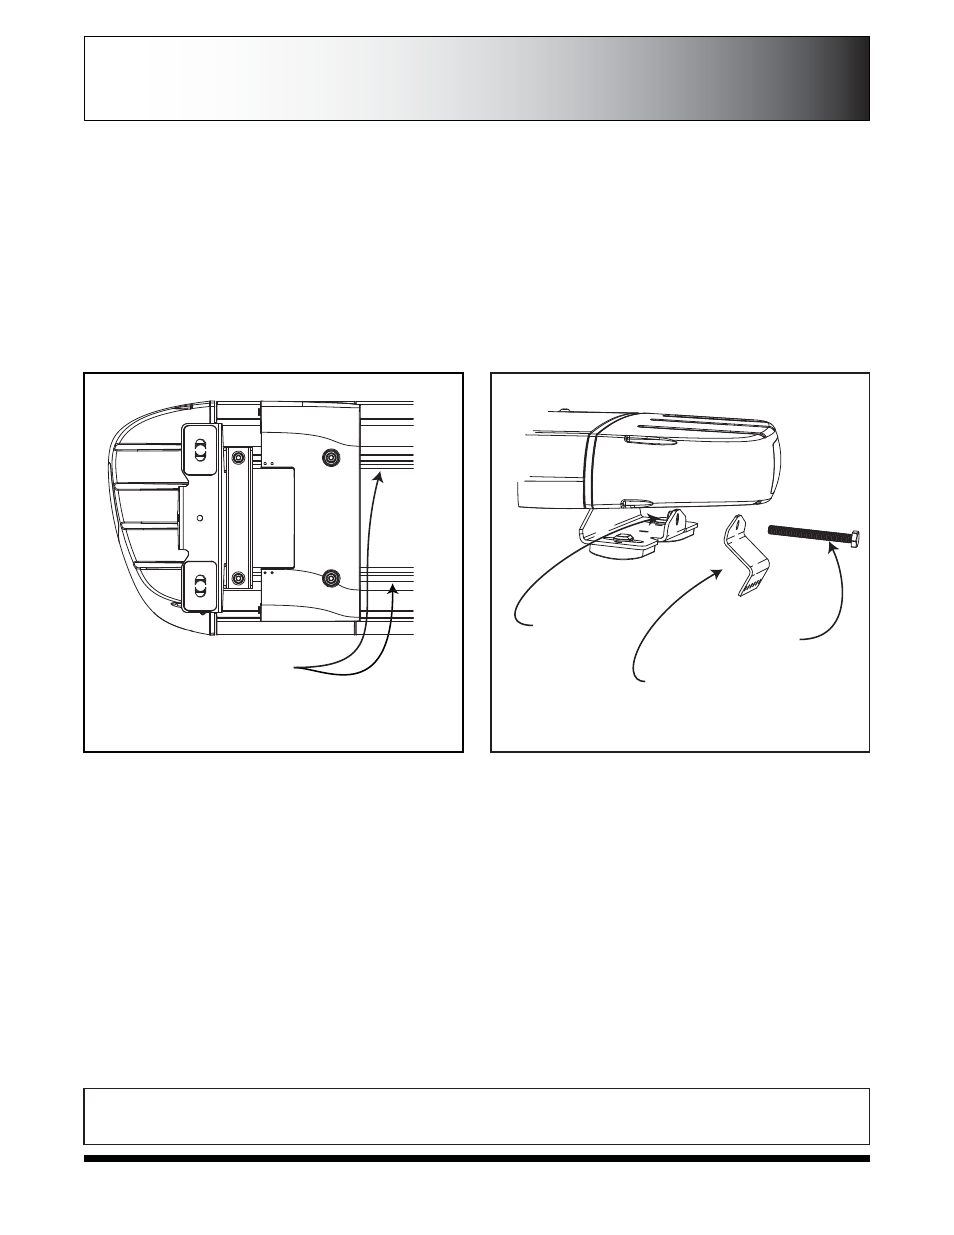
FIXED HEIGHT BRACKETS AND HOOK MOUNTING
1/4”-20 x 2.5”
Hex Head Bolt
Vehicle Specific Hook Bracket
1/4”-20 PEM Nut
FIGURE 1
FIGURE 2
1. Loosen lower air deflectors at each end of bar using 10mm socket. Then slide air deflectors toward center of bar to access
position for fixed height mounting brackets.
2. Mount fixed height brackets (See Figure 1) using supplied M6x16mm hex bolts on each side. Temporarily place the lightbar in its
correct position on the roof of the vehicle. The bar should be positioned about the center line of the “B” pillar. Determine the
appropriate position of the brackets on the lightbar and vehicle roof. Tighten brackets in position on bottom of lightbar.
3. Install supplied vehicle specific hook brackets using supplied 1/4”-20 x 2.5 Hex Head bolts onto the bar mounting foot as shown
in Figure 2. Nut is attached to mounting foot to prevent turning and improve ease of installation.
4. Using the vehicle specific hook brackets as a template, drill 4 pilot holes using a #30 (.128 dia.) drill bit on each side of the
vehicle.
Page 6
Slots for
adjustablitlity
for correct roof fit