Installation instructions – Brandmotion 1022-9590 User Manual
Page 9
INSTALLATION INSTRUCTIONS
9581 Instructions 4-18-13.doc
9 of 13
Step 47. Secure Chassis Harness with supplied Wire
Ties. If necessary, coil excess harness wire and secure
with Wire Ties. Attach to existing vehicle wiring where
possible.
Step 48. Reassemble vehicle. Follow your disassembly
steps in reverse order, taking care not to bind the
harness wiring when reinstalling.
CAUTION: Any bolts removed for safety devices
must be retightened to manufacturer’s specified
torque specifications.
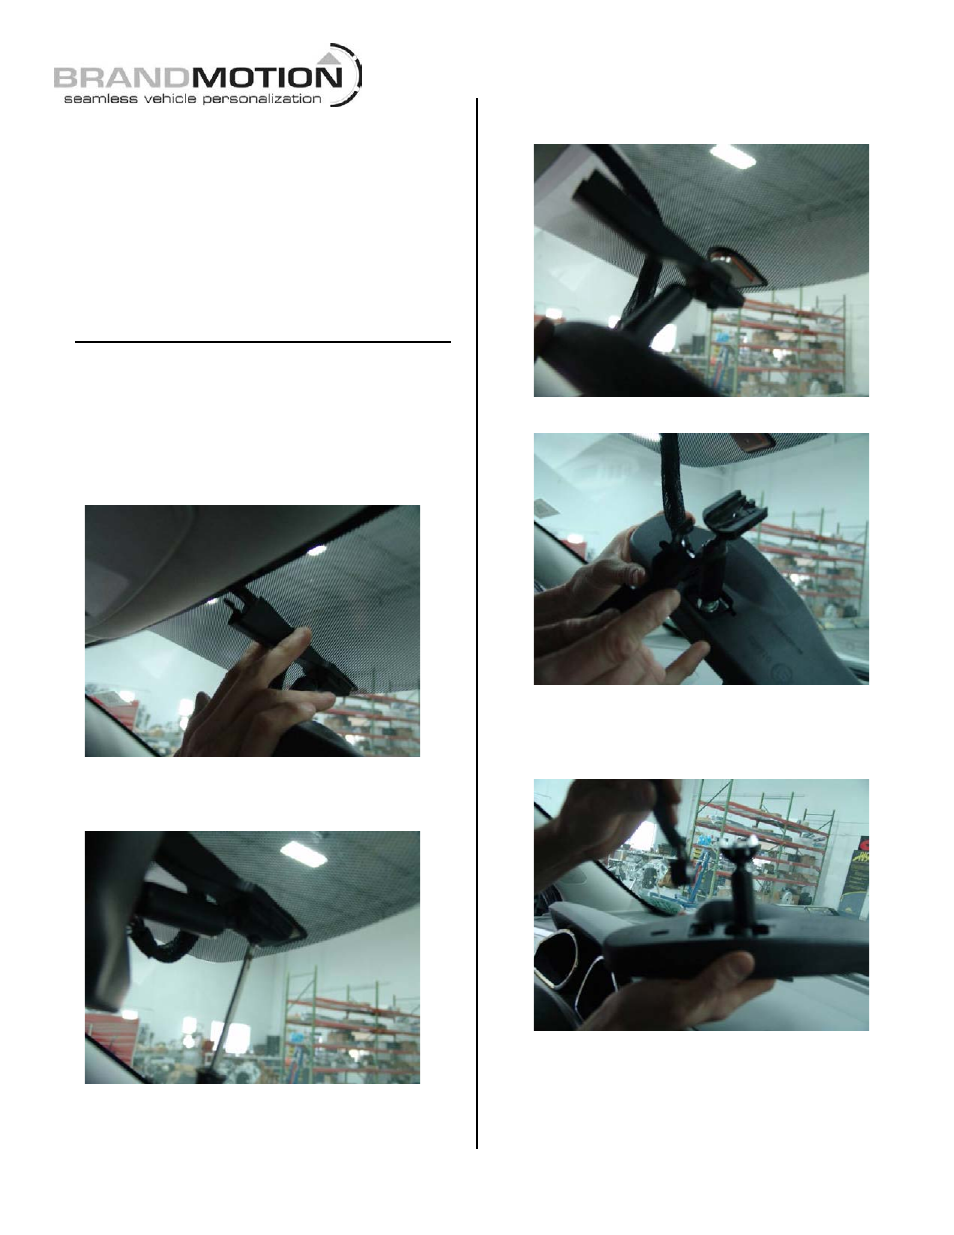
NOTE: Follow these steps ONLY if installing to a
mirror with a 16-pin connector. Refer to
Brandmotion Mirror kit 9002-9510 instructions
for full installation, wiring pinout, and operating
instructions.
Step 49. Slide the vehicle mirror wiring cover forward.
Step 50. Remove the screw that attaches the existing
rear view mirror to the windshield mounting button with
a T20 Torx driver.
Step 51. Slide mirror up and away from windshield
mount.
Step 52. Remove mirror wiring cover.
Step 53. Remove the wiring harness from the back of
the mirror by squeezing the lock tab of the 16-pin
connector and pulling the connector out with your
fingers.