Installation instructions – Brandmotion 1013-9550 User Manual
Page 4
INSTALLATION INSTRUCTIONS
9550 Instructions 1-8-13.doc
Page 4 of 13
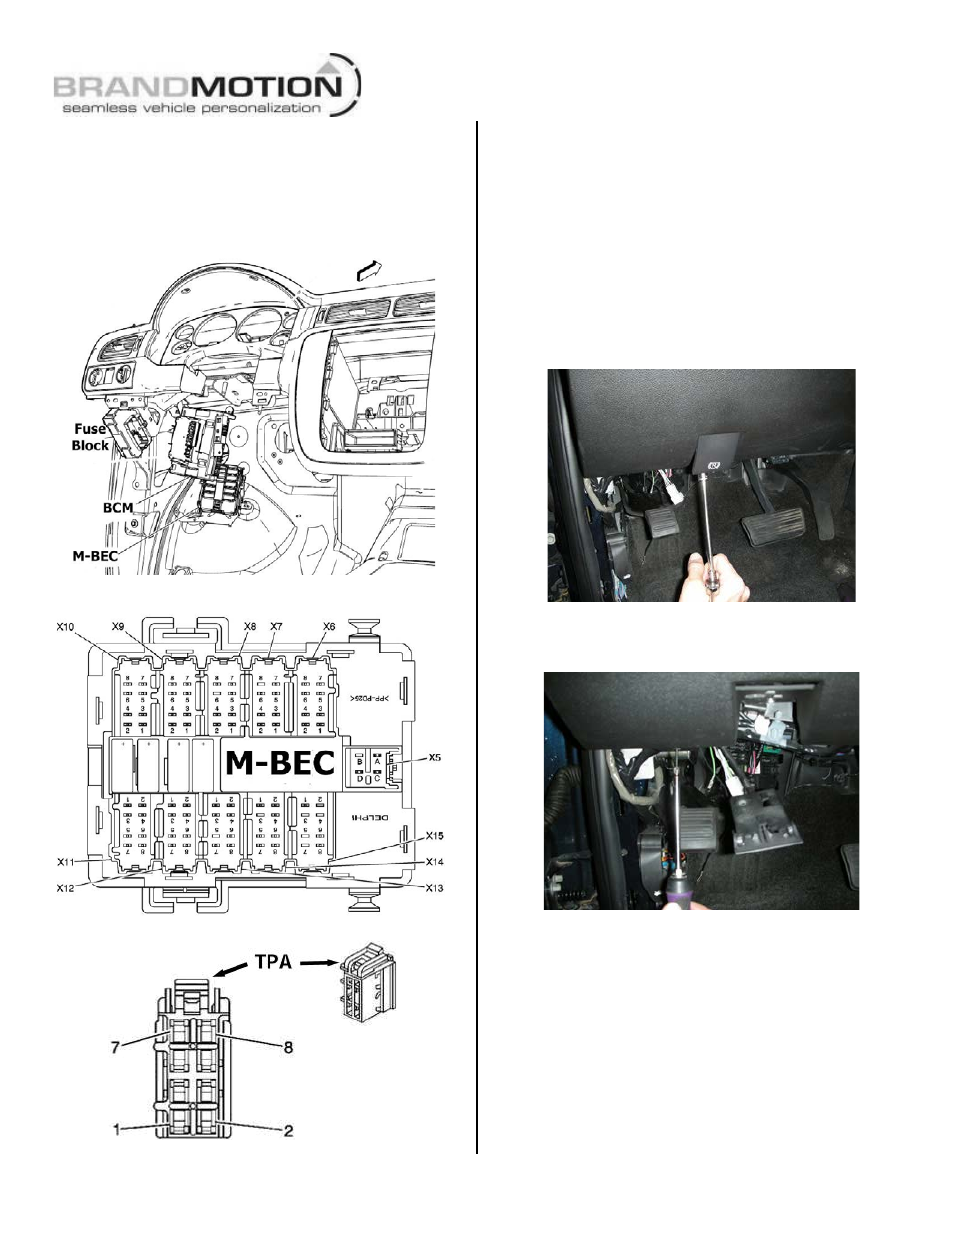
19. Have an assistant set parking brake, start vehicle,
and shift into Reverse. Using a digital multimeter,
check for reverse signal in Cavity 5 of the light gray
C11/ X11 Connector OR in Cavity 8 of the gray C10/
X10 Connector in the M-BEC. (Figures 13, 14 & 15)
Figure 13
Figure 14
Figure 15
20. If reverse signal is NOT present:
A. Check that the bail that secures the M-BEC
connectors is fully locked in place. Repeat Step
19.
B. If reverse signal is still not present, check the
Fuse Block for any blown fuses (Figure 13).
Replace any blown fuses and repeat Step 19.
C. If reverse signal is still NOT present,
proceed to Step 31.
21. Remove bolt running through the parking brake
lever using a 10mm socket, and remove lever.
(Figure 16)
Figure 16
22. Remove two knee bolster screws using a Phillips
screwdriver and remove knee bolster. (Figure 17)
Figure 17
23. Remove the light gray C11/ X11 Connector or
gray C10/ X10 Connector from the M-BEC
(Figure 14) located in the bolster stud by pulling it
out with your fingers. (Figure 15)
24. Remove TPA from C11/ X11 Connector or C10/ X10
Connector. (Figure 15)
If a dark blue wire does NOT exist in Connector
C11/ X11 Cavity 5 or Connector C10/ X10 Cavity 8:
A. Re-insert TPA and plug C10/ X10 or C11/ X11
connector into M-BEC.
B. Snap supplied Jumper Harness into black
connector on supplied NAV Harness. (Figure 18)