Installation instructions – Brandmotion 1013-9550 User Manual
Page 10
INSTALLATION INSTRUCTIONS
9550 Instructions 1-8-13.doc
Page 10 of 13
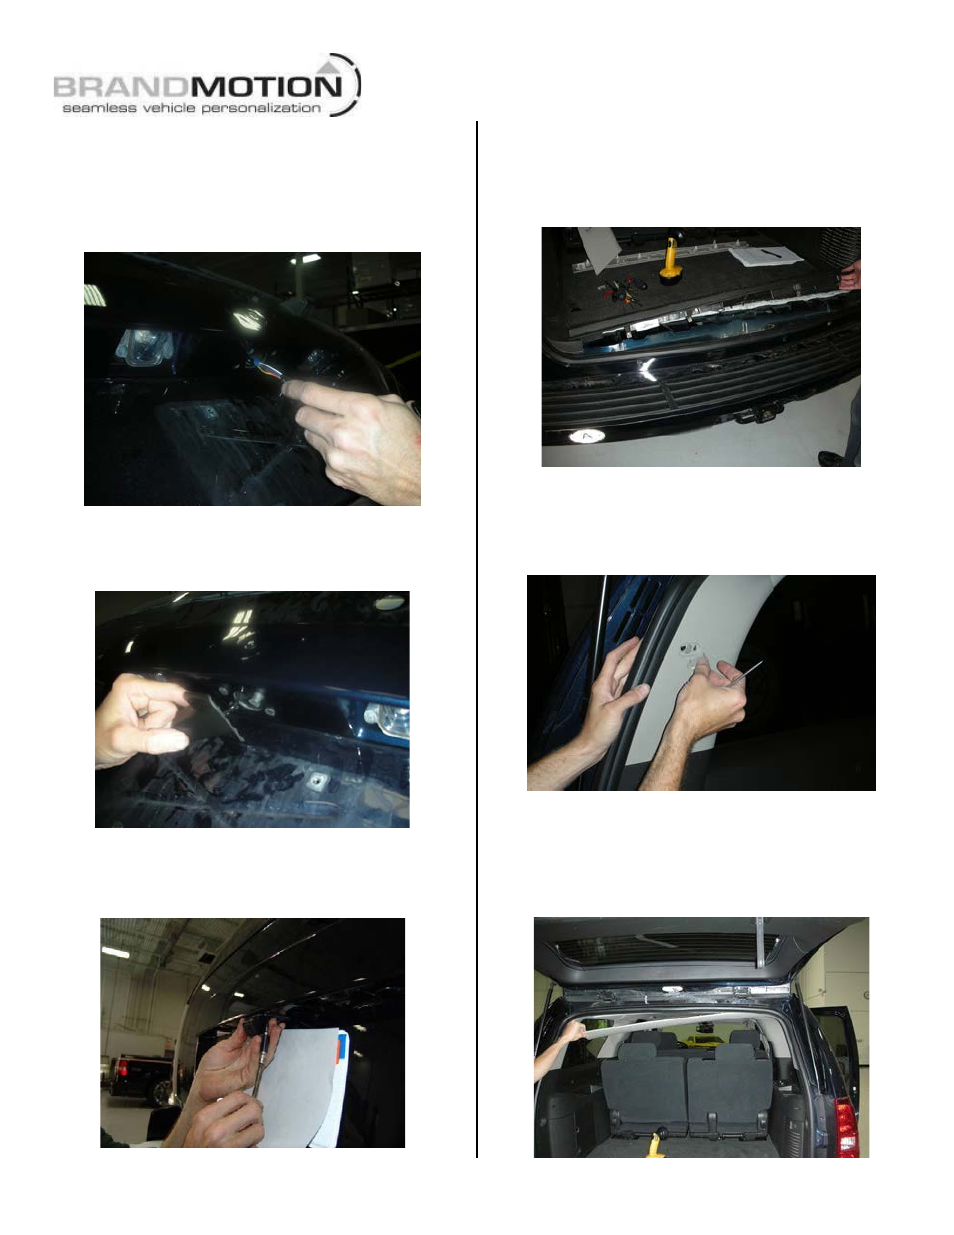
52. Route supplied Camera Harness through the 1-
3/16in hole in the appliqué then through the 1/2in
hole in the sheet metal. RECOMMENDED: Use a
small rubber grommet or dab of silicone caulk to
protect Camera Harness from sharp metal edges
(Figure 46)
Figure 46
53. Insert supplied Rubber Well Nuts into the two 5/16in
holes in the appliqué. (Figure 47)
Figure 47
54. Bolt the camera mount to the appliqué using the two
supplied Bolts and a Phillips screwdriver.
(Figure 48)
Figure 48
Install Chassis Harness
55. Remove the liftgate sill plate by lifting at one end
and working your way to the other with your hands
to release the mounting clips. (Figure 49)
Figure 49
56. Remove bolt cover on driver’s side D-pillar using a
pick. Insert the pick into the gap between the bolt
cover and D-pillar cover. Gently pry the bolt cover
away from the D-pillar cover. (Figure 50)
Figure 50
57. Remove D-pillar cover screw with a Phillips
screwdriver.
58. Remove headliner garnish by working your way from
one end to the other and popping out the mounting
pins with hands. (Figure 51)
Figure 51