Installation instructions – Brandmotion 1013-9550 User Manual
Page 2
INSTALLATION INSTRUCTIONS
9550 Instructions 1-8-13.doc
Page 2 of 13
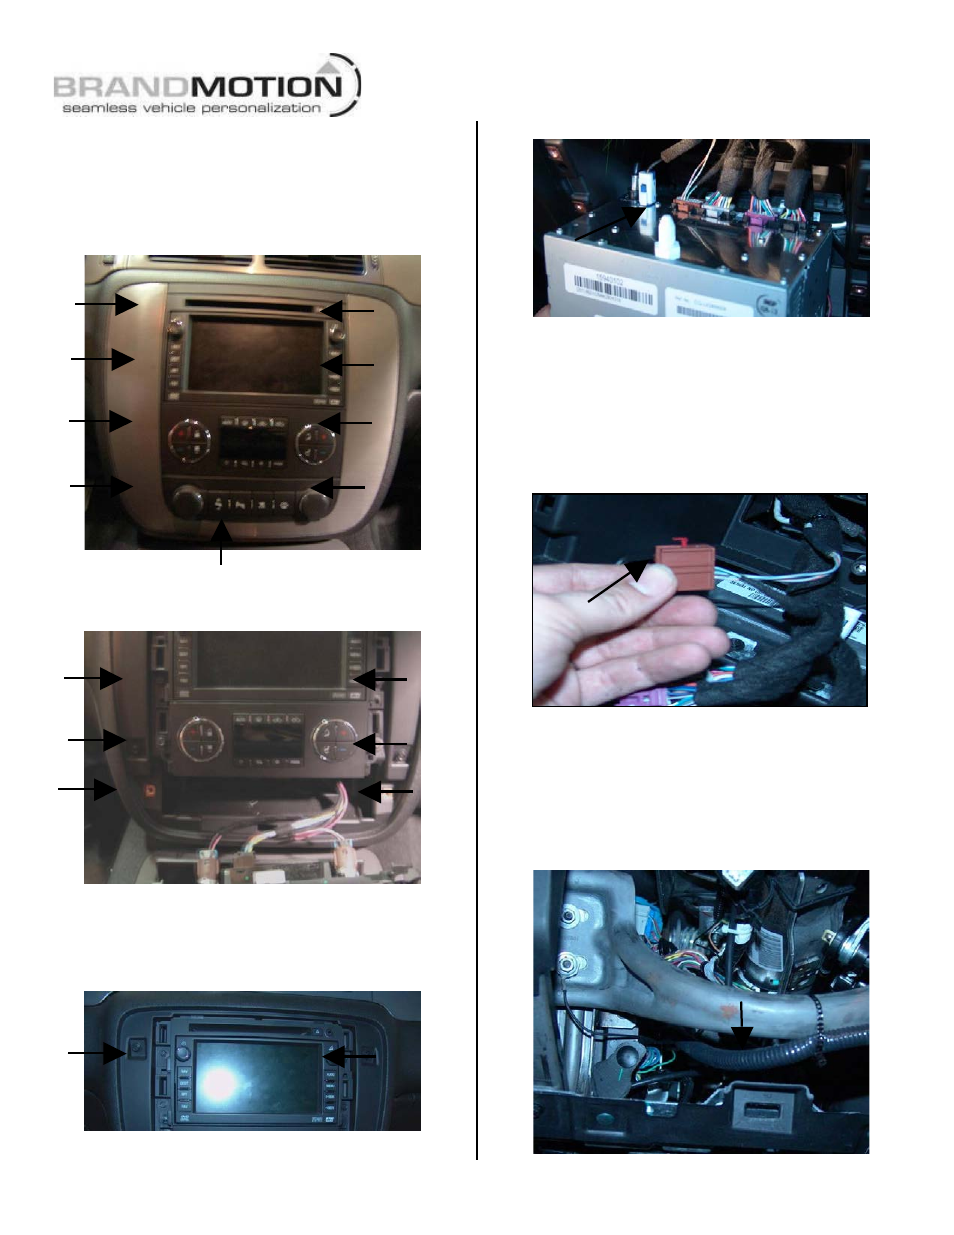
Remove NAV Radio & Connect NAV
Harness
5. Remove the NAV radio trim bezel by inserting nylon
trim removal tool along edges and twisting retaining
clips. (Figure 1)
Figure 1
6. Remove fasteners retaining accessory and HVAC
control head using 7mm socket. (Figure 2)
Figure 2
7. Remove fasteners retaining the radio/HVAC head
unit using a 7mm socket. Once fasteners are
removed lower radio and unplug brown NAV
connector. (Figures 3 & 4)
Figure 3
Figure 4
8. Locate the NAV Harness provided in the kit.
9. Remove the brown NAV connector from the back of
the radio.
10. Remove red terminal retaining plug from brown NAV
connector. Insert Gray/Dark Blue wire into cavity 6
and Gay/Orange wire into cavity 7. (Figure 5)
Note: If wires exist in these cavities remove
and isolate.
Figure 5
11. Reinstall red terminal retaining plug into brown NAV
connector and reinsert connector into radio.
12. Route supplied NAV Harness through the opening
and across the dash toward the M-BEC below the
steering column (see Figure 13). Use supplied Wire
Ties to secure Harness to the knee bolster support.
(Figure 6)
Figure 6