Rockwell Automation 1783-EMS08T Stratix 6000 Ethernet Managed Switch User Manual User Manual
Page 24
24
Rockwell Automation Publication 1783-UM001D-EN-P - January 2013
Chapter 2
Network Services Setup
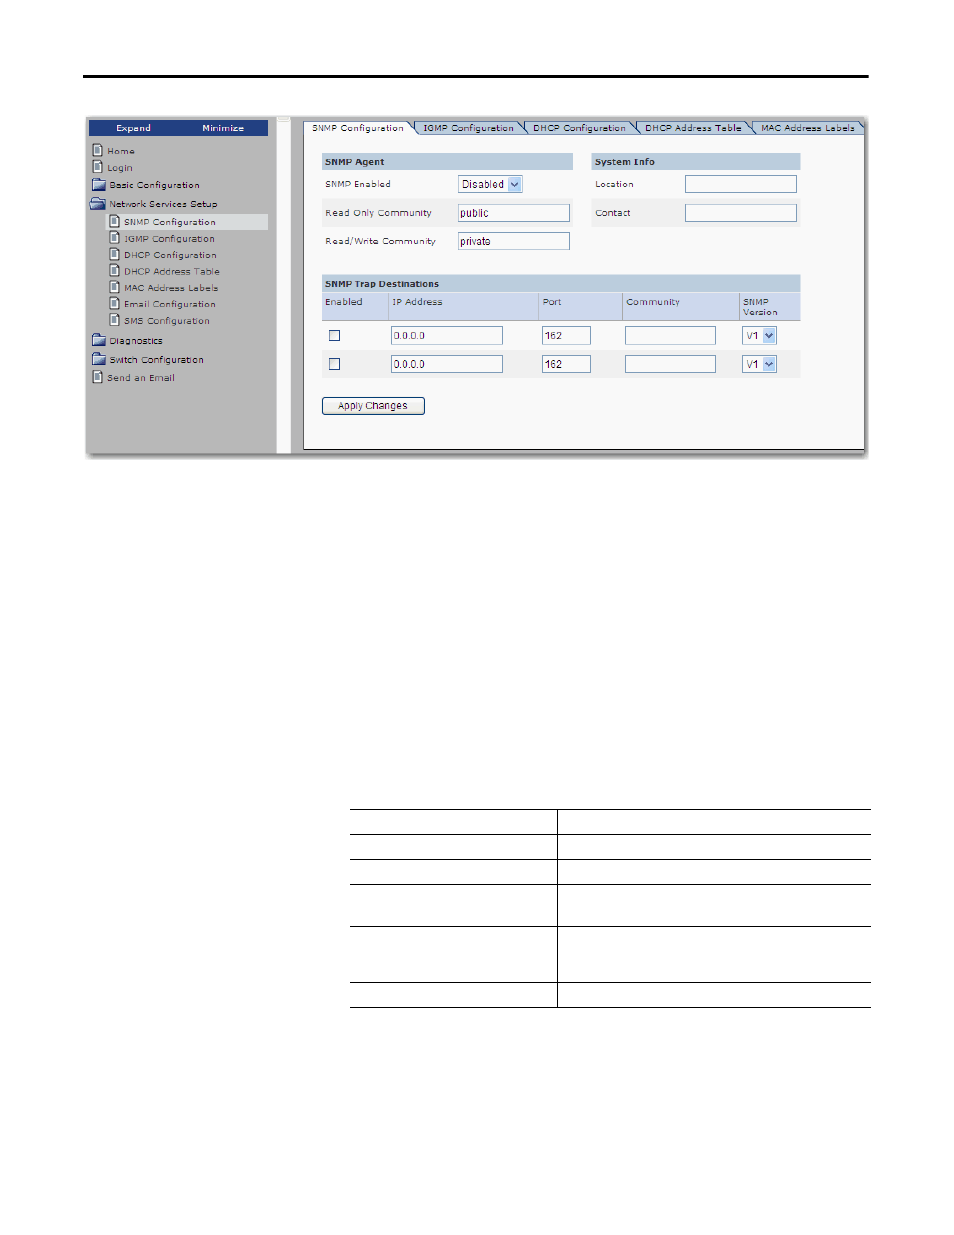
2. From the SNMP Enabled pull-down menu, choose Enabled to use SNMP.
3. Change the deault case-sensitive community names if desired.
• The read-only community enables the switch to validate Get (read-
only) requests from a network management station. If you set the
SNMP read community, users can access MIB objects, but cannot
change them.
• The read-write community enables the switch to validate Set (read-
write) requests from a network management station.
4. In the System Info area, provide optional information about the switch for
informational purposes only.
a. In the Location field, type the physical location of the switch, such as
the building where the switch is locatd.
b. In the Contact field, type the switch name or network administrator.
5. Identify up to two trap destinations by completing the fields below.
6. Click Apply Changes.
The changes will take effect immediately without requiring you to cycle
power to the switch.
Trap Destination Field
Description
Enabled
Check to enable trap messages to be sent.
IP Address
Type the IP address of the SNMP trap recipient.
Port
Type the UDP port number to which traps will be sent.
The default port number is 162.
Community
Type the read-only or read-write SNMP community name to be used in
traps sent to the destination.
Community names are case-sensitive.
SNMP Version
Choose the SNMP version to use.