STEMCO Aeris User Manual
Page 35
Aeris Installation and Service Manual
Page 35 of 42
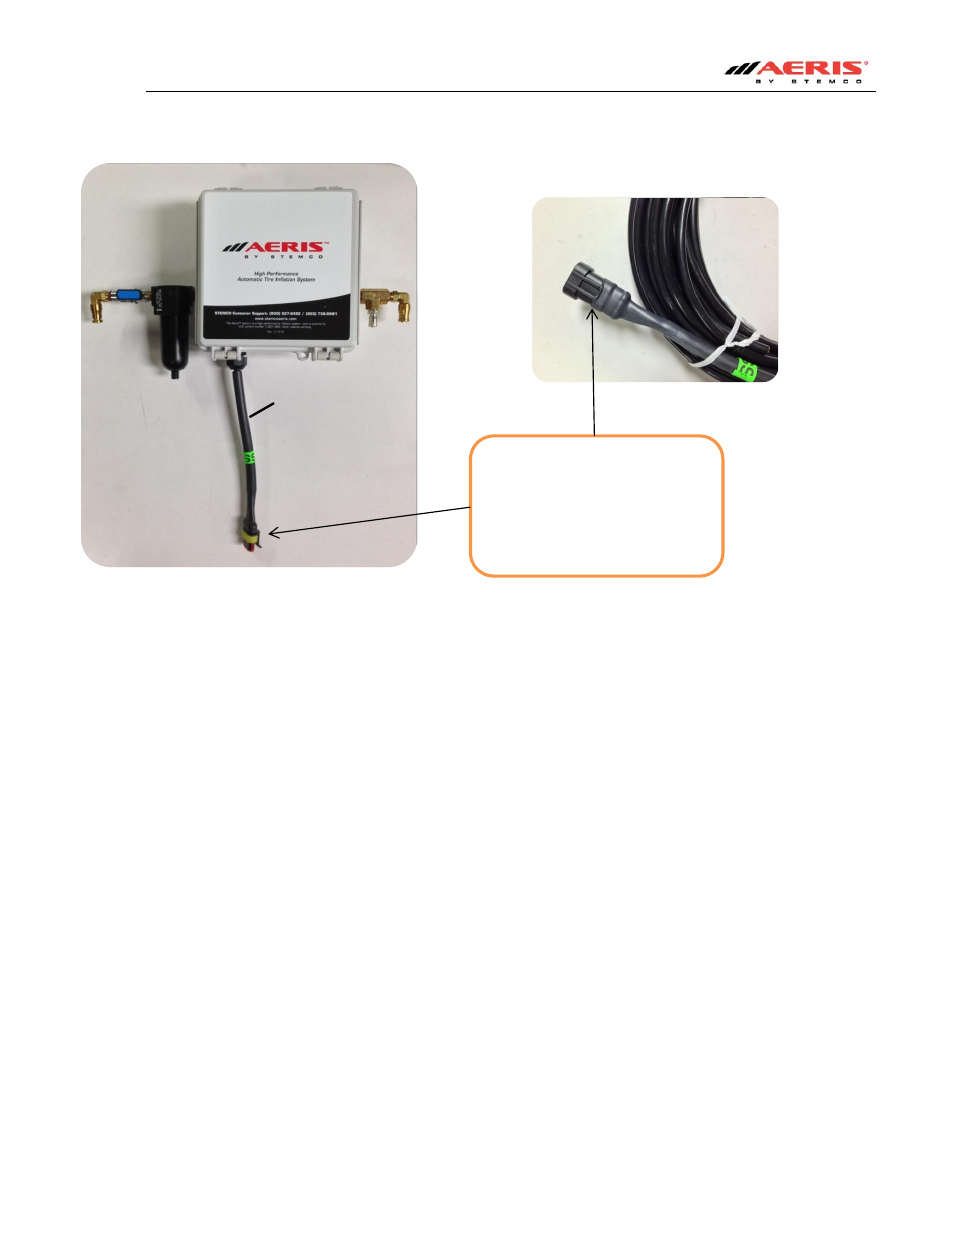
INSTEAD: When your control box looks like the one shown in Figure 32, the above instructions may be
disregarded since these steps are now done at the time of manufacture.
Figure 32
• Take the light and using the pigtail provided place the ring terminals of the pigtail onto the 2 posts on the
back of the light. White pigtails on “-“terminal; Black pigtail on “+” terminal. Tighten two nuts onto ring
terminals
• Now on the other end of the pigtail, remove the 2 plugs in the ends of the connectors and plug in the wire
extension. Make sure connectors snap in place fully. White wire to White pigtail; Black wire to Black
pigtail.
• Mount light in front corner of or side of trailer. Mount light in location where driver can see it in driver’s
side view mirror.
• Mount indicator light to trailer using the self-tapping screw provided. Make sure to tuck wires inside back
of light and where wires come out of slots provided to keep from pinching wire when mounted.
• Secure wire to trailer using p-clamps. Make sure wiring is not hanging down to catch on anything.
IMPORTANT: Make sure that as you are installing the p-clamps you run the wire with a drip loop in the
bottom of cable below the 7 pin connector box. This keeps water from running down the cable from the
indicator light into the electrical box. See Figure 34
• Remove the cover to the trailer 7 pin connector box. See Figure 33
Figure 1
Factory installed
wiring harness
eliminates field
wiring steps.
Simply plug in the factory
installed wiring harness (1)
into the pre-molded cable
end furnished with the kit
(2).
1
2