Aeris installation and service manual – STEMCO Aeris User Manual
Page 24
Aeris Installation and Service Manual
Page 24 of 42
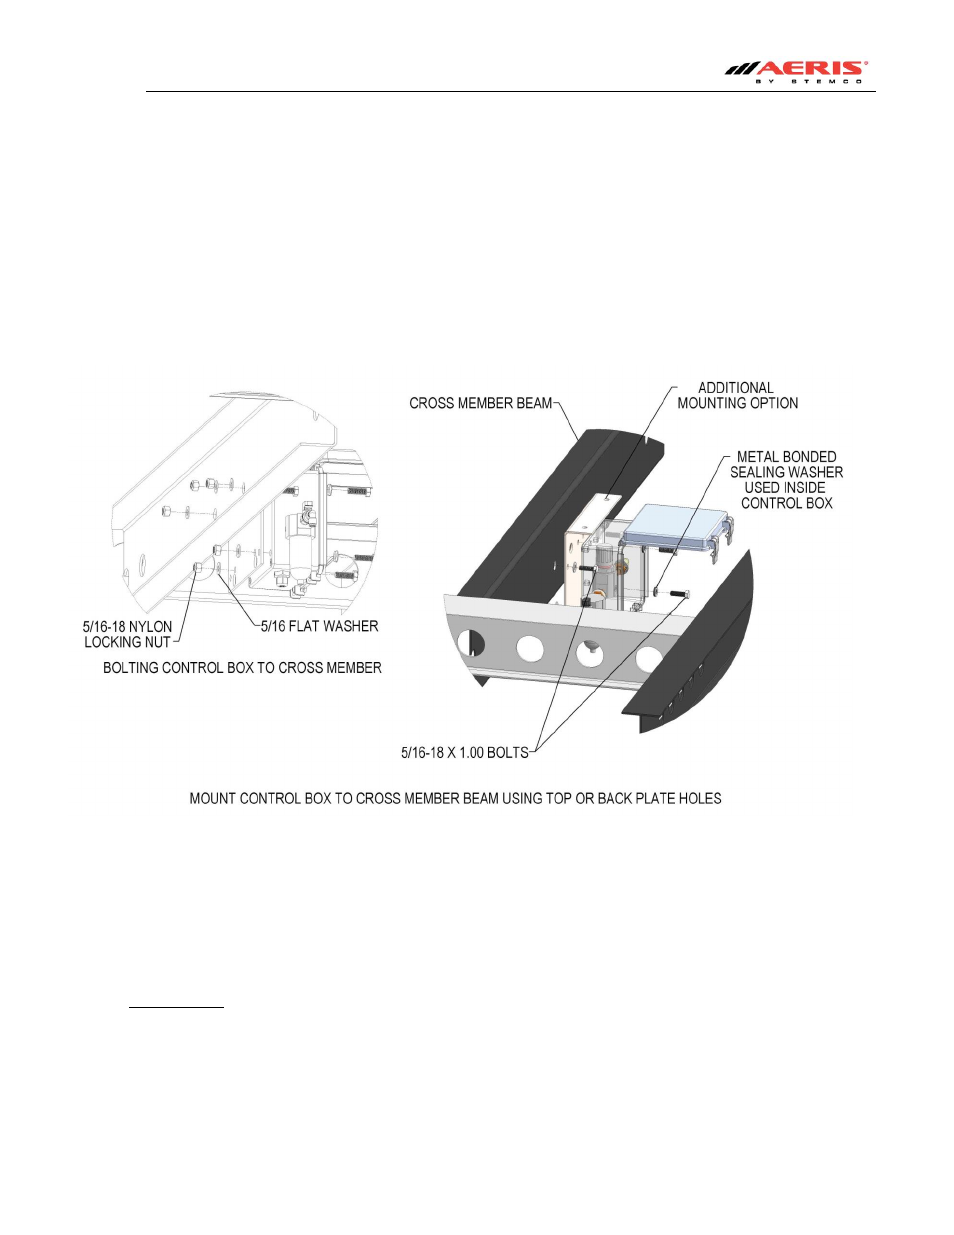
• The control box has several mounting options. In all mounting options the 5/16” sealing washer, lock nuts
and flat washers must be used. The sealing washer is always on the inside of the box.
1. Attach the box (without the bracket) directly to a cross member or frame section using the three 5/16”
mounting holes in the bottom of the box. Be sure to leave room at the top for the door to open up.
2. Use the mounting bracket provided with the Aeris system. The bracket can be mounted using the
holes on the side of the bracket or the holes in the top flange. The control box can then be bolted to
either side of the bracket (holes are symmetrical).
3. The mounting bracket can be welded to the trailer if desired, but the frame must have clearance holes
of the 5/16” mounting hardware (nut and flat washer) on the outside of the box. The box must be
removed from the bracket before welding and the welded area must have some anti-corrosion
treatment such as cold-zinc paint.
Figure 19
Connecting air lines to control box (see Fig. 23 – for SmartSense installation)
•
SmartSense: If you are installing an Aeris SmartSense® system, the airline tubing sections are not
connected together with tee fittings. Instead, each section of tubing runs in a continuous length
from each wheel end to the corresponding outlet port on the bottom of the Control Box. The
manifold inside the Control Box is labeled with the wheel end designation above the outlet port.
See Figure 23-SmartSense for a detailed diagram.