Sh eet, Instr u ction – Prescolite 8MD REFLECTOR User Manual
Page 5
Instr
u
ction
Sh
eet
Part No...........................................
With representatives offices in principal cities throughout North America.
Copyright , revision, All Rights Reserved - Printed in U.S.A.
701 Millennium Blvd • Greenville, SC 29607
www
.p
re
s
c
o
lit
e
.c
o
m
y
Prescolit
e
T
o
ll Free
T
e
c
hnic
a
l S
u
pp
ort
1.
88
8.
PR
S.
4TEC
y
Ho
u
rs
: 8a
m
-
5p
m
ET
93047835
2013
04/12/13
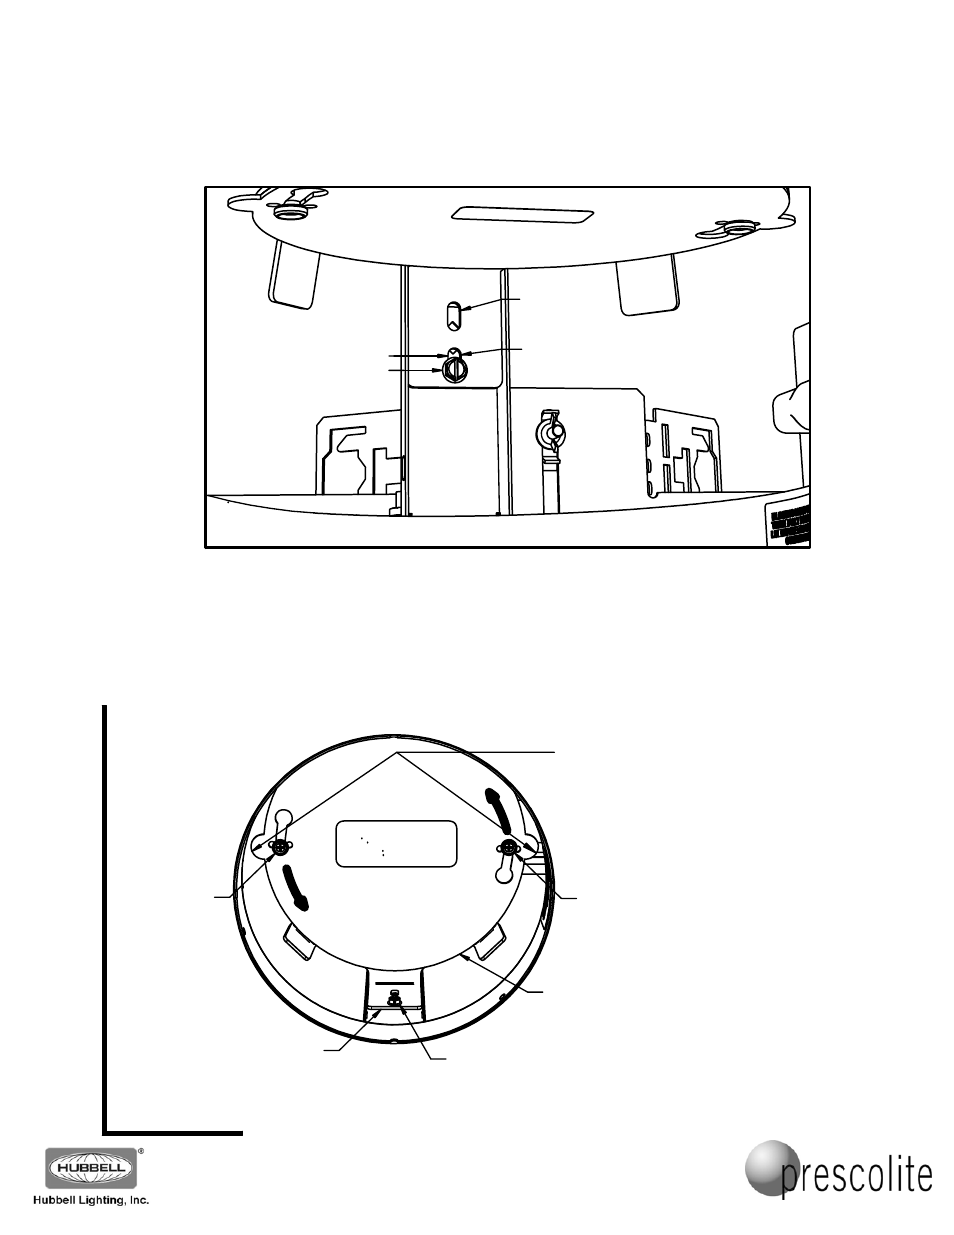
8. After positioning the light engine at the proper mounting location, reinstall the mounting screws in the
lower slots on the light engine yoke bracket. Adjust the light engine as shown in FIG. 6 below to position
it for either the lensed version of the reflector, or the open (no lens) version of the reflector by using the
vertical adjustment slot in the light engine yoke mounting bracket.
FIG. 6
ATTACHING THE 8MD REFLECTOR
9. After all ceiling installation and finishing work is complete, and before installing the reflector, remove the
clear protective cover from the light engine by rotating it counter-clockwise to unlock it, and then remove
it from the reflector mounting buttons. (See FIG. 7) This cover can be kept to protect the LEDs if future
ceiling refinishing is ever needed, or discarded (please recycle – it is made of polycarbonate plastic).
FIG. 7
LIGHT ENGINE YOKE
MOUNTING SLOT
NO LENS POSITION
LENSED POSITION
DO NOT
USE
REMOVE AND DISCARD THIS
CLEAR PROTECTIVE COVER
AFTER THE CEILING IS FINISHED
AND BEFORE MOUNTING THE
REFLECTOR!
93045753
REMOVE THE CLEAR PROTECTIVE COVER
FROM THE LIGHT ENGINE BY USING
THE EARS ON EACH SIDE TO TURN IT
COUNTER-CLOCKWISE.
REFLECTOR
MOUNTING
BUTTON
REFLECTOR
MOUNTING
BUTTON
CLEAR
PROTECTIVE
COVER
LIGHT
ENGINE
YOKE
LIGHT ENGINE YOKE
ADJUSTMENT SCREW
(ONE OF TWO)
PAGE 5 OF 7